09/2007
3-10
Phaser 8860/8860MFP Service Manual
IQ13, IQ14
Initial Issue
Image Quality
Initial Actions
1. Check that supported media is being used.
2. Run the Eliminate Light Stripes routine from the Control Panel.
Procedure
NOTE: If the Eliminate Light Stripes page indicates that the missing jets are arranged as 3 side
by side or 2 at the end of a row, jet substitution as described in Step 4 will not correct the prob-
lem.
NOTE: Air bubbles obstructing jets leading to light stripes generally are absorbed after a few
hours, even without purging. Air bubbles can be ingested into the Printhead as a result of a
strong shock, such as a tray slam, or during ink cooling and solidification.
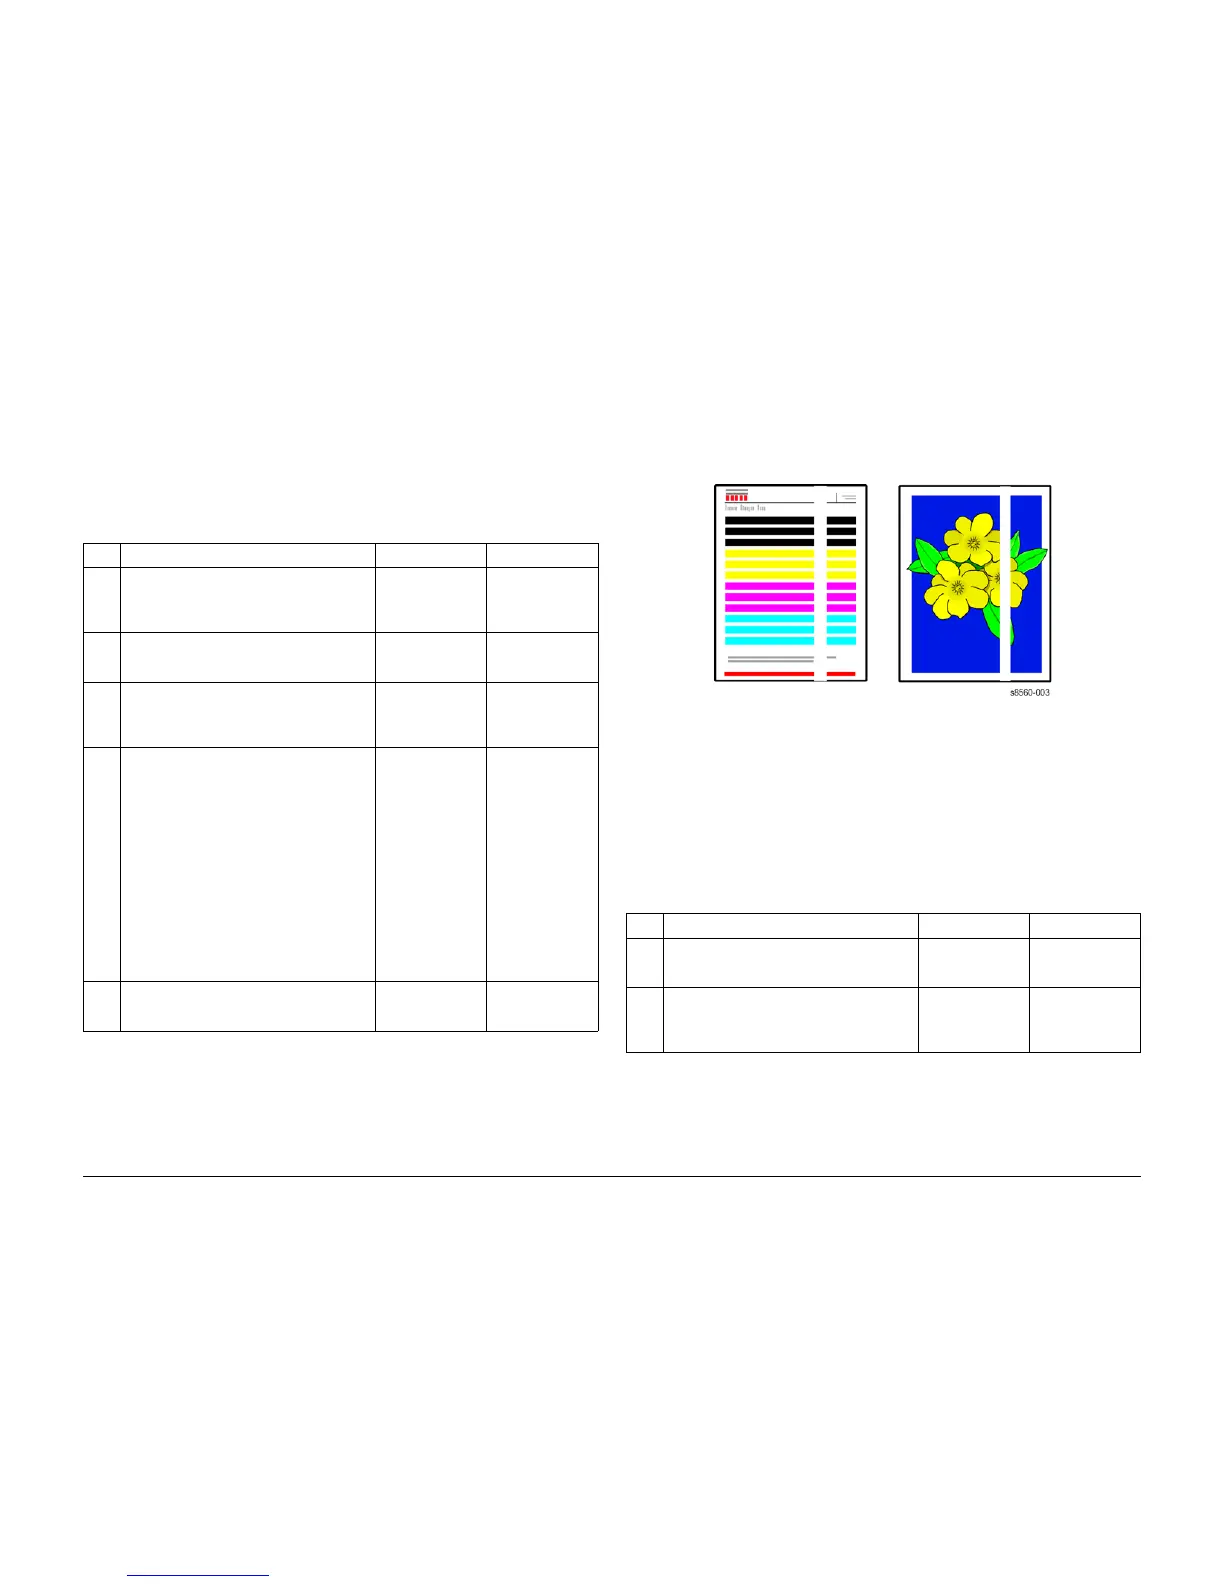
IQ14 Predominate Light Stripes
This RAP addresses image quality problems associated with the Print Engine. Predominate
light stripes typically result from something scraping the image off the Drum before Transfixing.
Indications of a random light stripe condition are all four color bars missing on the test page, or
output that appears as follows:
Figure 1 Example of Predominate Light Stripe Output
NOTE: If there are a series of regularly spaced white lines approximately 6 mm (.25 in.) apart,
see IQ31.
Initial Actions
1. Check that supported media is being used.
2. Run the Eliminate Light Stripes routine from the Control Panel.
Procedure
Table 1 IQ13 Random Light Stripes
Step Questions and Actions Yes No
1 Run the Eliminate Light Stripes routine from
the Control Panel. Multiple attempts are
sometimes needed to clear obstructed jets.
Does the problem persist?
Go to Step 2. Complete.
2 Clean the Print Engine exit path, and wipe the
Stripper Blade with a lint-free cloth.
Does the problem persist?
Go to Step 3. Complete.
3 Remove the Drum Maintenance Kit and wipe
the clear plastic Wiper Blade with a lint-free
cloth.
Does the problem persist?
Replace the Main-
tenance Kit. If the
problem persists,
go to Step 4.
Complete.
4 Select the Jet Substitution Mode.
1. On the Control Panel, select Trouble-
shooting, and then press the OK button.
2. Select Print Quality Problems, and then
press the OK button.
3. Select Eliminate Light Stripes, and then
press the OK button.
4. Select Jet Substitution Mode, and then
press the OK button.
5. Follow the Control Panel prompts to
select the color and malfunctioning jet
number indicated on the Light Stripes
Test page.
Does the problem persist?
Go to Step 5. Complete.
5 Turn off the system for at least 4 hours.
Run the Eliminate Light Stripes routine.
Does the problem persist?
Follow Printhead
Troubleshooting
Checklist.
Complete.
Table 1 IQ14 Predominate Light Stripes
Step Questions and Actions Yes No
1 Clean the Print Engine exit path, and wipe the
Stripper Blade with a lint-free cloth.
Does the problem persist?
Go to Step 2. Complete.
2 Remove the Drum Maintenance Kit and wipe
the clear plastic Wiper Blade with a lint-free
cloth.
Does the problem persist?
Replace the Drum
Maintenance Kit. If
the problem per-
sists, use IQ13.
Complete.

 Loading...