09/2007
3-15
Phaser 8860/8860MFP Service Manual
IQ20, IQ21
Image Quality
Initial Issue
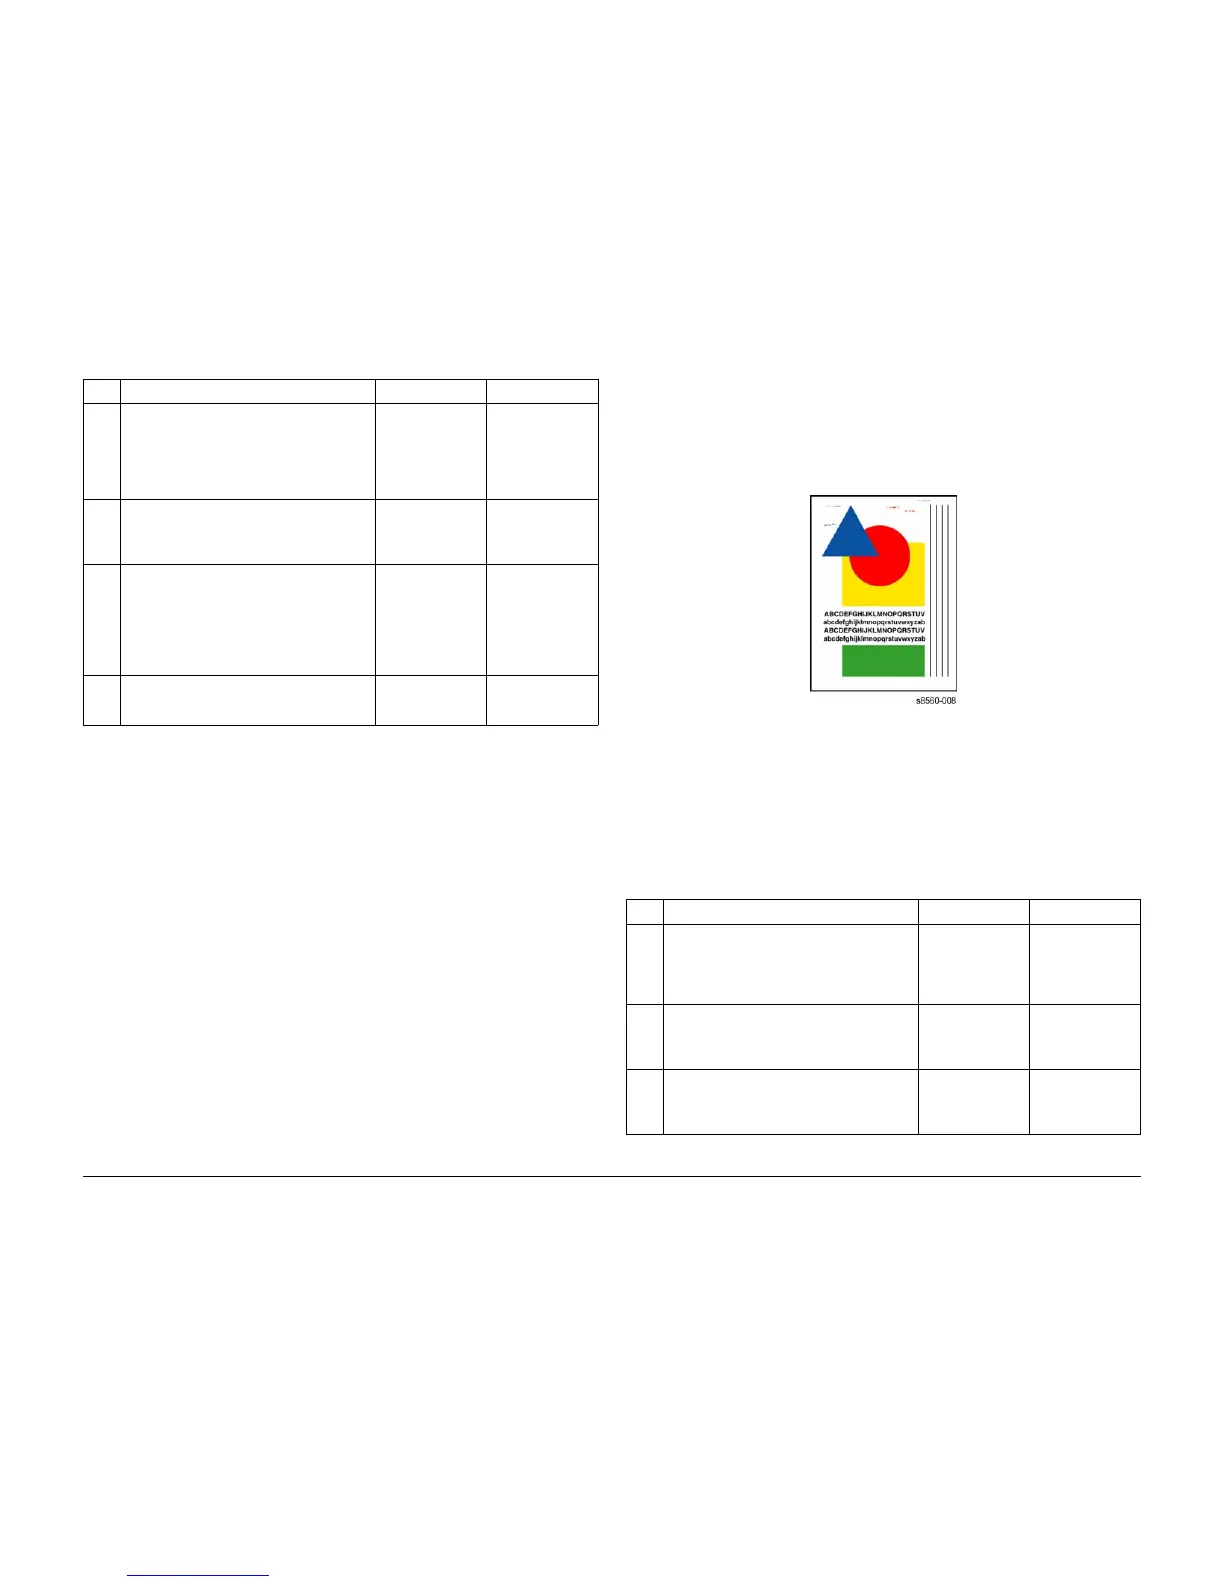
IQ21 Ink on the White Portion of the Printed Page
This RAP addresses image quality problems associated with the Print Engine. Color appearing
on blank areas of the output is called latent image. Latent images typically result from insuffi-
cient oiling of the Drum. Insufficient oiling is often the result of a dirty, defective, or expended
Drum Maintenance Kit. Printing on pre-punched media can also contribute to latent images.
debris in the paper path. Indications of latent images can appear as follows:
Figure 1 Example of Latent Image on Output
Initial Actions
1. Check that supported media is being used.
2. Check for any dirt, debris or jammed media in the exit path.
3. Run the Remove Print Smears routine from the Control Panel.
Procedure
4 The scratch occurred during the pick or trans-
port process from Trays 2, 3, or 4.
Inspect the Pick Guides, Front Door, and
Maintenance Kit.
Replace or clean parts as needed.
Does the problem persist?
Go to Step 5. Complete.
5 Check for debris on the Preheater.
Run the Service Diagnostics Remove Print
Smears routine.
Does the problem persist?
Go to Step 6. Complete.
6 Force a sheet of thick (65 to 85 lb.) paper
through the Preheater.
Using care not to damage the sensor actua-
tors, gently buff the heating surface by mov-
ing the sheet back and forth through the
Preheater.
Does the problem persist?
Go to Step 7. Complete.
7 Check the paper guides for nicks, cuts, or
debris.
Are the guides damaged?
Replace damaged
parts.
Clean all parts in
the paper path.
Table 1 IQ20 Scratches or Marks Parallel to the Long Axis of Printing
Step Questions and Actions Yes No
Table 1 IQ21 Ink on the White Portion of the Printed Page
Step Questions and Actions Yes No
1 Try printing using a smoother, higher quality
paper, some recycled papers are too coarse.
Watermarked or punched paper could also
cause latent images.
Does the problem persist?
Go to Step 2. Complete.
2 Remove the Drum Maintenance Kit and wipe
the clear plastic Wiper Blade with a lint-free
cloth.
Does the problem persist?
Replace the Drum
Maintenance Kit. If
the problem per-
sists, go to Step 3.
Complete.
3 Clean the Stripper Blade.
Run the Service Diagnostics Remove Print
Smears routine.
Does the problem persist?
Go to Step 4. Complete.

 Loading...