09/2007
4-53
Phaser 8860/8860MFP Service Manual
REP 4.0.7
Repairs and Adjustments
Initial Issue
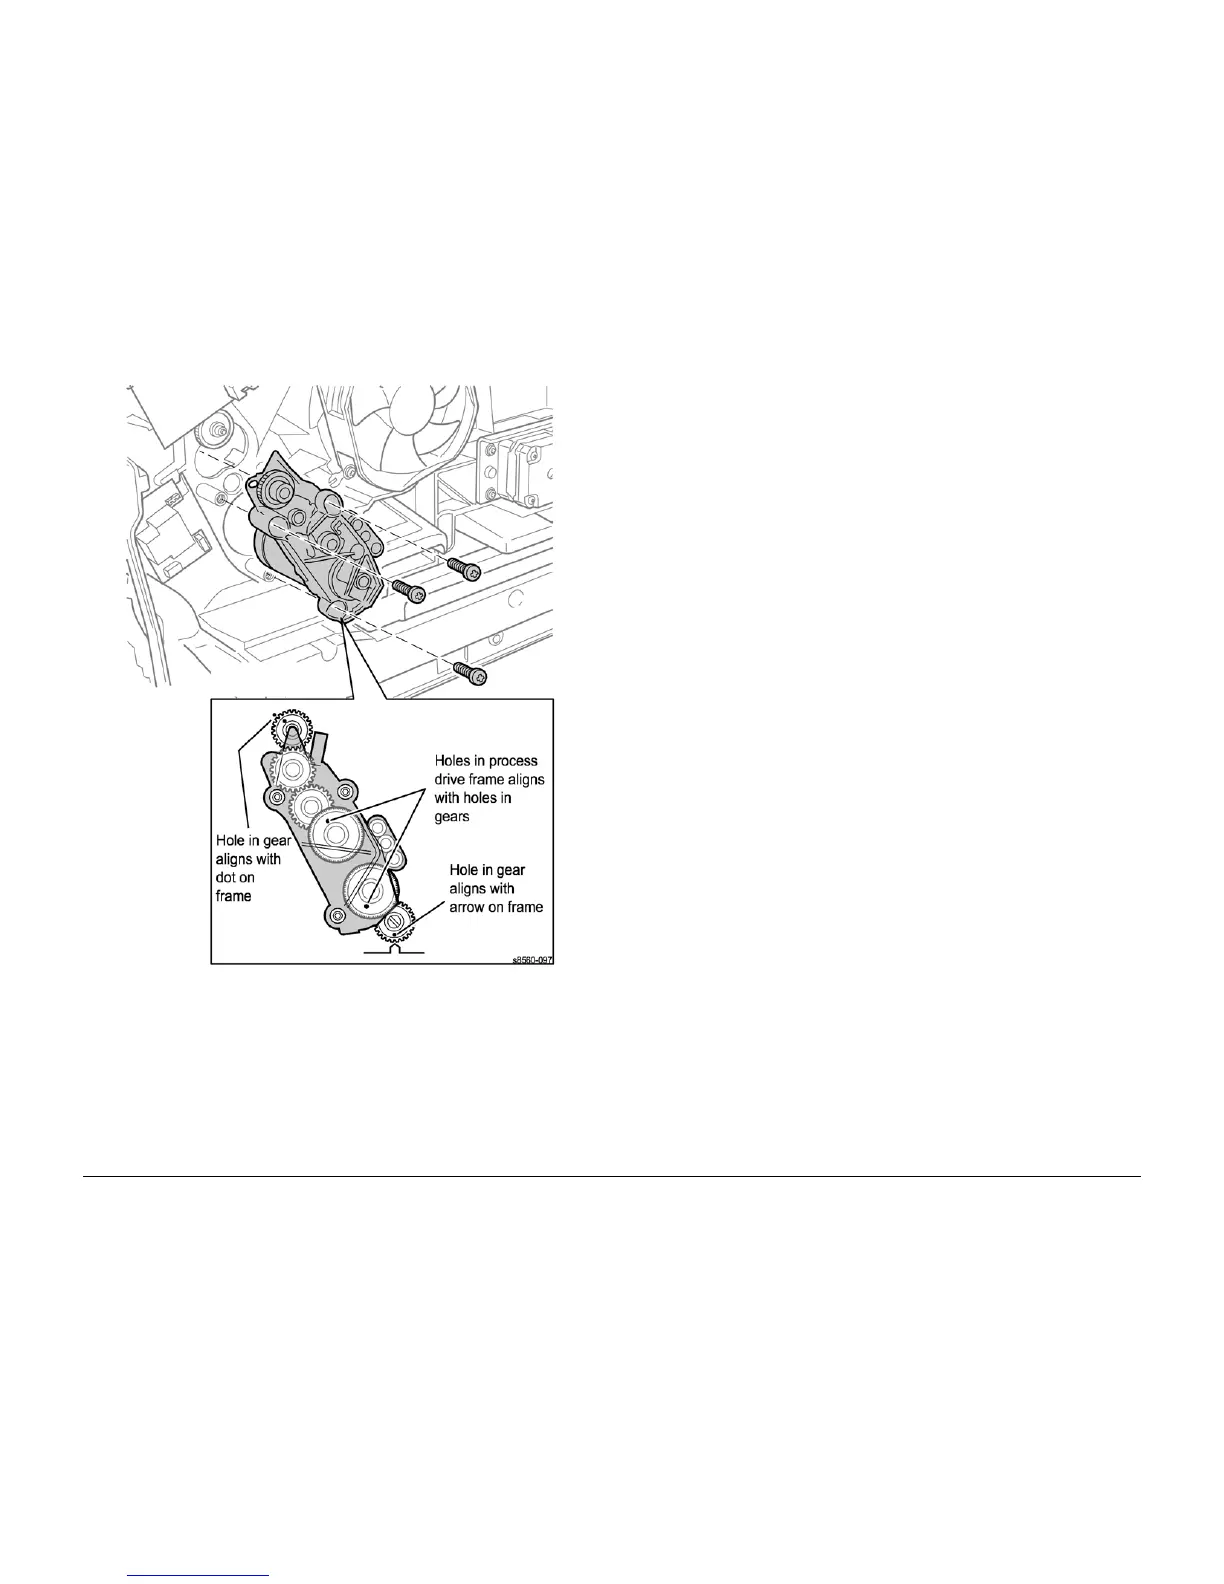
Figure 1 Removing the Process Drive and Process Drive Gear Alignment
8. Remove the Process Drive from the chassis.
9. Disconnect the Process Drive from the harness.
Replacement
CAUTION
Before tightening the Process Drive mounting screws, align the holes in the Process Drive
flange with the mounting bosses on the frame, seat the gears, and press the Process Drive
tightly against the frame. Next, seat all three screws before torquing the screws to a final tight-
ness of 12 in-lbs. Tightening the screws individually before seating all three can put undue
strain on the mounting bosses. Do not use the screws to pull the Process Drive into alignment.
Perform the Head Tilt Gear (ADJ 4.13.1), and Process Drive Alignment (ADJ 4.7.1) adjust-
ments before restoring system power.

 Loading...