73R5906112 /15 UDX
• Use the ▲ or ▼ key to shift the lens (image) in vertical direction.
• Use the enter key to transform the keypad to digital zoom mode (if enabled).
• Use the return key to exit without saving.
5. If digital zoom is enabled, you can now do the following:
• Use the ◄ or ► key to zoom the lens in or out.
• Use the enter key to either finish digital shift and zoom.
• Use the return key to exit without saving.
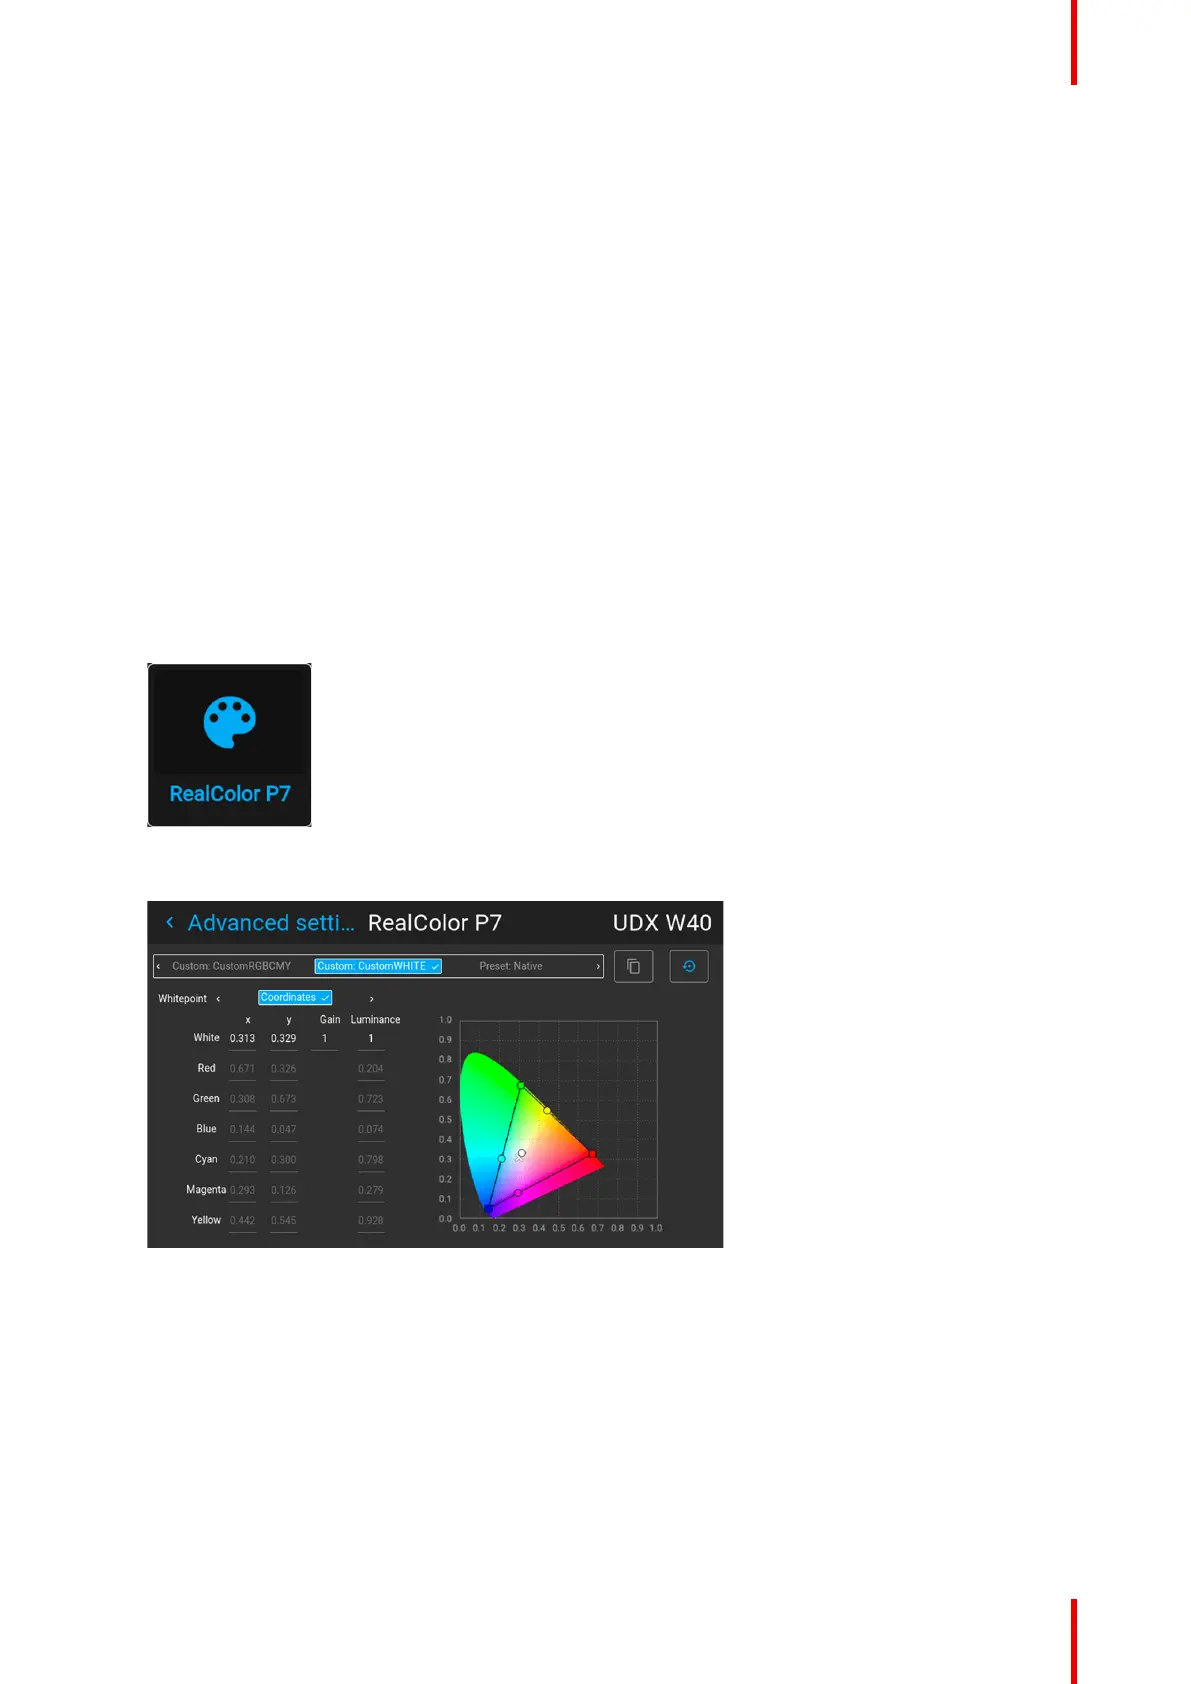
7.6 RealColor P7
Purpose
When blending images from multiple projectors, the measured color coordination of each projector can be
altered to a desired common level. This so that the projected colors are identical over all projectors used.
Alternatively, if you are unfamiliar with how to adjust the colors to a specific setting, there are also a certain
number of presets available, which forces the color output to specific color standards.
How to set custom P7 values
1. In the main menu, select Image → Advanced → RealColor P7.
Image 7–26 Advanced settings menu – RealColor P7
The P7 menu is displayed.
Image 7–27 Example of the RealColor P7 menu, here on a UDX
2. Select the desired Custom Mode. Select one of the following Custom options and confirm:
• Custom RGB: 3–point color configuration.
In RGB mode, the C, M and Y coordinates will be calculated automatically based on the R, G and B
coordinates.
• Custom RGBCMY: 6–point color configuration (both RGB and CMY).
In RGBCMY mode, each color can be given a specific coordinate within the measured color triangle.
• Custom WHITE: Configure only the White temperature.
3. Choose how to determine the Whitepoint. Choose one of the following:
• Coordinates: Configure the white point via specific coordinates.
The white point is specified using an x, y coordinate in the CIE 1931 Chart.
GUI – Image
 Loading...