68
Connecting and Setting Up Your Printer
Setting Up the Printer Using Dell Printer Easy Install (Windows
®
Only)
NOTE:
To set up the printer connected with Macintosh computers or Linux computers, see "Installing Printer Drivers on
Macintosh Computers" or "Installing Printer Drivers on Linux Computers (CUPS)" respectively.
Basic Setup
To set up the printer, you can use the Dell Printer Easy Install program on the computer running a Microsoft
®
Windows
®
operating system.
The program first searches for the printer and grasps how the printer is connected to the computer. Based on that
information, the program will automatically try to configure the printer, and install the drivers and software to your
computer.
Before starting this basic setup, make sure that the printer is turned off, and ensure the cable connections as follows:
To set up the Dell Cloud Multifunction Printer | H815dw as a wireless printer
1
Disconnect the Ethernet cable and the USB cable from the printer.
2
Ensure the computer you use for printer setup is connected to a known wireless network (2.4 GHz).
After setup completion, the printer will connect to the same wireless network that your setup computer is
connected to.
To set up the printer as a network (wired) printer
1
Connect the Ethernet cable to the printer.
To set up the printer as a USB printer
1
Connect the USB cable to the printer.
NOTE:
Where the wireless network connection is available, you cannot set up the Dell Cloud Multifunction Printer | H815dw as
a USB printer in the basic setup. In this case, set up the printer following the procedures described in "Setting Up the Printer in
Another Connection Method."
NOTE:
For Windows Vista
®
, you cannot set up the Dell Cloud Multifunction Printer | H815dw automatically as a wireless printer
in the basic setup. In this case, set up the printer manually following the procedures described in "Setting Up the Printer in
Another Connection Method."
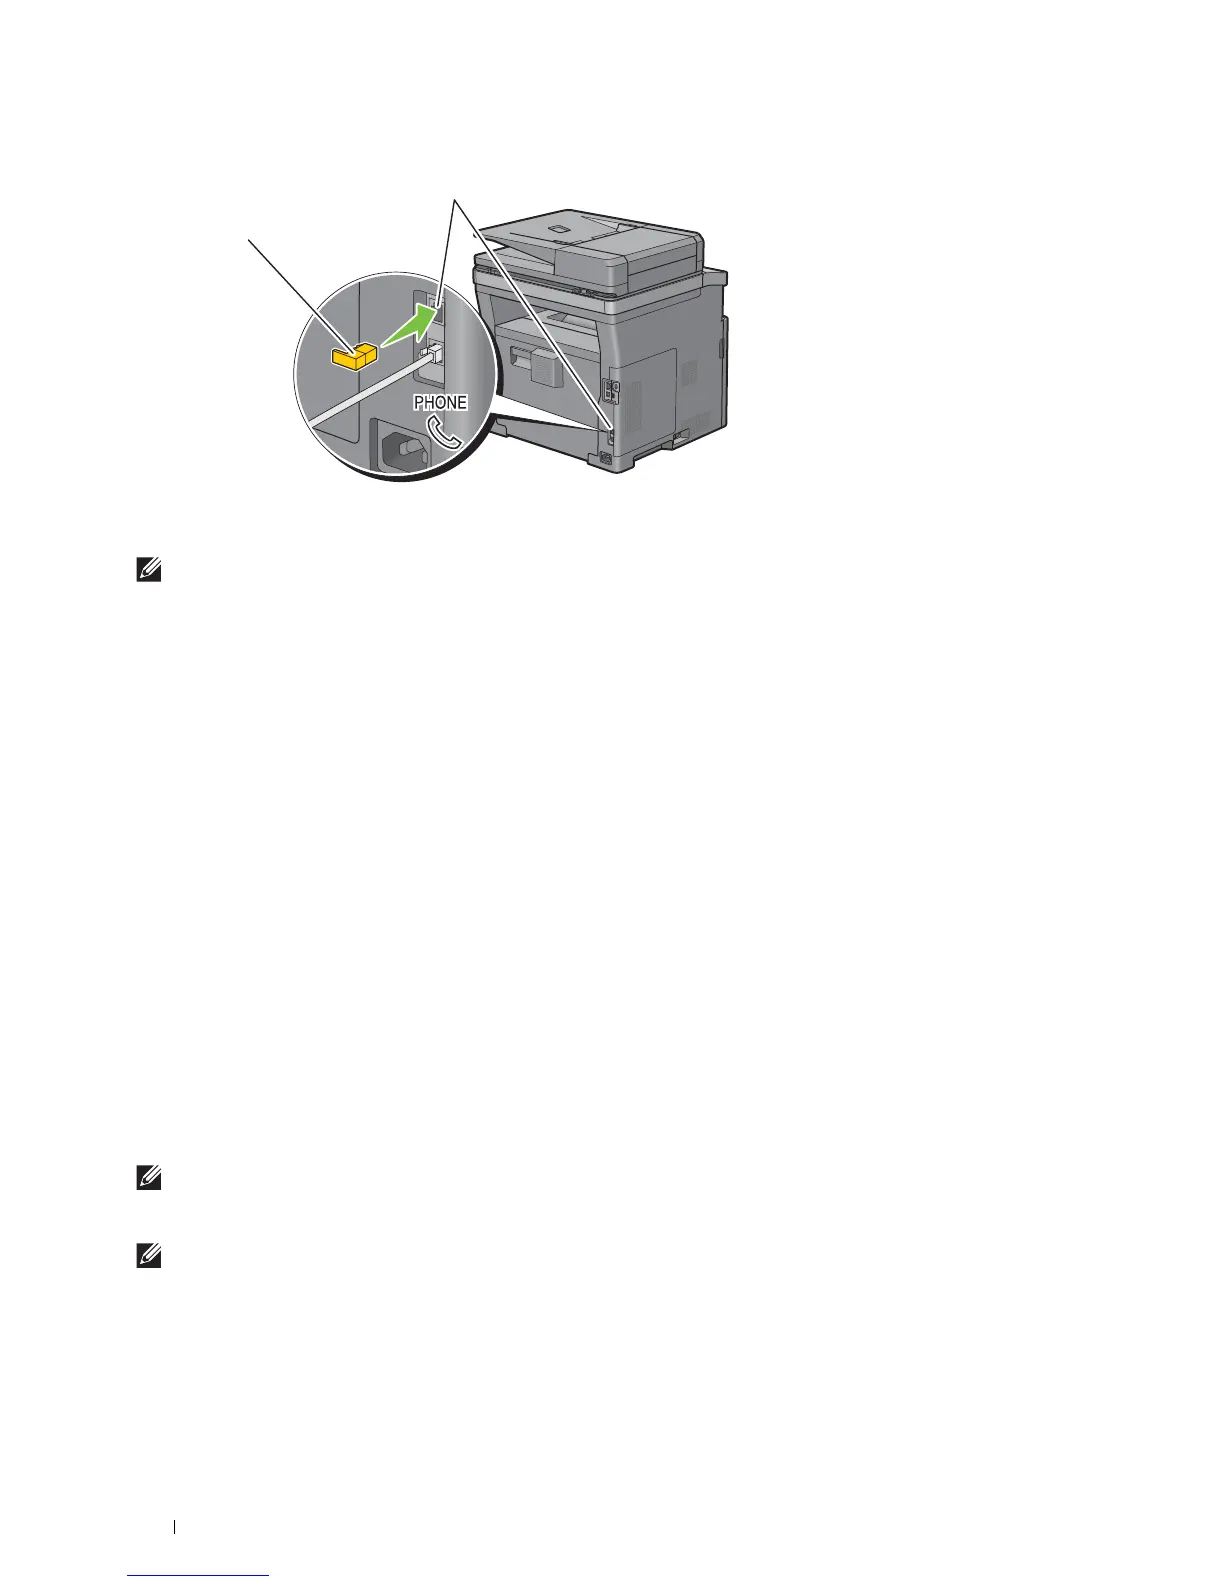
Phone connector
"Yellow" terminator
 Loading...