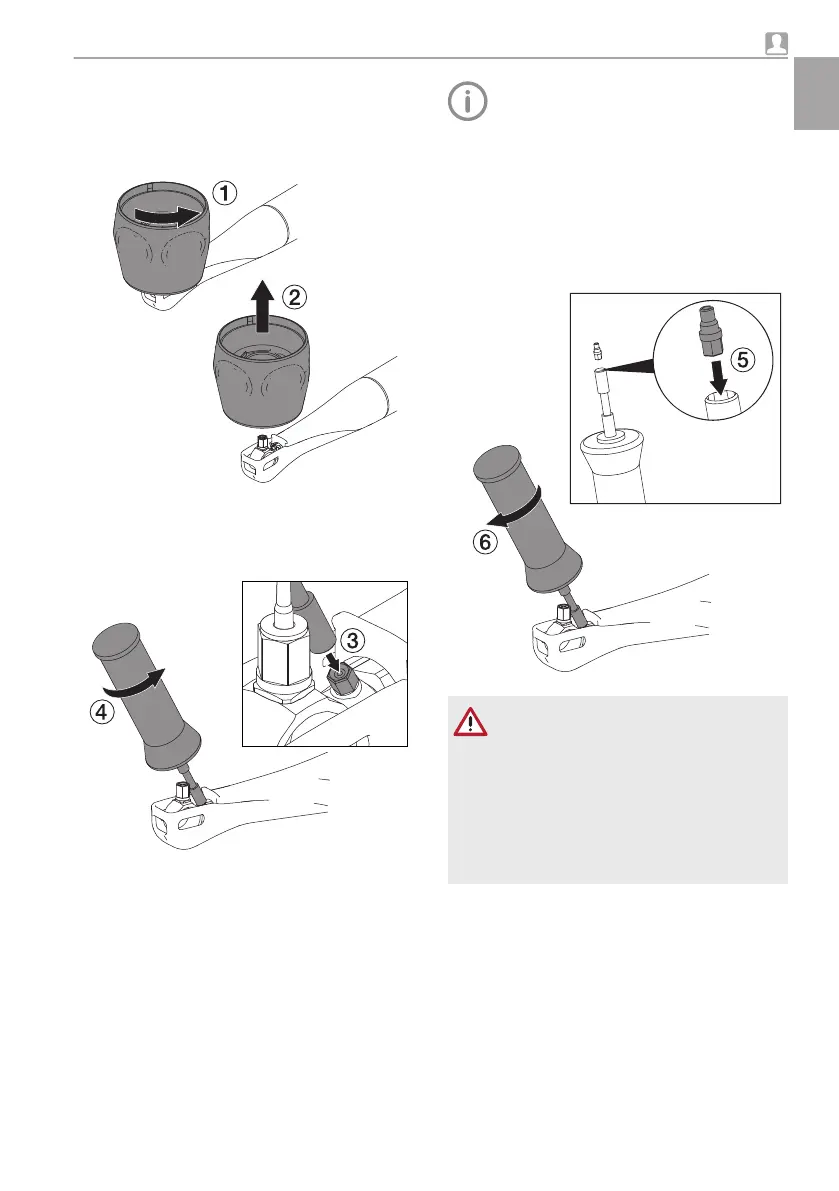
15.8 Changing the nozzle in the
Paro handpiece
❯
Remove the instrument, "Inserting/changing
instruments".
❯
Place the nozzle torque wrench (contained in
the service kit) on the nozzle and unscrew the
nozzle anti-clockwise.
❯
Rinse the thread in the resonating body with
the air and water syringe.
New nozzles are stored in the nozzle
torque wrench housing.
The nozzles are made of plastic and do
not have a thread. The thread die in the
resonating body is self-tapping.
❯
Insert the new nozzle with the hexagon into the
nozzle torque wrench and, while maintaining
the correct angular position, apply light force to
screw it into the thread cutting die of the res-
onating body.
WARNING
Risk of injury due to loose nozzles
Injuries can occur if the nozzle is not
screwed in correctly and becomes loose
during treatment.
❯
Only work with the nozzle properly
tightened. (An audible click can be
heard when screwing in the nozzle).
❯
As soon as the self-tapping thread takes hold,
reduce the pressure. Screw om the nozzle until
a slight cracking noise is heard (torque limit is
reached).
If it is not possible to tightly screw the nozzle
into position (torque limit is not reached or the
nozzle falls out again), check whether there is a
chip in the thread. Remove the chip with a fine
needle.
Usage
9000-615-28L02 1903V004 63
EN
 Loading...