20Service Guide: EFI Fiery Central integrated server
Replacing parts
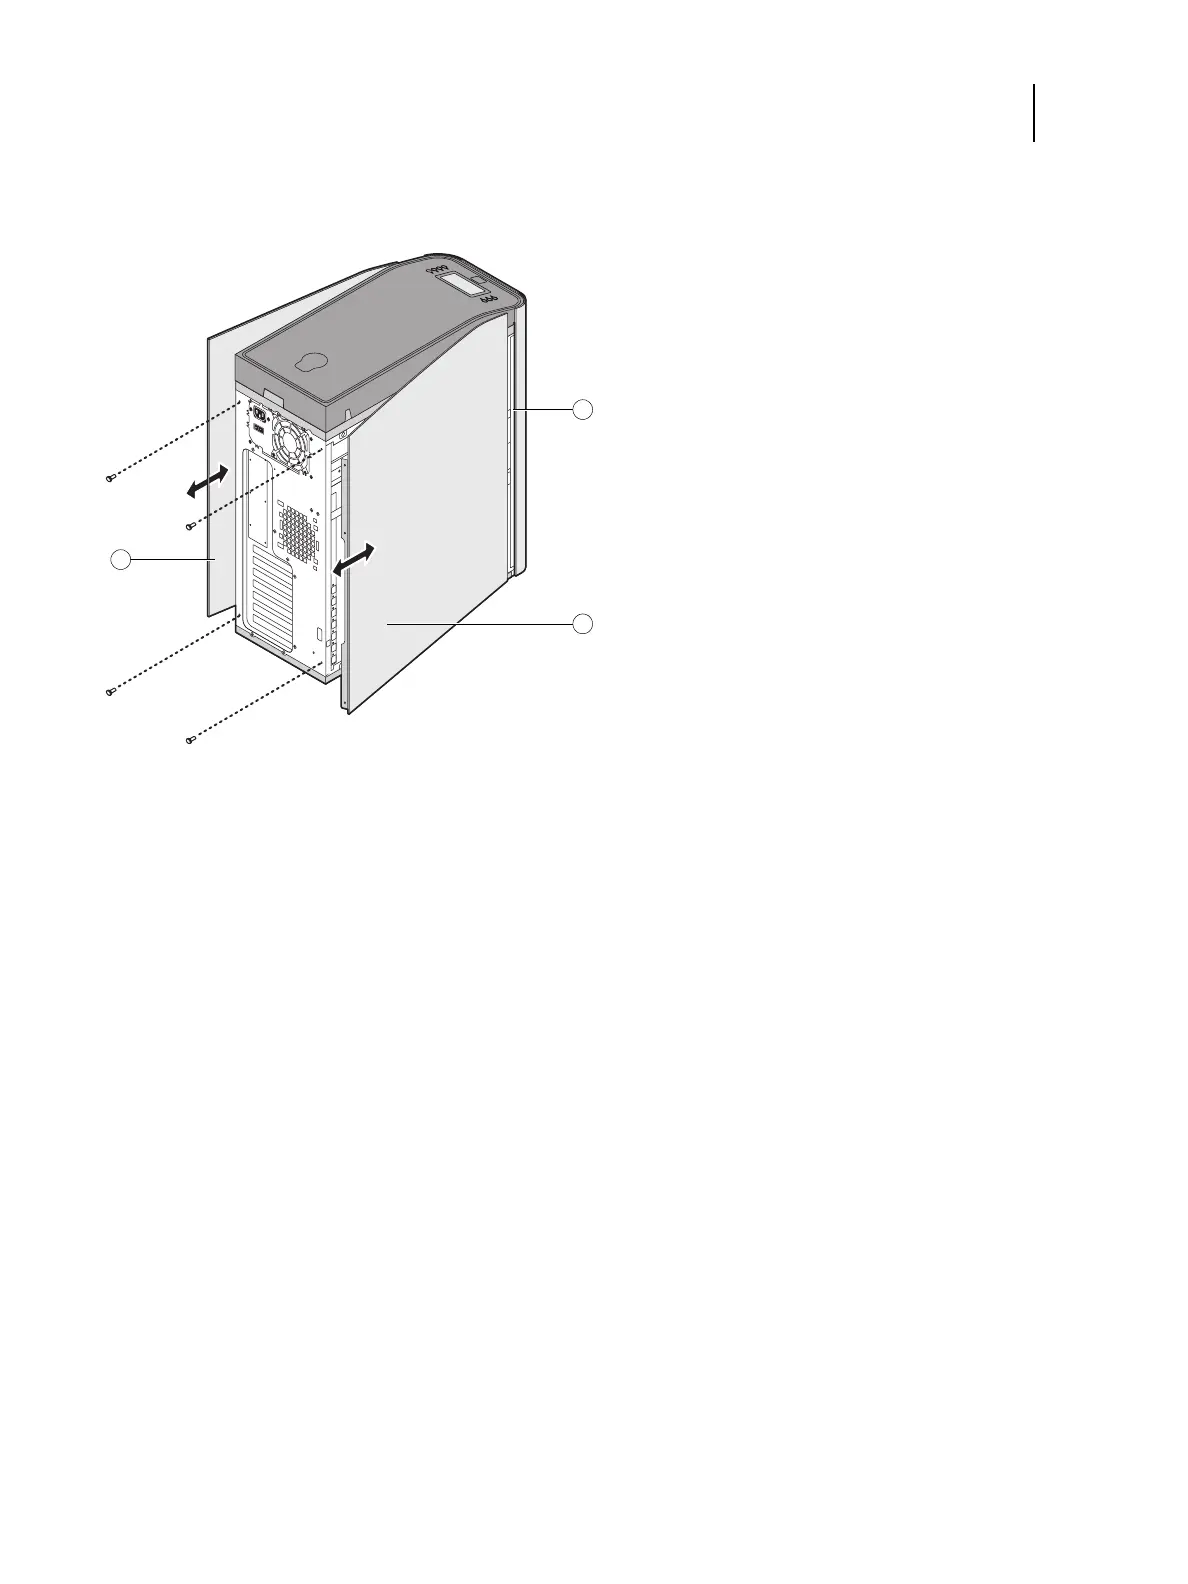
2 Pull the back edge of the panel away from the chassis and lift the panel off the chassis.
Figure 6: Removing/replacing the side panels
3 To replace the panel, fit the front edge of the panel on the pivot post in the chassis.
4 Rotate the panel closed against the back of the chassis and replace the screws that you removed earlier.
Make sure not to damage cables as you replace the panel. Fold all cables inside the chassis before closing the panel
against the chassis.
To remove and replace the front panel
Note: To remove the front panel, you must first remove the left and right panels.
1 Remove the upper faceplate from the front of the chassis.
Press down to release the two tabs that secure the upper faceplate to the front panel, and then carefully remove the
upper faceplate from the front panel.
Note: You must remove the upper faceplate in order to remove the front panel from the chassis.
2 Pull outward on the six tabs that secure the front panel to the chassis, and then lift the panel off of the chassis.
First remove the two top tabs, then the two middle tabs, and then the two bottom tabs.
1 Right side panel
2 Pivot post inside chassis
3 Left side panel
 Loading...