21Service Guide: EFI Fiery Central integrated server
Replacing parts
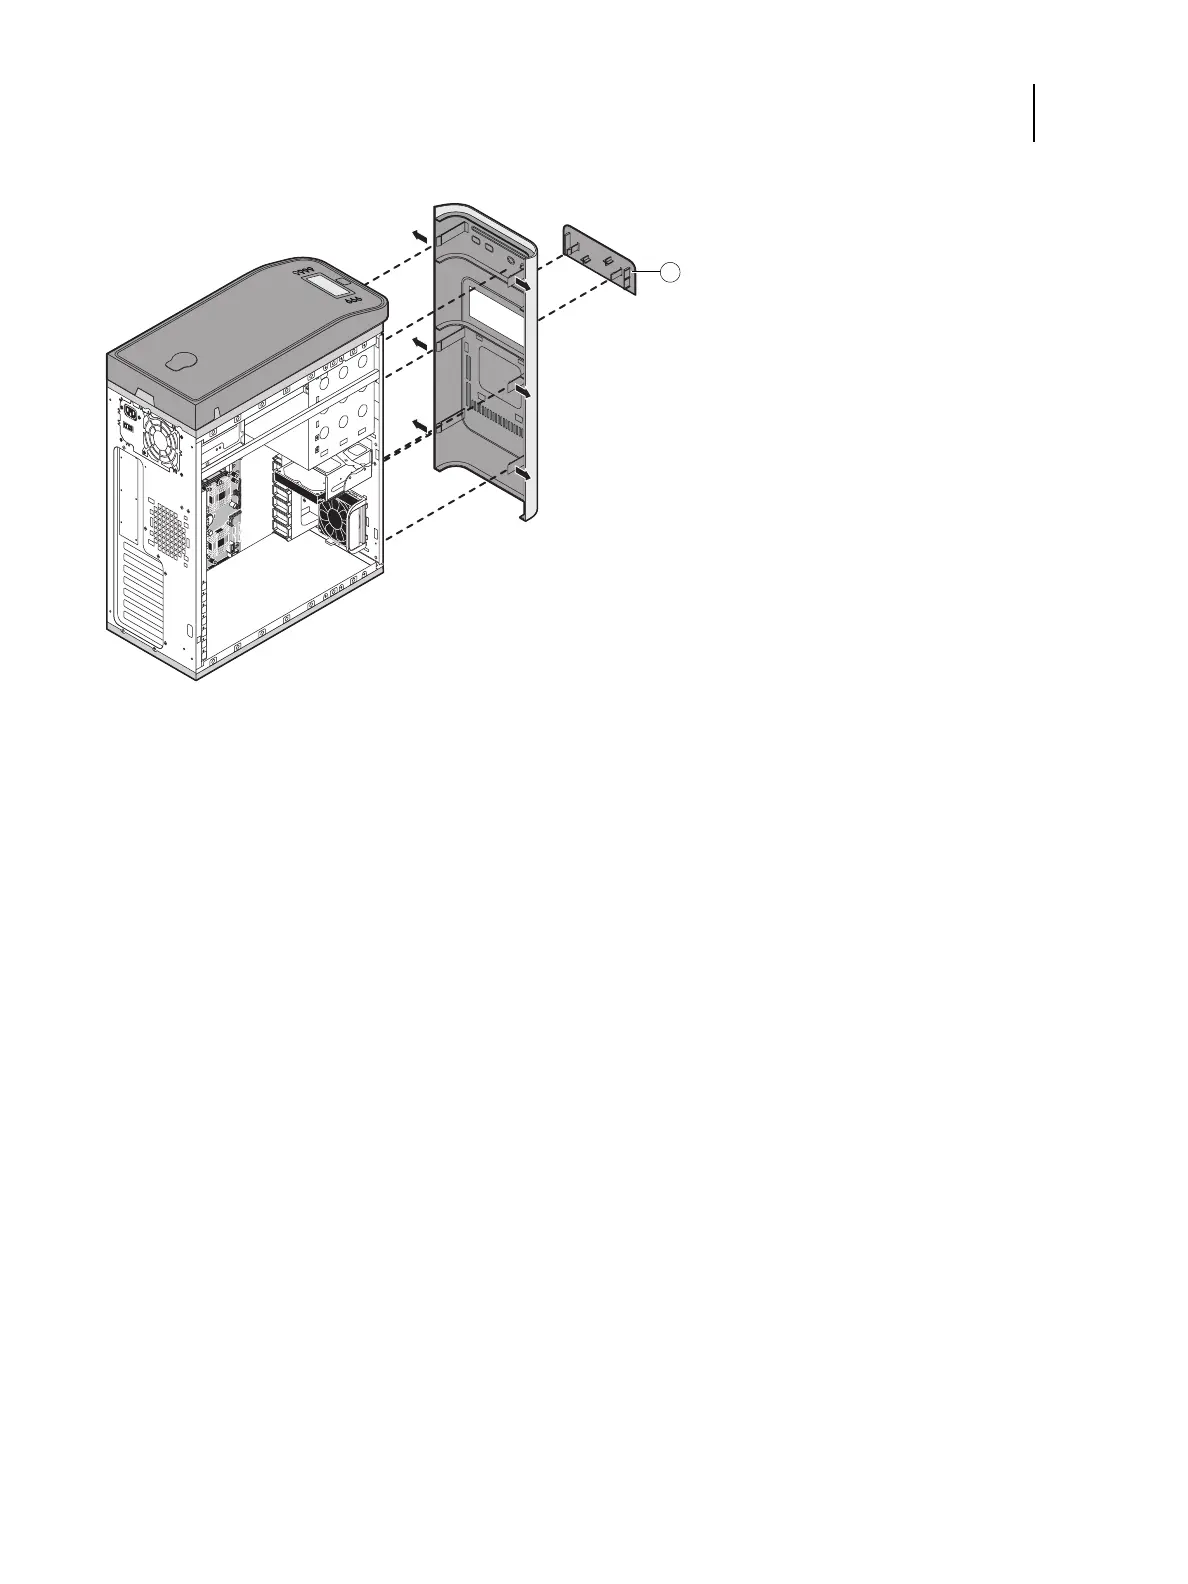
Figure 7: Removing/replacing the front panel
3 To replace the front panel, align the four cutouts in the panel with the power and reset buttons and front USB
ports.
4 Press the panel against the chassis to snap it into place.
Snap the tabs in pairs (first the top tabs, then the middle tabs, and then the bottom tabs).
5 Replace the upper faceplate.
Insert the two standoffs at the base of the faceplate into the chassis, and then carefully press the faceplate against
the chassis to lock the faceplate into place.
To remove and replace the top panel
Note: To remove the top panel, you must first remove the left, right, and front panels.
1 Remove the plug from the top panel.
From the cutout in left side of the top panel, access and loosen the locking bolt, and then remove the plug.
2 Loosen the top panel.
Slide the top panel a few inches toward the front of the chassis to disengage the hooks in the panel from the slots in
the top of the chassis.
Note: You may need to tap the back edge of the panel toward the front of the chassis to disengage the panel.
3 Detach the UIB cable from the motherboard.
1 Upper faceplate
 Loading...