36Service Guide: EFI Fiery Central integrated server
Replacing parts
4 Wipe the contact surface of the CPU (the smooth, gray side of the chip) with a clean, lint-free cloth to ensure
proper contact with the new heatsink.
If you remove the CPU from the motherboard to install it on a new motherboard, make sure that you completely
remove any thermal compound residue on the surface of the CPU and at the base of the heatsink. It may help to
scrape all the residue off of the surface using the flat edge of something non-conductive.
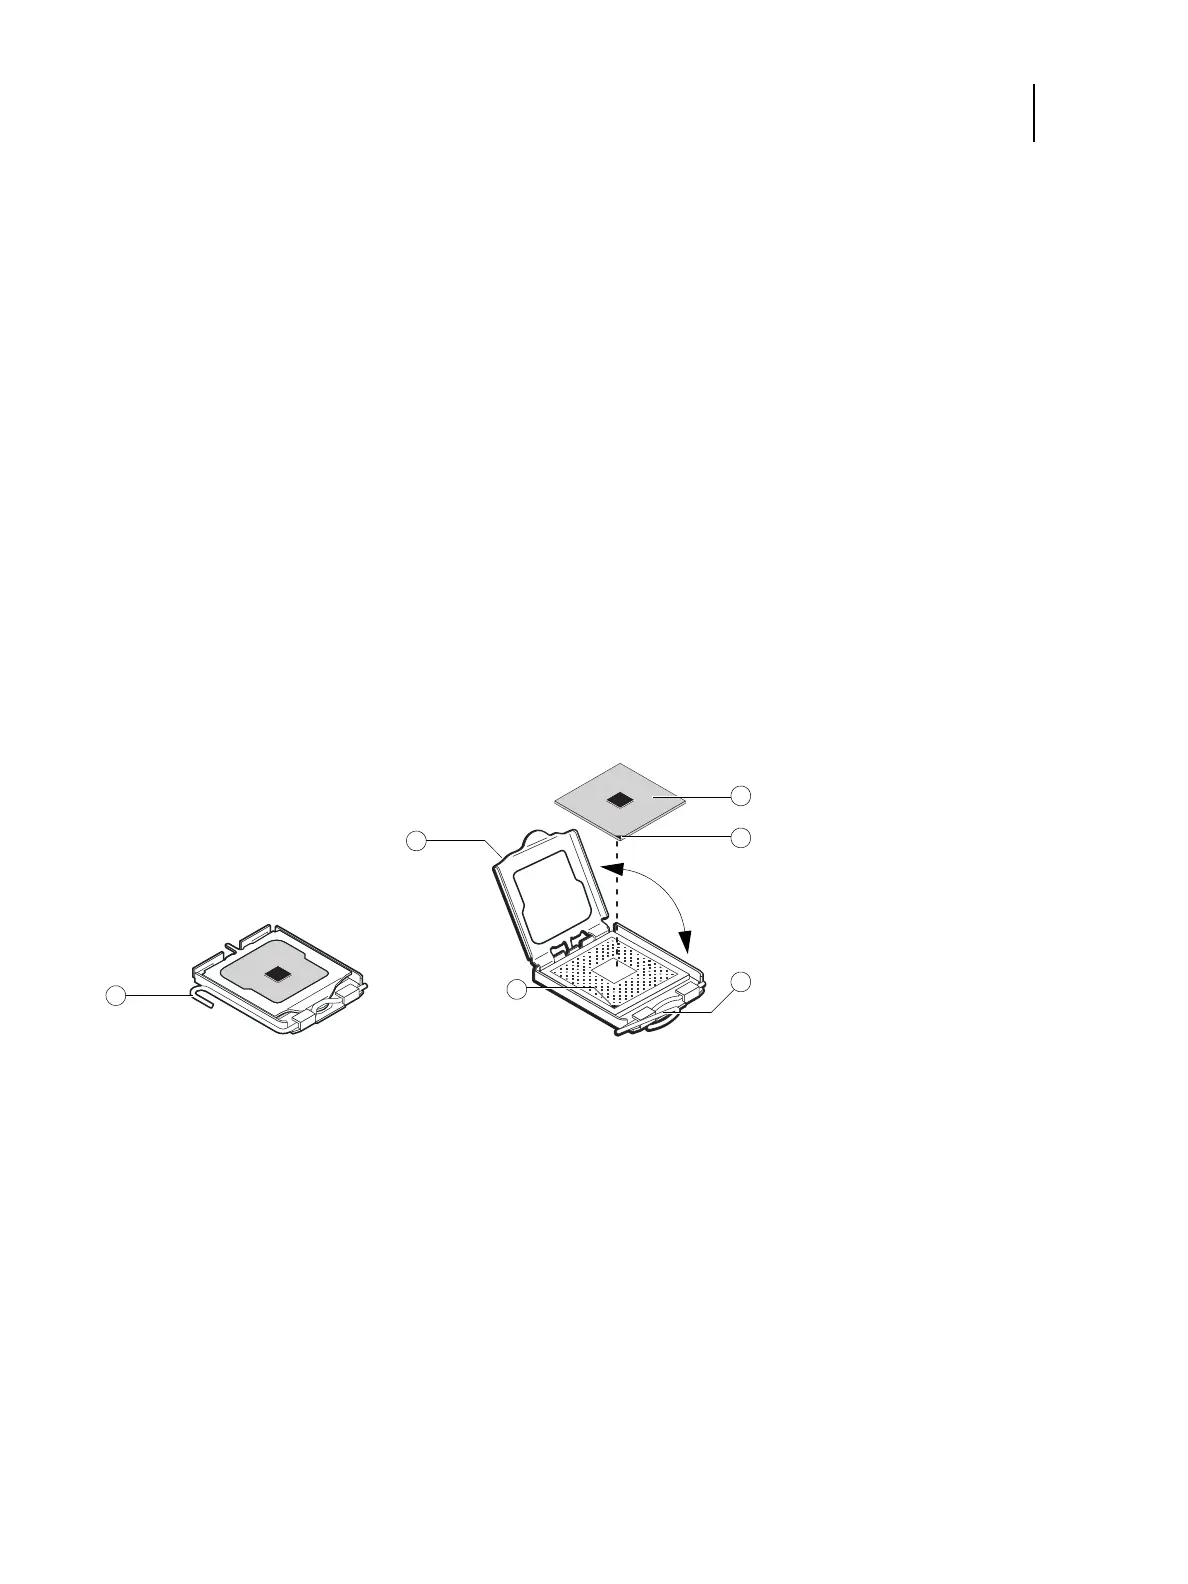
5 Prepare the CPU socket by ensuring that:
• The socket lever is in the open position.
• The load plate is open.
6 Place the CPU in the socket.
The CPU and the socket are keyed to ensure correct installation. The notches on the edges of the CPU correspond
with the two small posts inside the socket. Align the yellow triangle on the CPU with the yellow triangle on the
socket. Do not force the CPU.
7 Close the load plate.
8 Lower the socket lever and place it in the locked position under the retention post.
Figure 14: Removing/replacing the CPU
To replace the CPU cooling assembly
Note: Before you install the cooling assembly, completely remove any thermal compound residue on the surface of the
CPU and the base of the heatsink, and then apply a fresh thermal compound square to the base of the heatsink. When
installing the thermal compound square, make sure to remove the plastic backing on both sides of the square. Avoid
creating any bubbles or wrinkles on the square. Bubbles and wrinkles reduce the heat-transfer efficiency of the cooling
assembly.
1 Socket lever in the locked position
2 Load plate open
3 Yellow triangle
4CPU
5 Socket lever in the open position
 Loading...