26Service Guide: EFI Fiery Central integrated server
Replacing parts
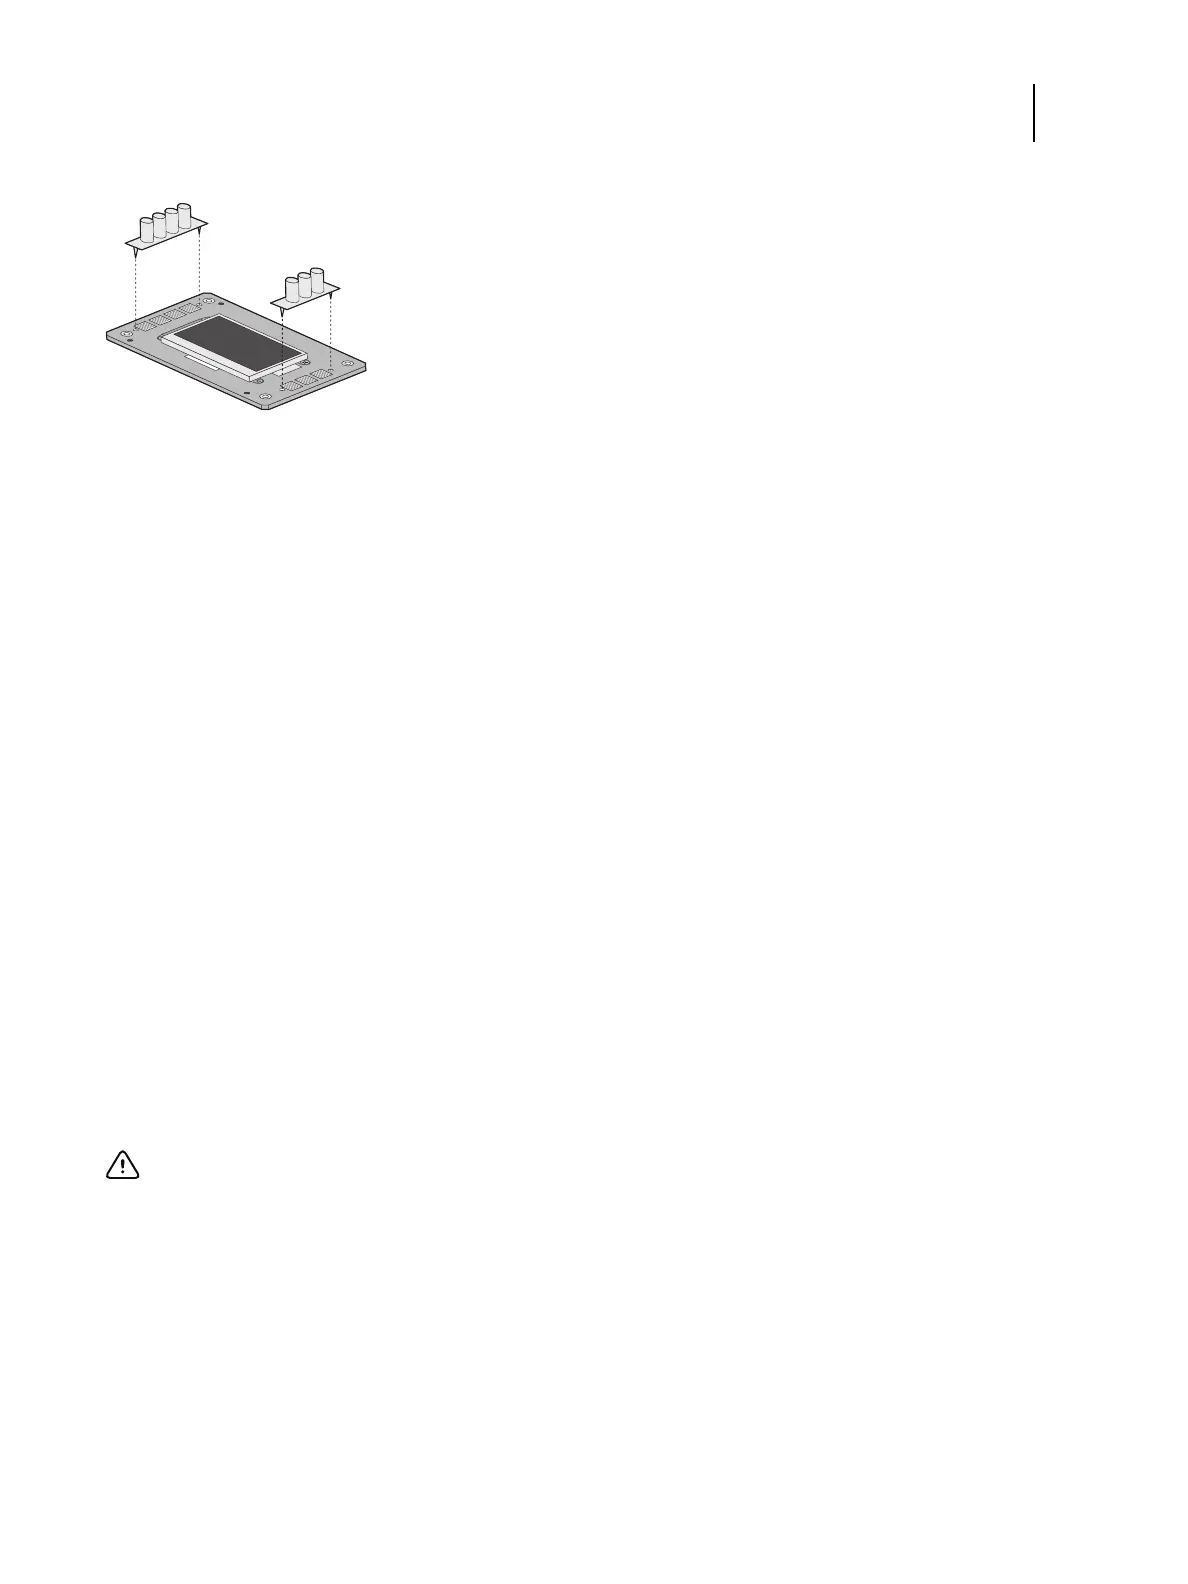
Figure 11: Removing/replacing the UIB buttons
2 Attach the UIB cable to the connector on the back of the UIB (see Figure 10 on page 25).
3 Turn the top panel over to expose its underside and place it on a padded surface.
4 Position the plastic lens around the display window of the UIB.
5 Secure the UIB to the underside of the top panel.
Grasp the UIB in one hand while using the other hand to hold the plastic lens steady against the UIB display
window. Place the UIB in the mounting area of the top panel and carefully fit the buttons through the cutouts in the
top panel as you hold the plastic lens in place.
Replace the four screws that secure the UIB to the underside of the top panel. Be sure to use the same screws that
you removed earlier.
6 If you are replacing the UIB cable with a new cable, do the following:
If present, cut the clamp securing the old cable to the underside of the top panel and remove the old cable. Attach a
new UIB cable to the connector on the UIB. If a new tie-wrap is included in the new UIB cable spare kit, use it to
secure the new UIB cable to the underside of the top panel.
7 Replace the top panel (see page 21).
Route the UIB cable through the chassis and connect it to motherboard connector J27 (see Figure 5 on page 17).
8 Reassemble the FC integrated server and verify its functionality (see page 54).
Motherboard
The motherboard controls hard disk drive functions and the communication between the FC integrated server and
external devices. The motherboard has four DIMM sockets.
Removing the motherboard
The motherboard attaches to the side of the chassis, below the power supply. Before you remove the motherboard, you
must remove the following:
• The left panel
Important: If you are removing the motherboard in order to replace it with a new motherboard, review the
troubleshooting and motherboard cautions on page 30.
 Loading...