FLEX-6000 Signature Series – Maestro User Guide
Copyright 2024 FlexRadio, Inc. All Rights Reserved. | Page 146
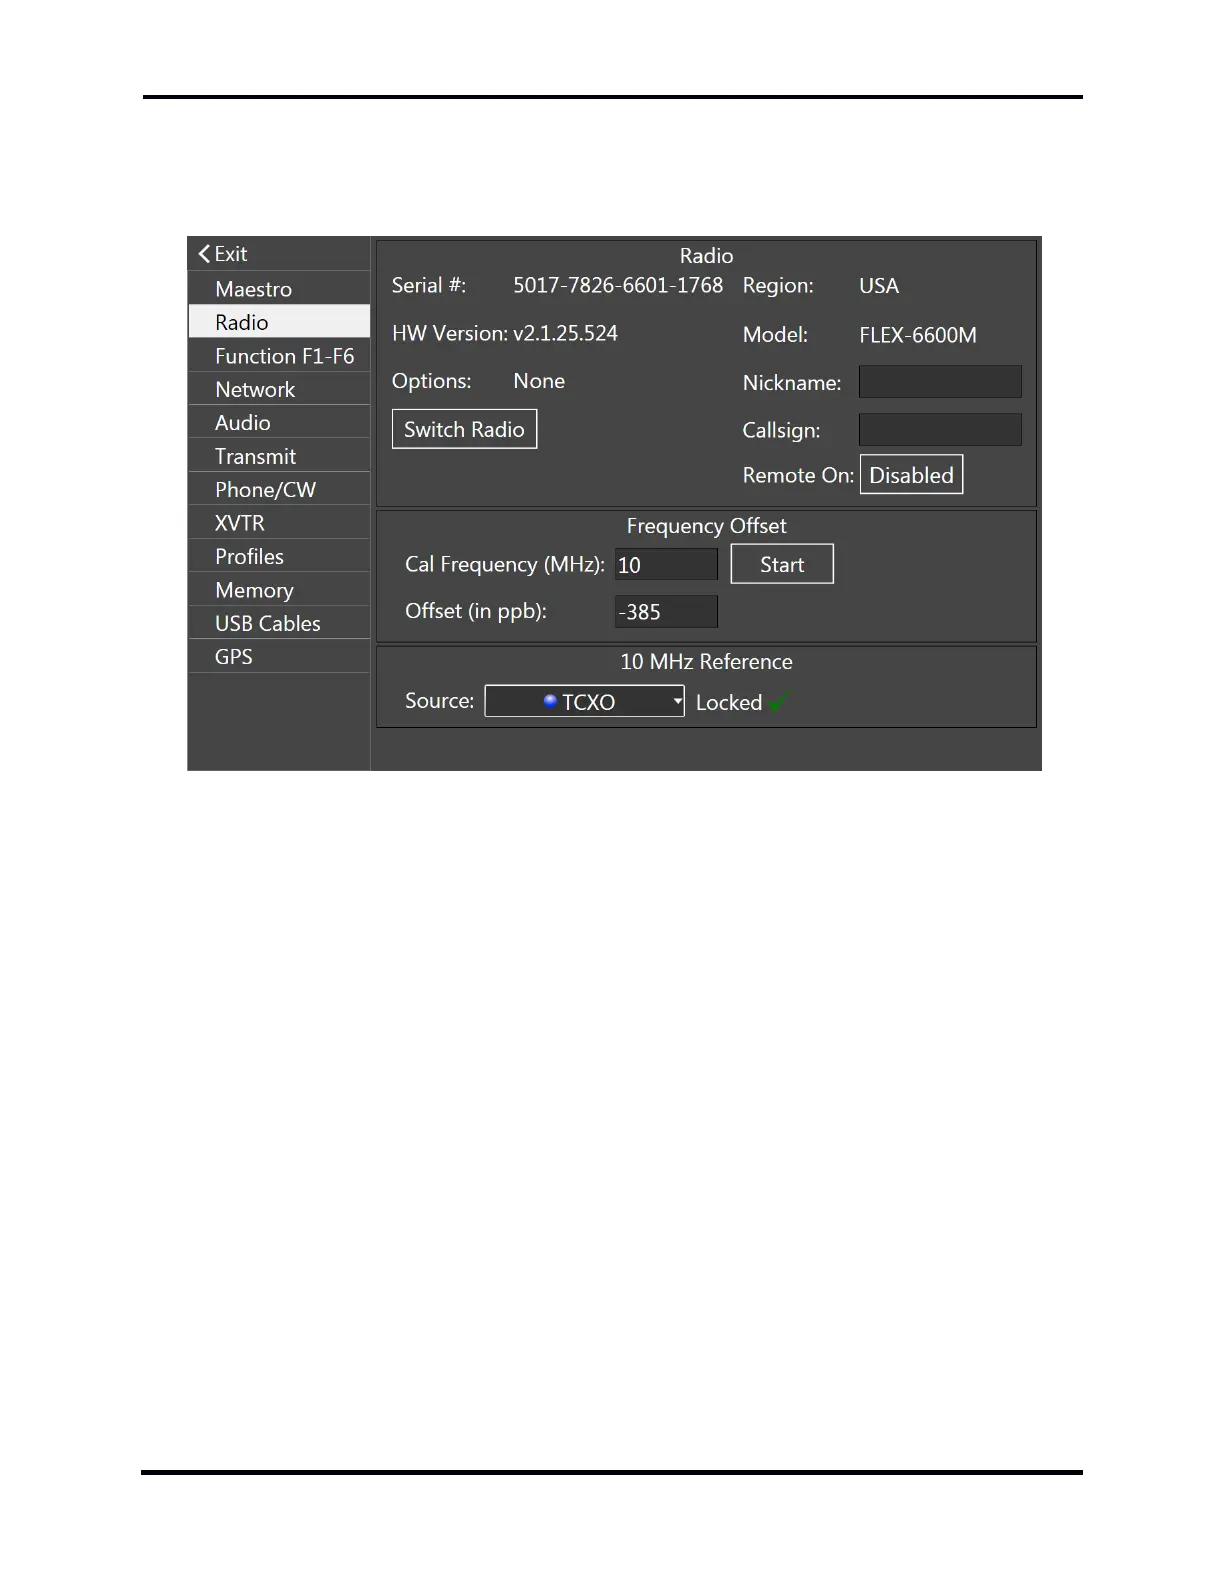
33.3 RADIO TAB
Located in the Radio tab is basic information about the selected radio. The tab contains the radio
Hardware Version and installed Options of the radio.
The Region indicator displays the country on which the radio’s transmit capabilities are based.
A set of three buttons provides a means to change the contents of the OLED front panel display on
Flex-6500 and Flex-6700 transceivers. When the Model button is selected, the radio’s model name
is displayed. When the Nickname button is selected, the nickname text is displayed. Tapping on
the nickname field opens a keyboard so that the nickname can be changed. When the Callsign
button is selected, the call sign text is displayed. Tapping on the call sign field opens a keyboard so
that the call sign can be changed.
Next is the Remote On enable/disable control. Tap the button to enable and disable this feature.
When enabled, closing the circuit in the RCA connector on the rear panel of the radio will power up
the radio. Opening the circuit will power down the radio.
Tapping the Switch Radio button disconnects Maestro from the radio, ending the operating
session, and returns control to the Select Radio screen.
The backlight section controls the intensity of the radio’s front panel backlight on those models that
have this feature.
The Frequency Offset controls are used to compensate for the error in the radio’s local oscillator.
Calibrate the local oscillator by performing the following steps:

 Loading...