FLEX-6000 Signature Series – Maestro User Guide
Copyright 2024 FlexRadio, Inc. All Rights Reserved. | Page 25
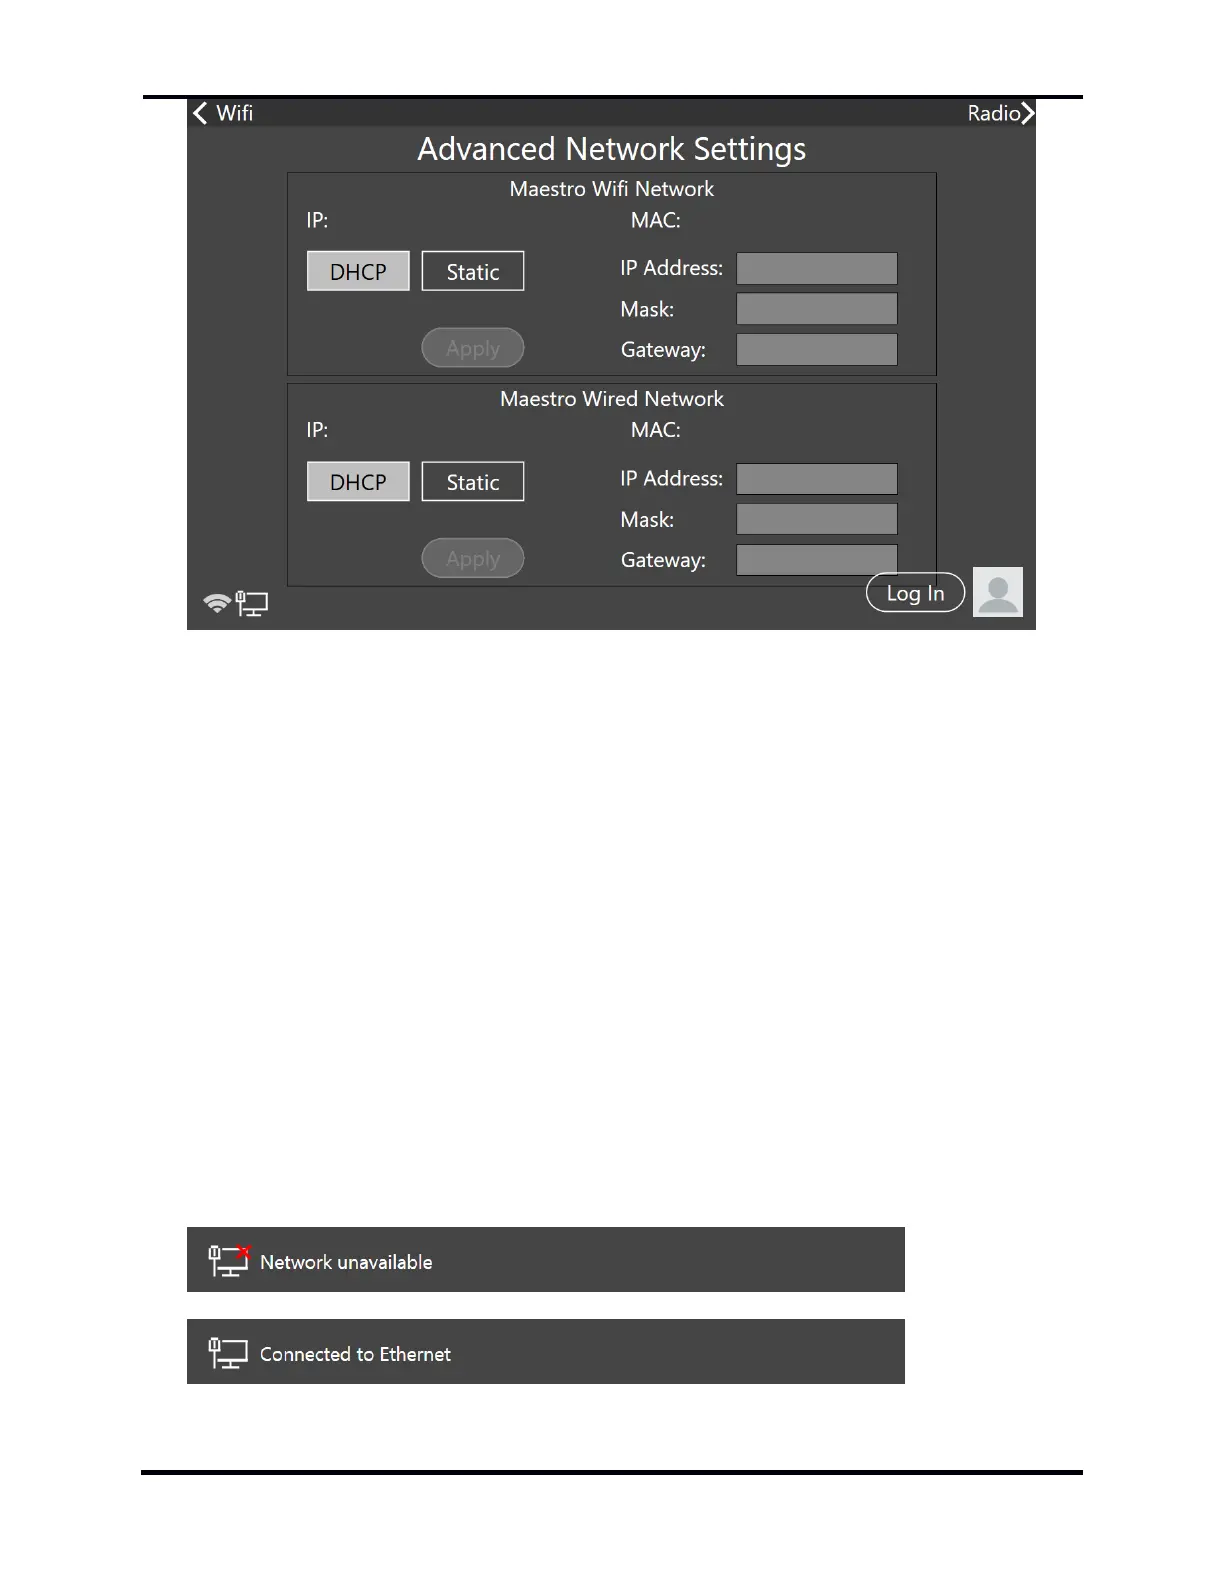
The configuration details of the WiFi and wired network interfaces are displayed. The default
configuration for each interface is to use Dynamic Host Control Protocol (DHCP) to configure the
interface. If a static configuration is needed, tap the Static button and enter the parameters in the
IP Address, Mask, and Gateway fields, then tap Apply. Each interface can be configured
independently.
See section 33.5, Network Tab for more information about Maestro network connections and the
WiFi Settings button.
4.7 NETWORK STATUS
When Maestro starts, the user has a choice of the Choose a WiFi Network, Select Radio, and Select
a Version startup screens. Each of these screens includes information about the network
connection that Maestro has made or is attempting to make. This information is shown by an icon
in the lower-left corner of each of these screens.
The icon provides status information about a wired Ethernet connection, a wireless WiFi
connection, and the Maestro server (which provides Maestro software for installation). Tap the
icon to display text that provides more information. Some examples of the network status icon
follow:

 Loading...