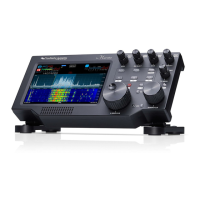
FLEX-6000 Signature Series – Maestro User Guide
Copyright 2024 FlexRadio, Inc. All Rights Reserved. | Page 185
Level control: Moving the slider to the right increases the amount of transmitter audio
input gain. Moving the slider to the left decreases the audio input gain. This level can also
be adjusted using the inner knob of the transmitter multi-function control.
MON button and Slider: Tapping this button enables the audio input monitor while
transmitting, allowing the operator to hear the audio signal being sent to the transmitter in
real time. Moving the slider to the right increases the monitor volume of the transmit
audio. Moving the slider to the left decreases the monitor volume.
ATU MEM button: Enables the ATU memories. See section 24, How to Operate the ATU
for complete details.
DAX Button: Tapping the DAX button enables audio input from the Digital Audio eXchange
(DAX) channel in place of the microphone or other audio source. See section 20.4.7, DAX
TX Channel and Microphone Interaction for more information on the coordination of DAX
and microphones.
ACC button: Tapping this button enables audio input and output on the ACC connector on
the rear panel of the FLEX-6000 at the same time as a different primary audio source.
Carrier: This slider adjusts the level of the AM carrier generated by the radio. Sliding the
control to the right will increase the carrier level while sliding to the left will decrease the
level.
Voice-Operated Transmit (VOX) button and slider: When VOX mode is enabled, the
operator’s voice will automatically switch the transceiver into transmit mode. When
moved to the right, the slider increases the audio level at which the transmitter is engaged
and reduces the level when moved to the left.
Delay slider: This slider adjusts the delay between the end of the voice input and the point
in time when the radio switches back to receive mode. Sliding the control to the right
increases the delay while sliding to the left decreases it.
Downward Expander (DEXP): A downward expander variably attenuates the mic gain by a
certain percentage below a threshold setting rather than gating it on and off. This results in
filtering out background noise without the abrupt on/off or chattering of a noise gate. The
effect of a downward expander is to increase the apparent dynamic range of the system by
decreasing the gain during the relatively quiet times thereby moving the apparent noise
floor downward. See section 20.4.6, How to Configure the Downward Expander (DEXP)
for full details.
Tune Pwr Slider: The Tune Pwr (Power) slider sets the output power level when TUNE is
enabled. Moving the slider to the right increases the RF power output. A value of 0 will not
produce any RF output. The scale, from 0 – 100 approximates RF output wattage.
TX Low Cut and High Cut: allows the user to set the low-end cutoff and the high-end cutoff
of the transmit bandwidth.
Mic and TX Profiles: The operator may choose from a list of microphone and transmit
profiles defined in the radio. See section 16, How to Use Profiles for complete details.

 Loading...