Printer Connection and Software Installation
112
• CentreWare Internet Services
1
Select CentreWare Internet Services, and then click Next.
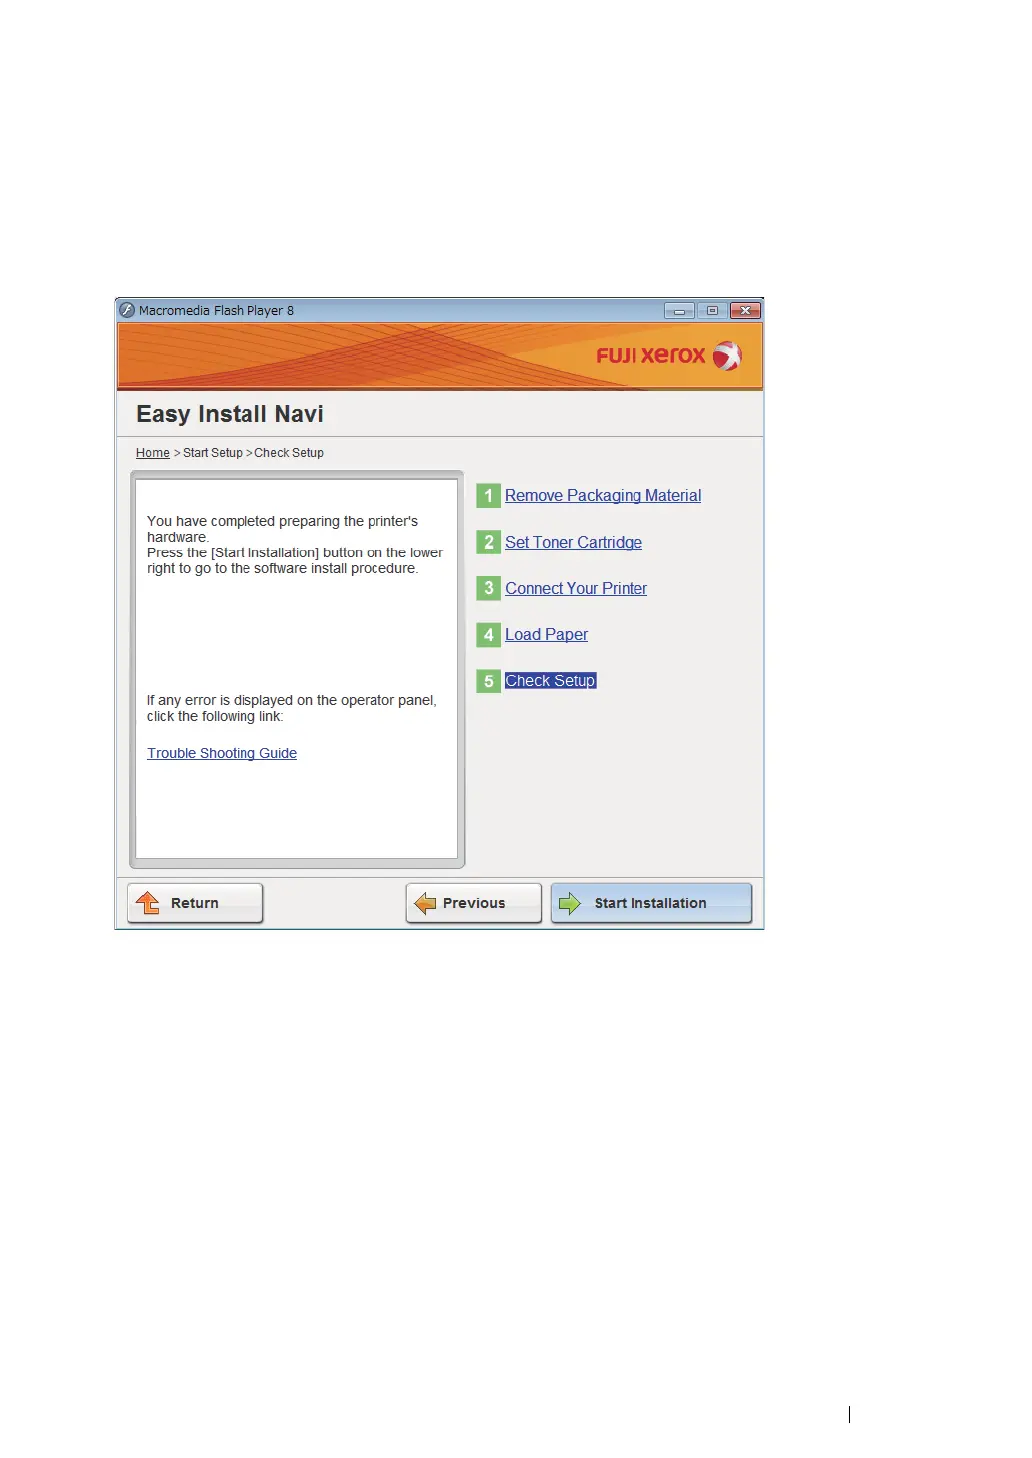
2
Follow the on-screen instructions until the "Check Setup" screen appears.
3
Confirm there are no errors displayed on the LCD panel, and then click Start Installation.
If you see any errors, click Trouble Shooting Guide and follow the instruction.
4
If you agree to the terms of the License Agreement, click I accept the terms of the license
agreement to continue the installation process, and then click Next.
5
Check if the printer to be installed is listed in the "Select Printer" screen, and then click Next.
NOTE:
• If the printer to be installed is not listed in the "Select Printer" screen, try the following steps:
- Click
Refresh
to update the information.
- Click
Add Printer
, and then enter the details of the printer manually.
6
Configure the required items on the "Enter Printer Settings" screen, and then click Next.
7
Select the software to be installed, and then click Install.
8
Click Finish to exit this tool.
The wireless configuration is complete.
When the CentreWare Internet Services operation is successful and the printer is rebooted, wireless
LAN connection is completed.
 Loading...