190-00870-02 Rev. A
Garmin G950 Pilot’s Guide for the Pilatus PC-6
311
HAZARD AVOIDANCE
SYSTEM
OVERVIEW
FLIGHT
INSTRUMENTS
EIS
AUDIO PANEL
& CNS
FLIGHT
MANAGEMENT
HAZARD
AVOIDANCE
AFCS
ADDITIONAL
FEATURES
APPENDICES INDEX
6.2 STORMSCOPE LIGHTNING
WARNING: Do not rely on information from the lightning detection system display as the sole basis for
hazardous weather avoidance. Range limitations and interference may cause the system to display inaccurate
or incomplete information. Refer to documentation from the lightning detection system manufacturer for
detailed information about the system.
The following pages can display Stormscope data:
• Stormscope Page • AUX - Trip Planning Page
• Navigation Map • Nearest Pages
• AUX - Video Page
The Stormscope Page is the principal map page for viewing Stormscope lightning information. To display
Stormscope data on the Navigation Map, AUX - Trip Planning Page, or any of the Nearest Pages, press the
MAP
Softkey, then press the
STRMSCP
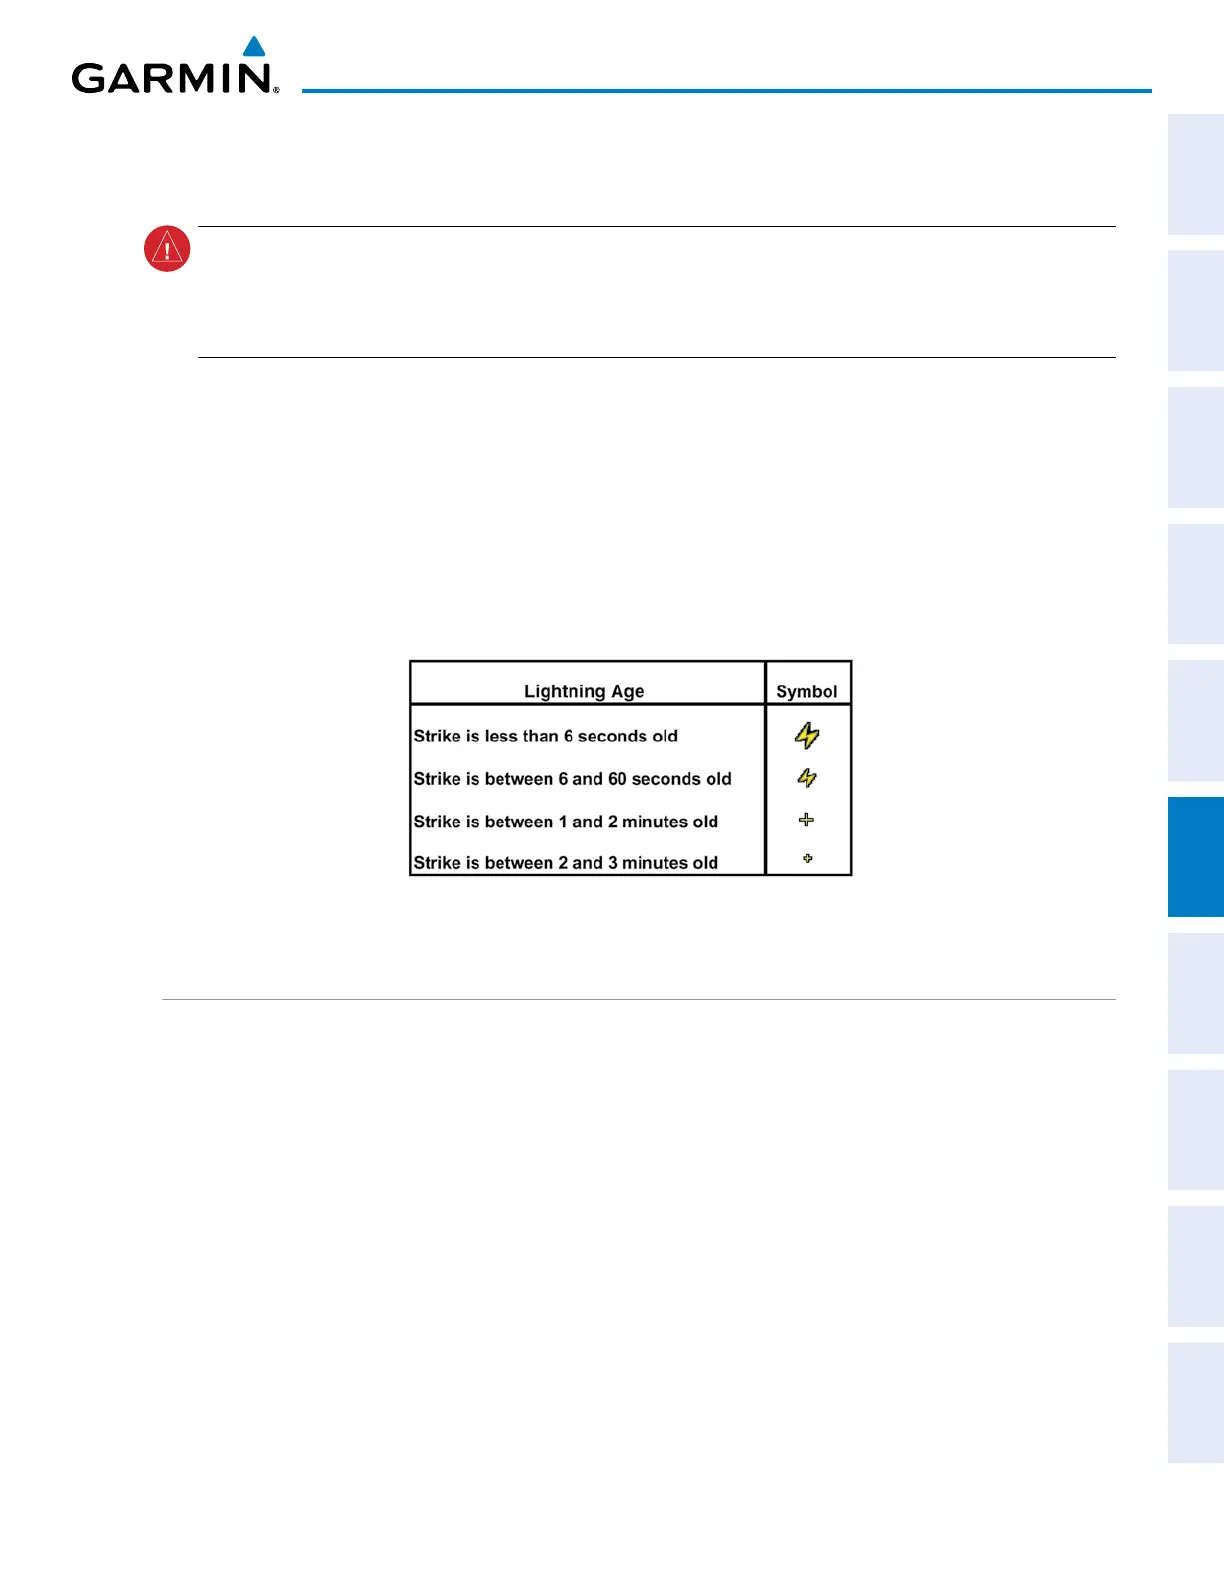
Softkey. These pages can also display cell or strike data using the yellow
lightning strike symbology shown in Table 6-6.
Table 6-6 Lightning Age and Symbols
SETTING UP STORMSCOPE ON THE NAVIGATION MAP
Setting up Stormscope options on the Navigation Map:
1) On the Navigation Map Page, press the MENU Key.
2) With ‘Map Setup’ selected (Figure 6-22), press the ENT Key.
3) Turn the small FMS Knob to display the group selection window. Turn the small FMS Knob to select ‘Weather’),
and press the ENT Key.
4) Turn the large FMS Knob to highlight and move between the product selections.
5) When an item is highlighted, turn the small FMS Knob to select the option.
6) Press the ENT Key.
7) Press the
FMS
Knob to return to the Navigation Map Page (Figure 6-24).
 Loading...