Non-invasive blood pressure
16-3
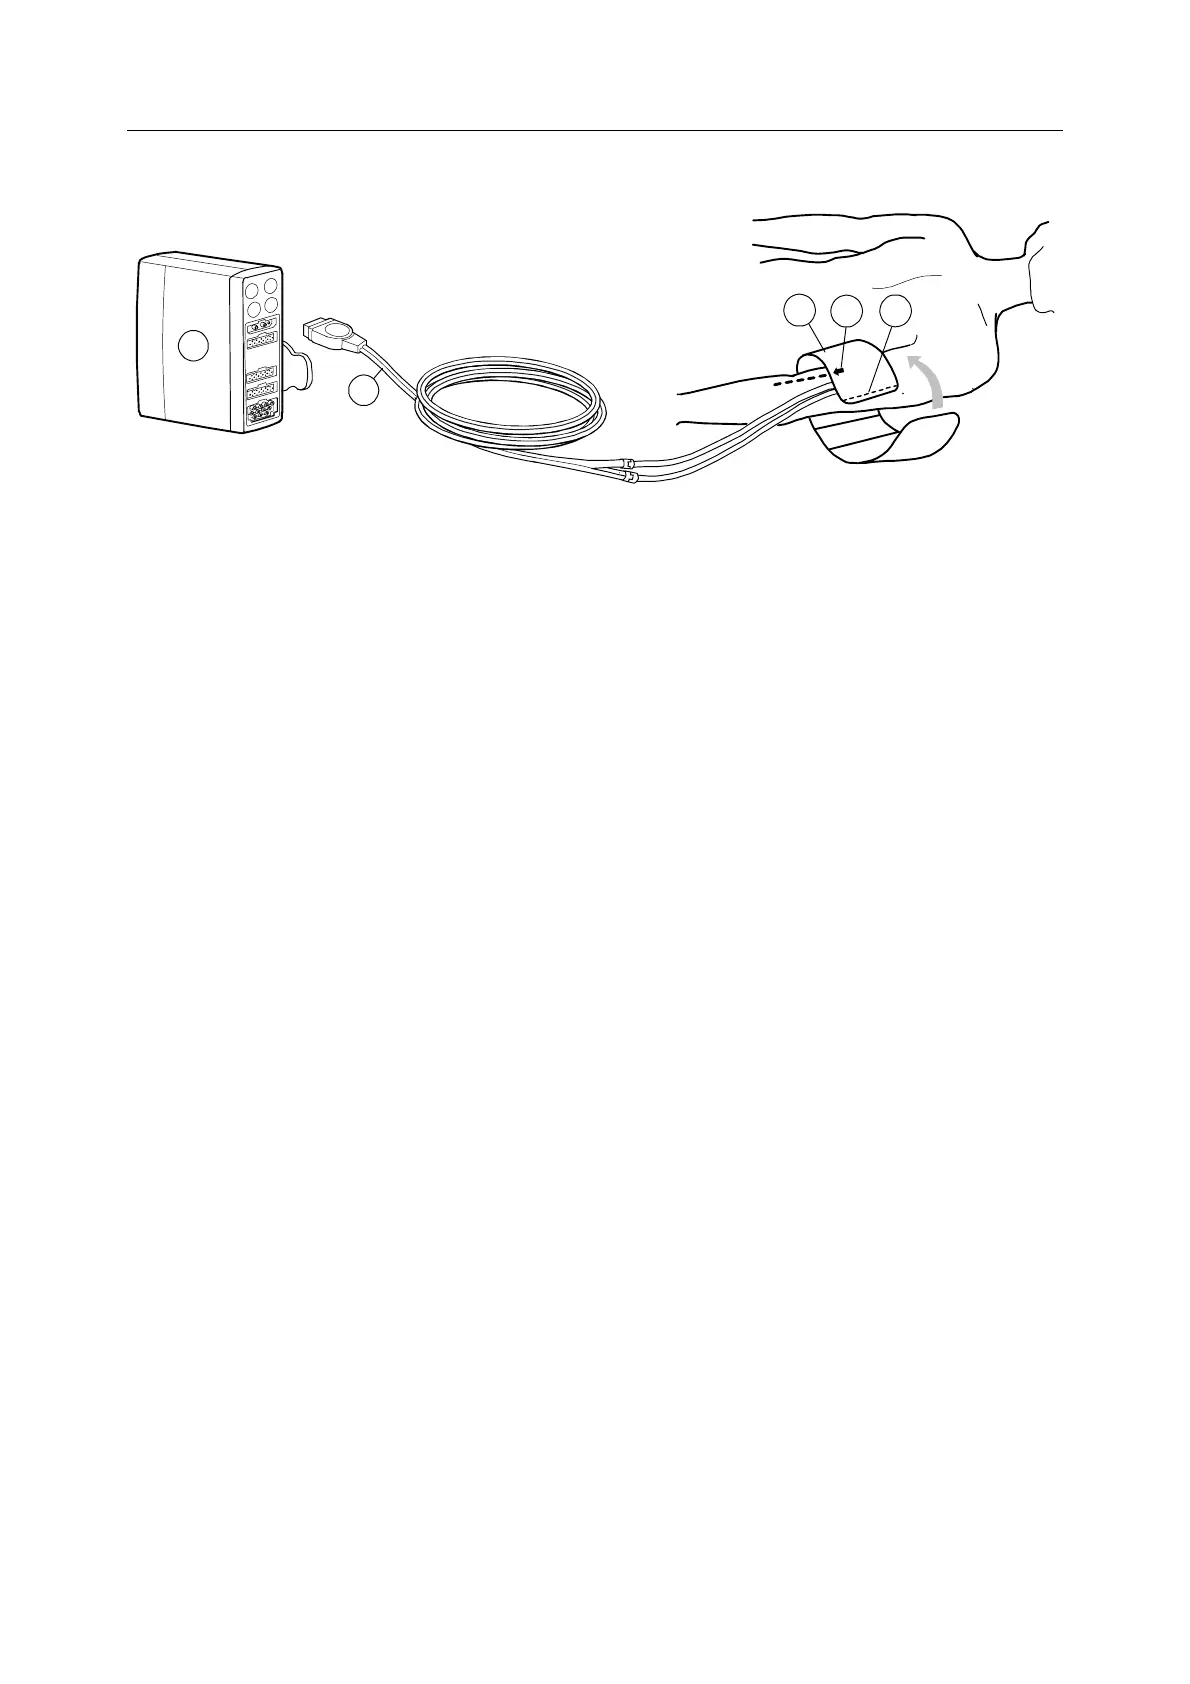
Patient connections
Figure 16-3 Cuff positioning
(1) E-PSMW or E-PSMPW module
(2) Cuff hose
(3) Cuff of correct size
Place the arrow (4) over the brachial artery. Check that the index line (5) falls within the range
markings on the cuff, and wrap the cuff around the upper arm.
For a comprehensive list of accessories, see the “Supplies and Accessories” catalog. The listed
NIBP cuffs are latex-free.
Selecting a cuff and a cuff hose
Two different cuff hoses with different cuff connections are available:
− BLACK hose for adults and children (corresponding inflation limits Adult and Child.
including cuff identification.
− LIGHT BLUE hose for infants (corresponding inflation limit Infant. without cuff
identification.
The monitor automatically identifies the black hose and sets the inflation limits automatically
for adults to Adult. For children and when using hoses without identification (the light blue
infant hose), the inflation limit must be set manually in the NIBP Setup menu. To do this:
1. Press the
NIBP key and select NIBP Setup - Inflation Limits.
NOTE: When using hoses without identification, the monitor goes to this selection
automatically when you try to start the NIBP measurement. With these hoses, AUTO
option is not available.
2. Select the limit according to the hose with the ComWheel. For children, select Child, and
for infants, select Infant.
NOTES:
− You cannot select Adult inflation limits when using an infant cuff
− The NIBP system incorporates a safety circuit to prevent overpressure or prolonged
inflation of the cuff.
− The alarm limits change automatically according to the cuff hose type used (Adult/
Infant.)
To determine the correct cuff size, check that the index line on the outer edge of the cuff falls
between the range lines. If not, use a larger or smaller cuff.
2
1
4
5
3

 Loading...


