Installation
XPR300 Instruction Manual 809480 131
Install the torch in the torch mounting bracket
Before you can install the torch in the torch mounting bracket, you must connect the torch lead
assembly to the torch receptacle. Refer to Install the torch into the torch receptacle on page 135.
As the installer or user, you must supply the torch mounting bracket for your cutting system. Choose
one that meets the requirements in Torch mounting bracket requirements on page 64. Mounting
brackets are available from Hypertherm. Refer to Torch bracket on page 387. of the Parts List.
The XPR torch mounting sleeve is larger than the HPR torch mounting
sleeve. Modification or replacement of an HPR mounting sleeve is
necessary prior to XPR torch installation.
1. Remove the power from the cutting system:
a. Set the line-disconnect switch to the OFF position.
b. Make sure that the power-indicator LED is not illuminated on the plasma power supply, gas
connect console, and TorchConnect console.
2. Install the torch mounting bracket onto the torch lifter.
Refer to the instruction manual that came with the torch lifter for
information about how to install the torch mounting bracket in the torch
lifter.
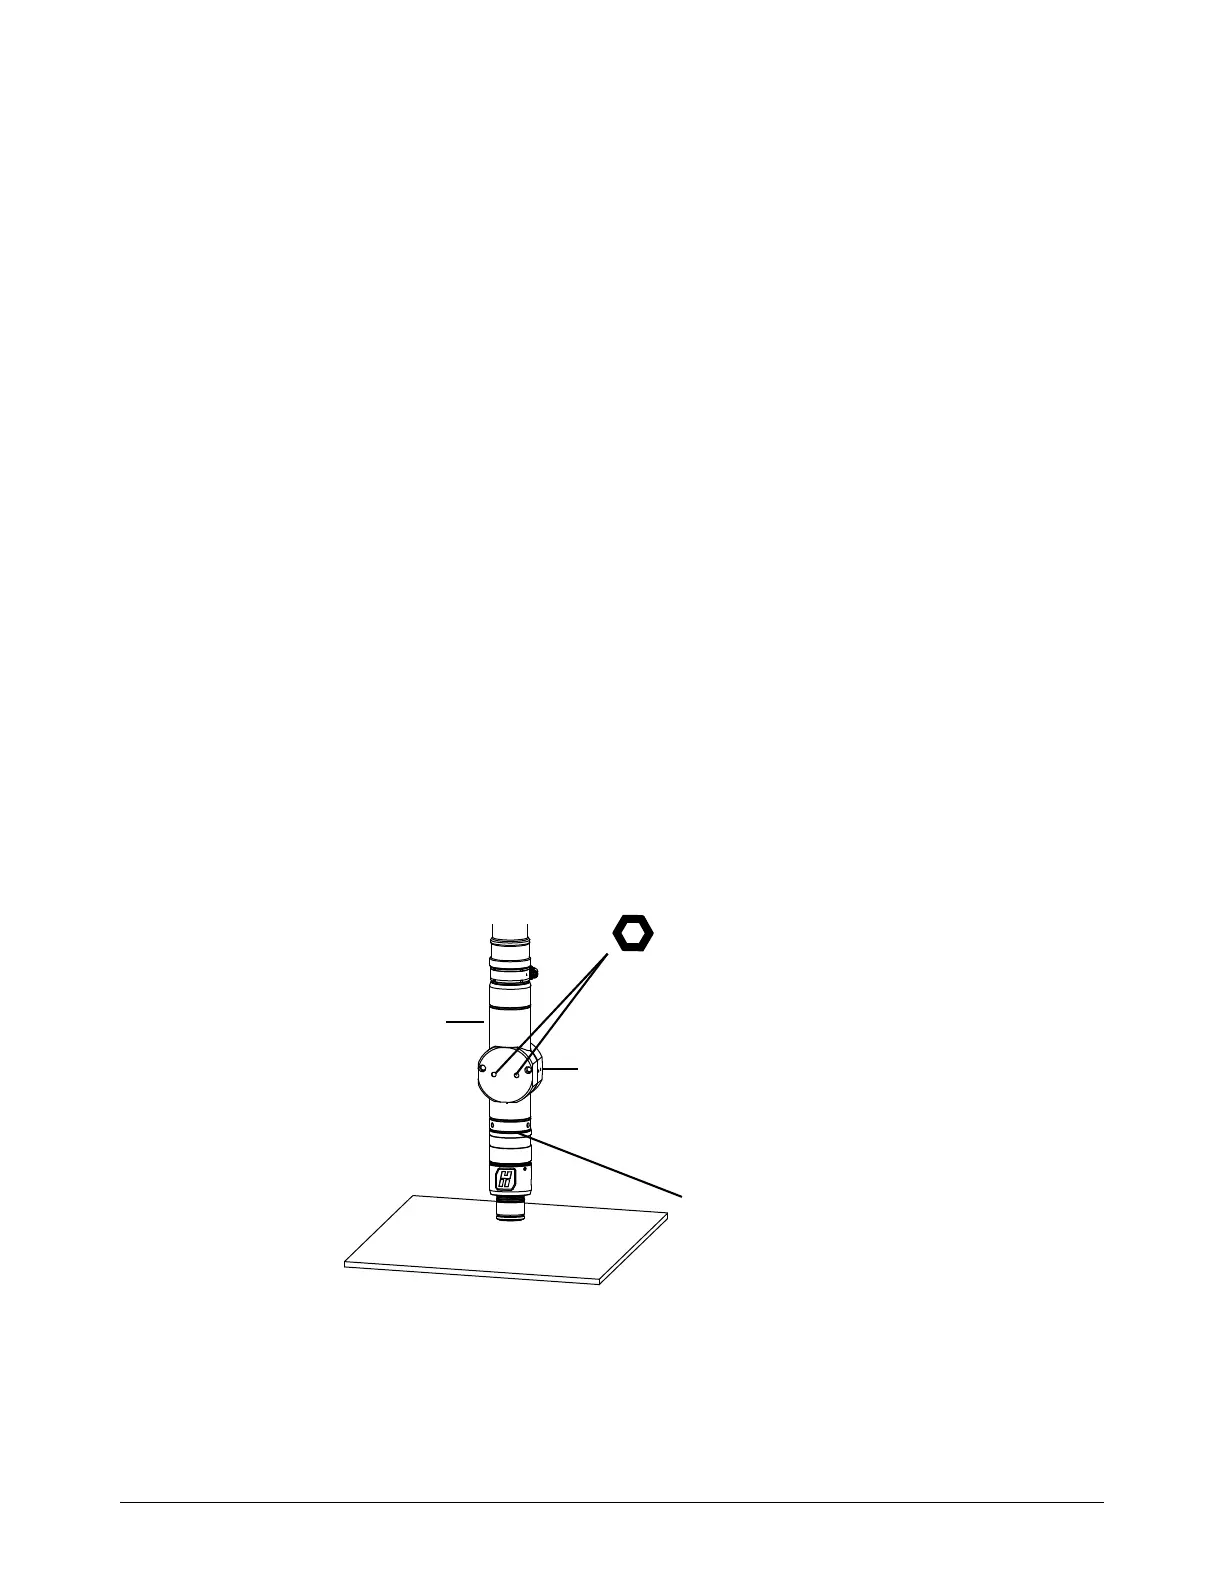
3. Insert the torch (with attached torch lead assembly) into the torch mounting bracket, as shown in
Figure 34.
Figure 34 – Torch in mounting bracket
4. Move the torch if necessary, so that the torch mounting bracket is around the lower part of the
torch and does not touch the torch receptacle. Make sure that the torch mounting bracket is as
low as possible on the torch sleeve, without touching the torch receptacle. This position can
minimize vibration at the torch tip.
Lower torch sleeve
Torch mounting bracket
5.72 cm
(2.25 inches)
Torch receptacle
4.8 mm (3/16 inch)
 Loading...


