Installation
XPR300 Instruction Manual 809480 87
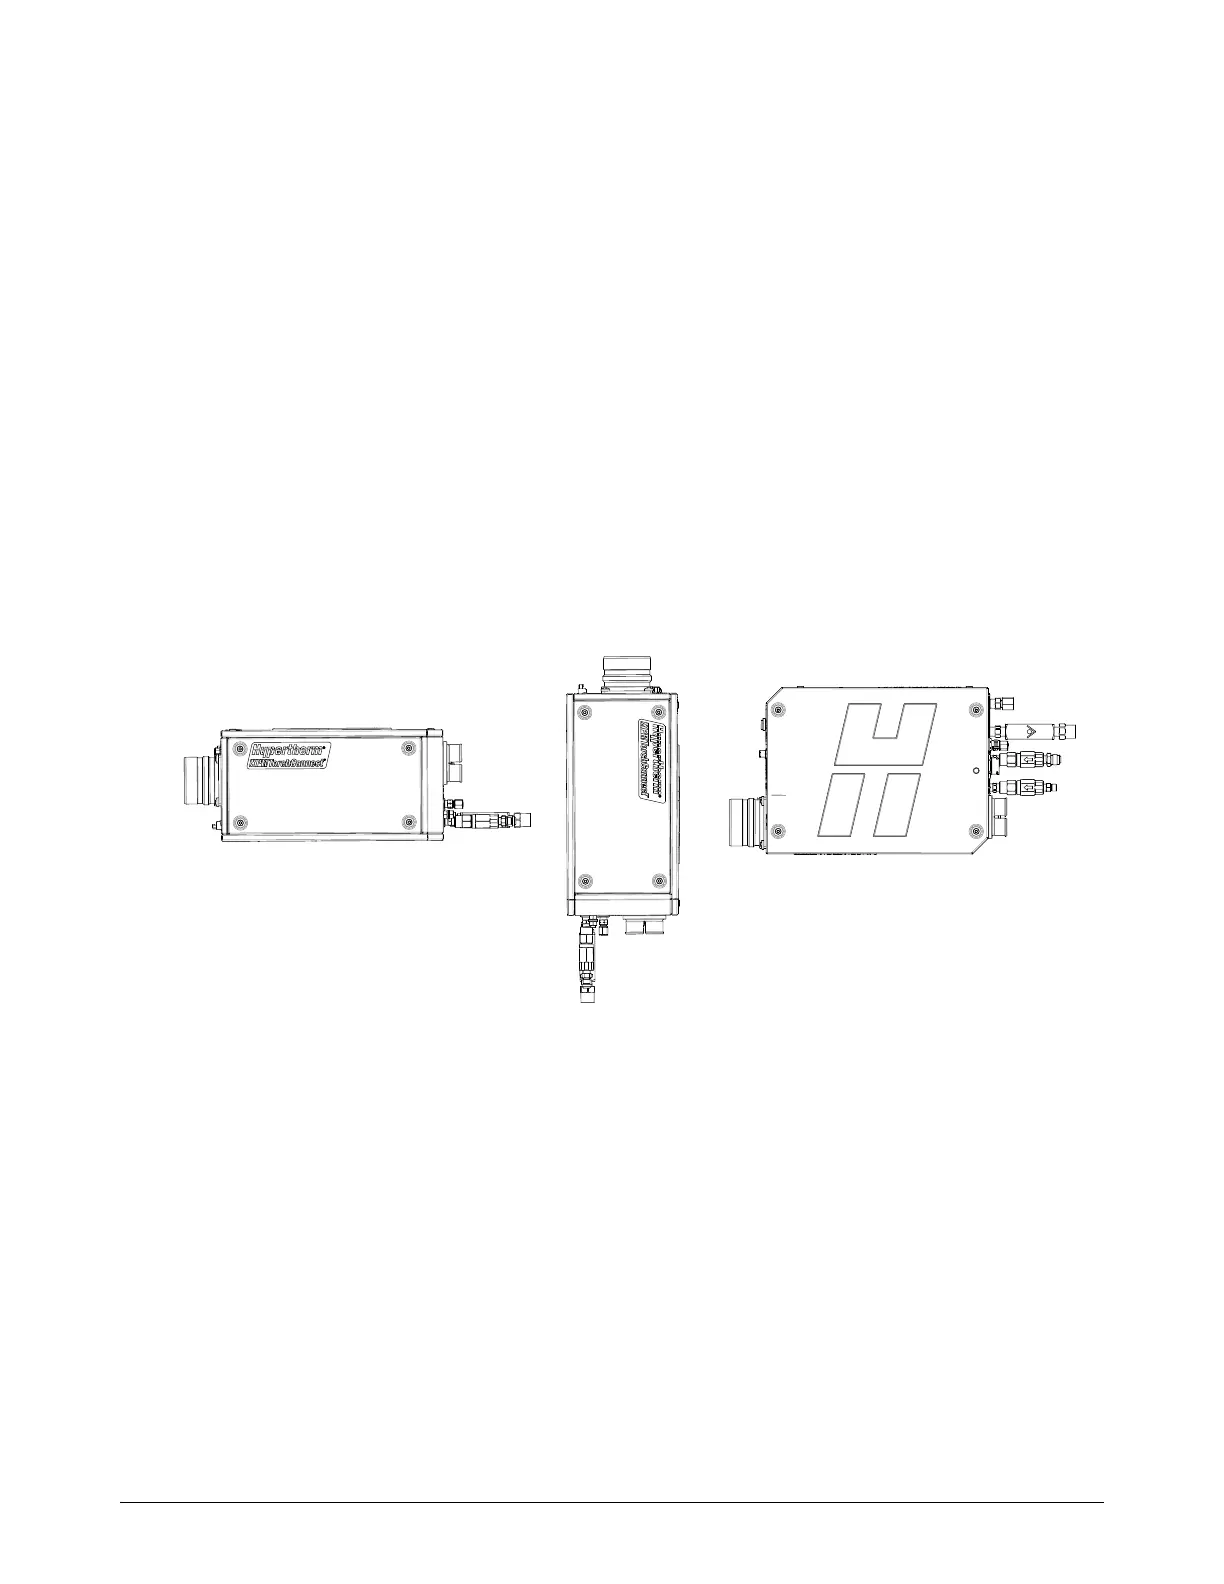
TorchConnect console
There are 3 mounting orientations for the TorchConnect console: 1 bottom, 1 end, and 1 side. The
factory-installed location for the mounting brackets is on the bottom. But, you can reposition them to
the end or to the side.
Make sure to consider how console orientation can have the following effects:
Console orientation with the torch lead connection on the bottom can minimize the risk of
leaked water or coolant collection inside. Water or coolant inside the console can damage
internal electrical components.
If the EasyConnect connection points up, it is necessary to support the torch lead so the
minimum 15.25 cm (6 in.) bend radius is maintained.
If you have questions about console orientation or about when or how to use the mounting brackets,
contact your cutting machine supplier or regional Hypertherm Technical Service team.
Figure 3 – Recommended orientations for the TorchConnect console
 Loading...


