Connect for Communication
XPR300 Instruction Manual 809480 193
How to use ohmic contact sense
Ohmic relay overview
The relay is normally open when not powered.
The relay is closed during operation, except during ignition or cutting with water processes.
Ohmic contact is disabled when cutting with a water process.
Ohmic contact is disabled when the remote on-off switch is in the OFF position.
Internal ohmic contact sense
This is the default installation for the torch and torch connect console. No action is required.
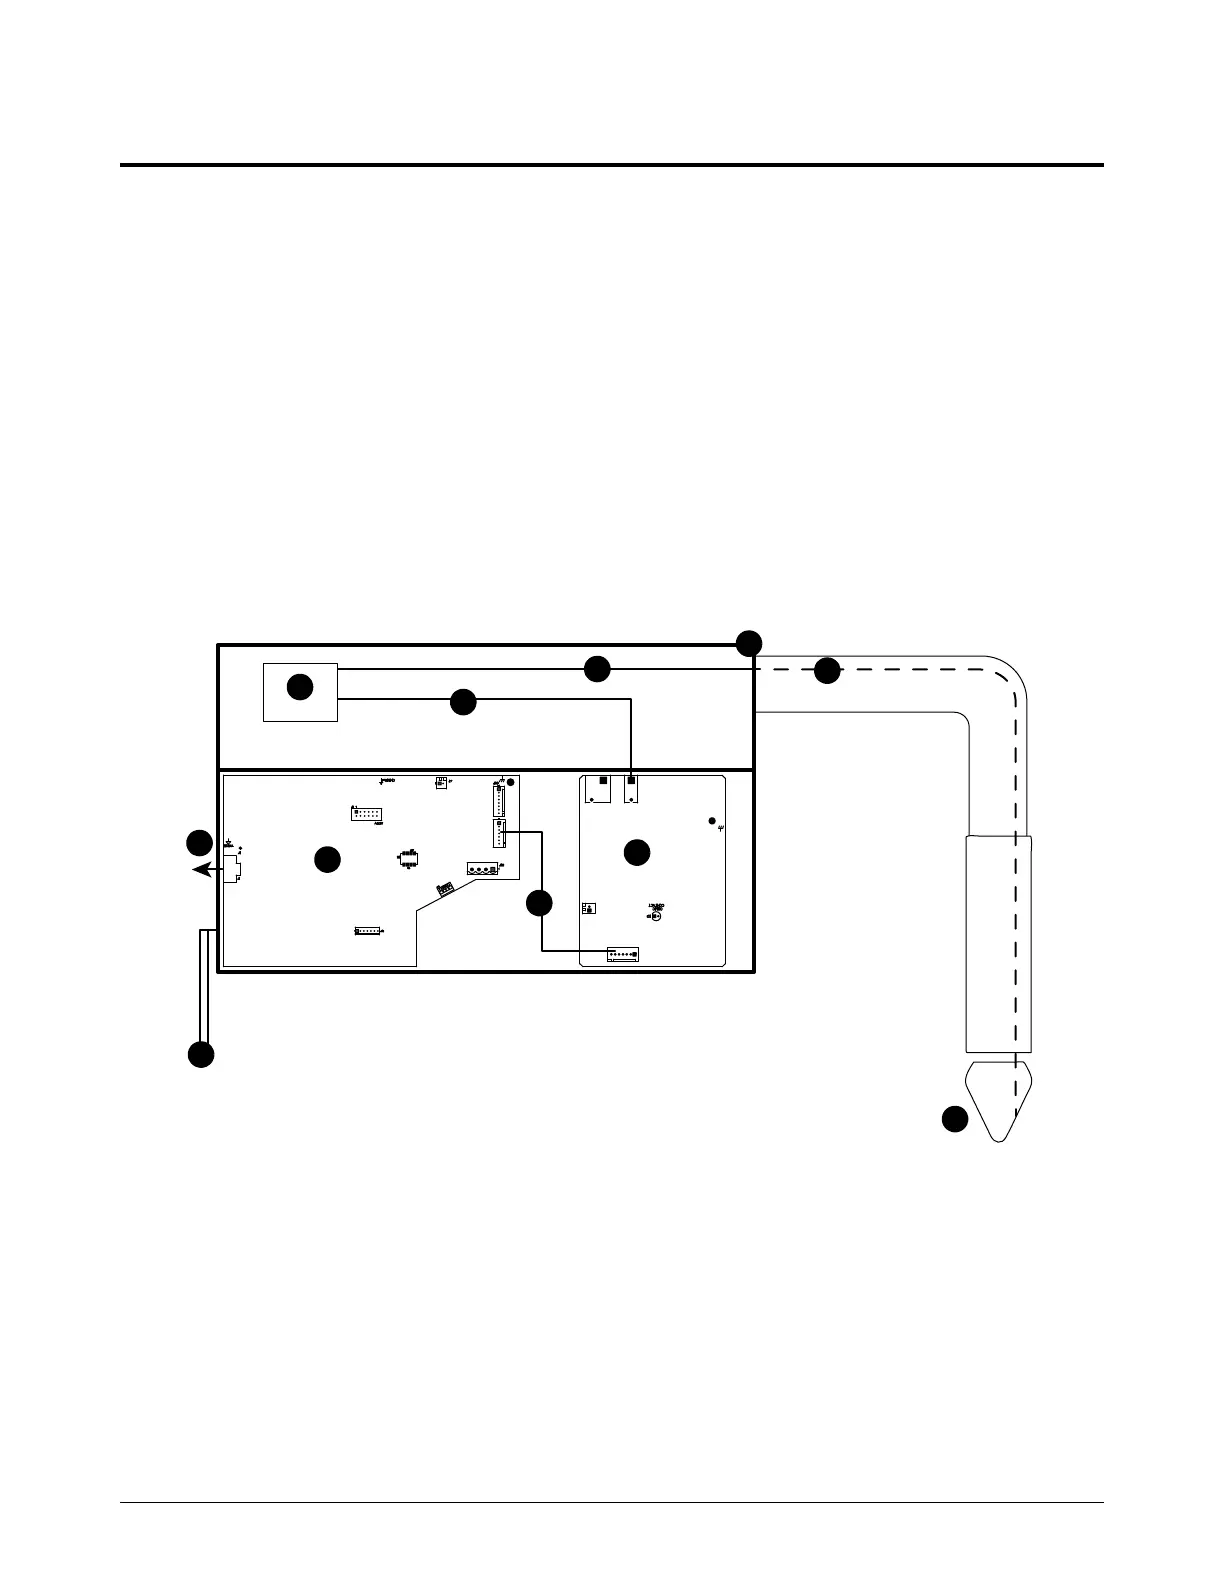
Figure 53 – Internal ohmic diagram
1 Torch
2 Ohmic wire, inside torch and torch lead
3 Torch connect console
4 Ohmic wire, torch receptacle to ohmic relay
5 Ohmic relay
6 Ohmic wire, ohmic relay to J3
7 Ohmic PCB
8 J1 to J27 wires
9 Control PCB
10 CAN connection
11 2 ground connections (required)

 Loading...


