Specifications
XPR300 Instruction Manual 809480 33
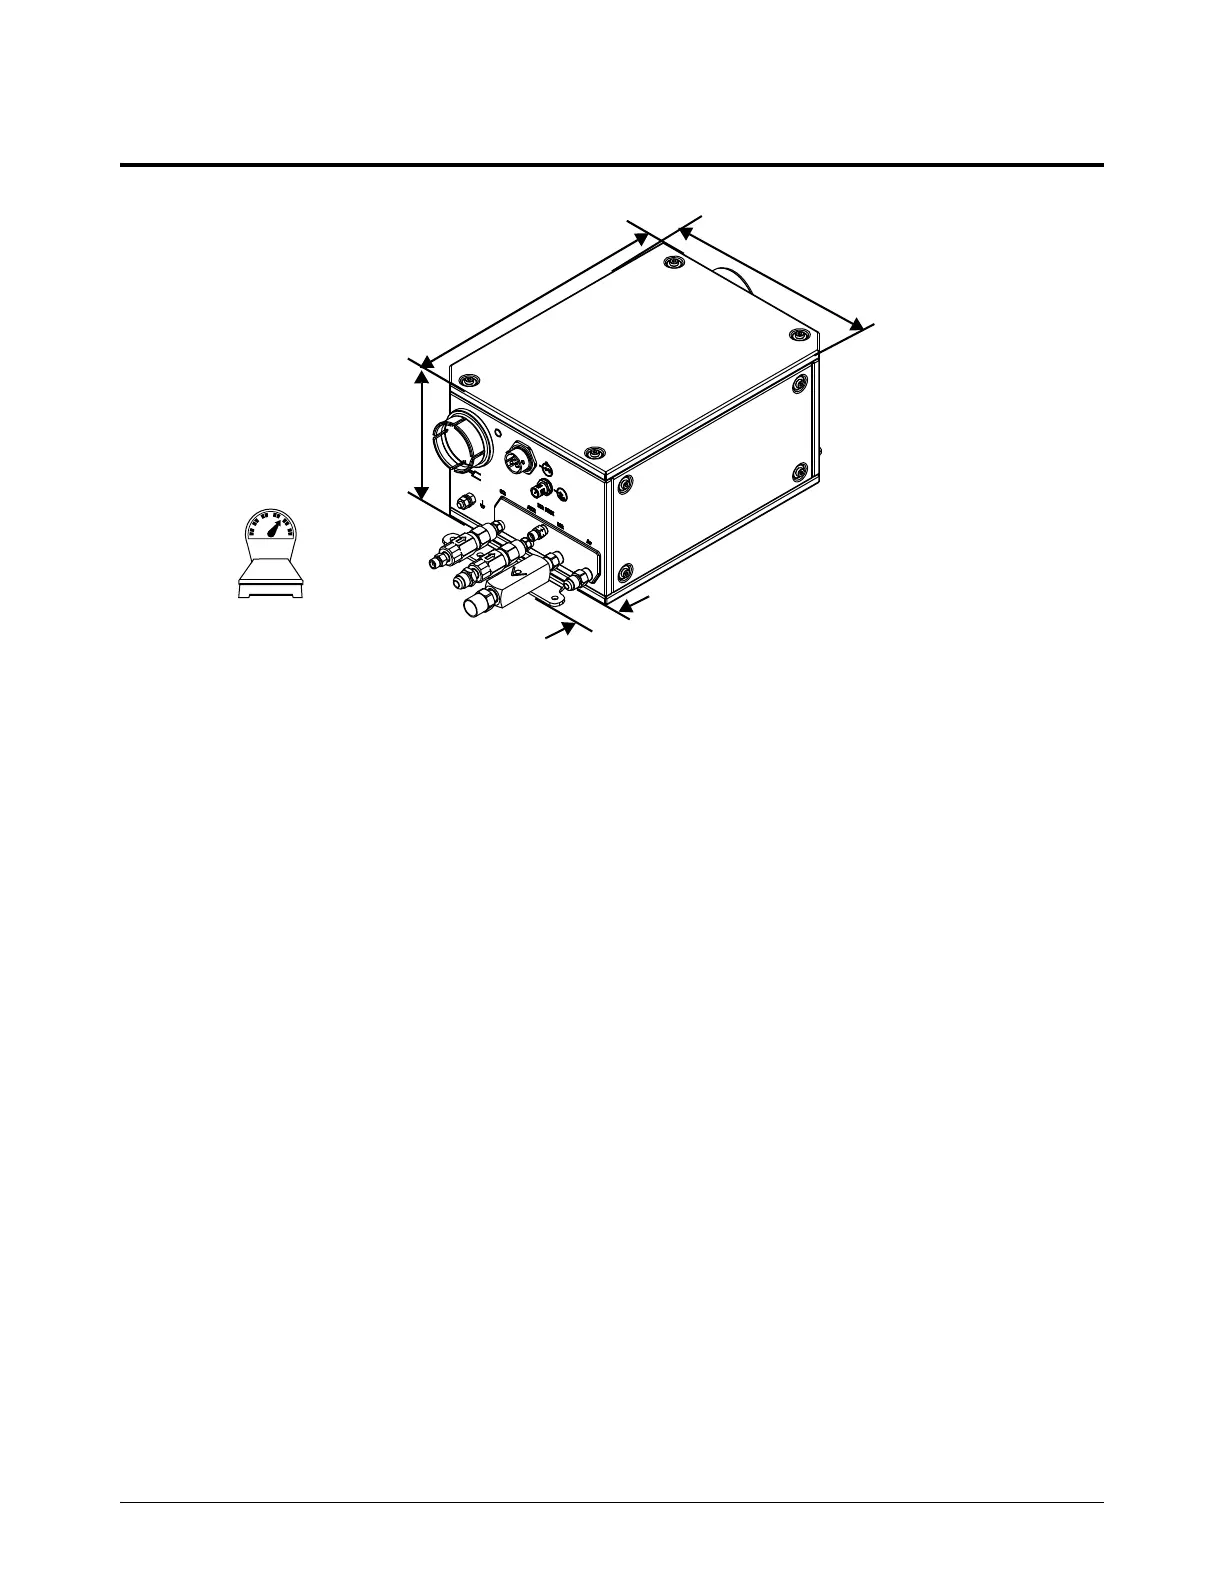
TorchConnect console (078618)
The TorchConnect console (078618) goes with the 3 types of gas
connect consoles (Core, VWI, and OptiMix).
Do not remove the inlet check valves from the torch connect console.
The factory location for the mounting brackets is on the bottom of the torch connect console.
However, you can move the mounting brackets to either side. Console placement with the torch
lead connection on the bottom can minimize the risk of leaked water or coolant collecting inside of
the console. Water or coolant collection inside of the TorchConnect console can damage internal
electrical components.
For mounting dimensions, refer to TorchConnect console on page 87.
15.24 cm
(6 in.)
22.86 cm
(9 in.)
30.48 cm
(12 in.)
2.62 cm
(1.03 in.)
9.30 kg
(20.5 lb)
 Loading...


