Industrial Sewing Machine SADE
111
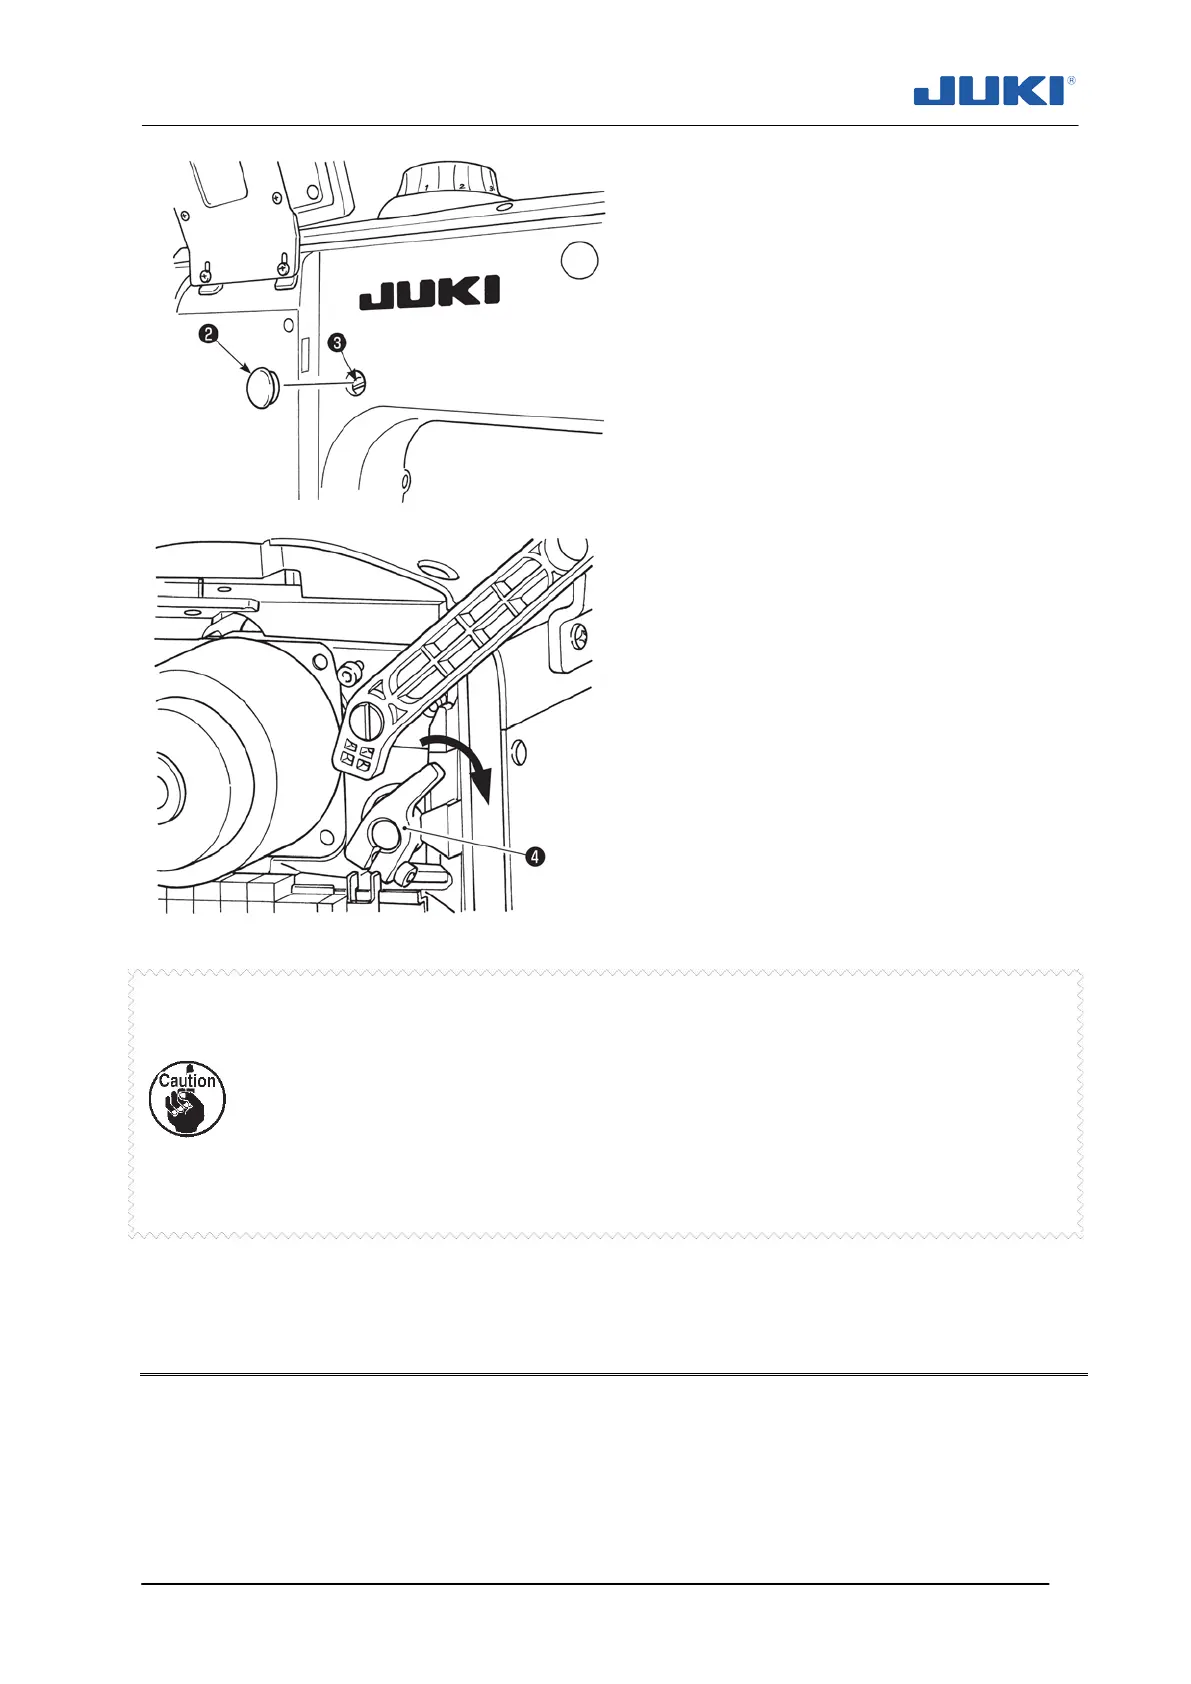
4) Remove rubber cap ❷ from the rear
face of the machine arm. Loosen set-
screw ❸.
5) Turn presser bar lifting arm ❹ in the di-
rection of the arrow until it will go no fur-
ther. Then, tighten setscrew ❸.
For the standard gauge type machine, the top end of the walking foot inter-
feres with the needle bar frame when the auto-lifter is
amount of the alternating vertical movement of the walking
presser foot is set at 2 mm or smaller and in the case it is set at 7 mm or
more and the reverse-rotation needle-up is carried out.
To use the machine with the amount of the
alternating vertical movement of
the walking foot and the presser foot set at 2 mm or less,
amount of the presser foot by means of the auto-lifter at 17 mm or less.
7.8 Normal-/reverse-feed stitch needle entry points alignment at the
time of automatic reverse feed stitching
When the sewing speed or stitch pitch is changed, the normal- and reverse-feed stitch
needle entry points may not be aligned at the time of automatic reverse feed stitching.
In such a case, correct the alignment of needle entry points by changing the ON/OFF
timing of the automatic reverse feed cylinder.

 Loading...