Industrial Sewing Machine SADE
51
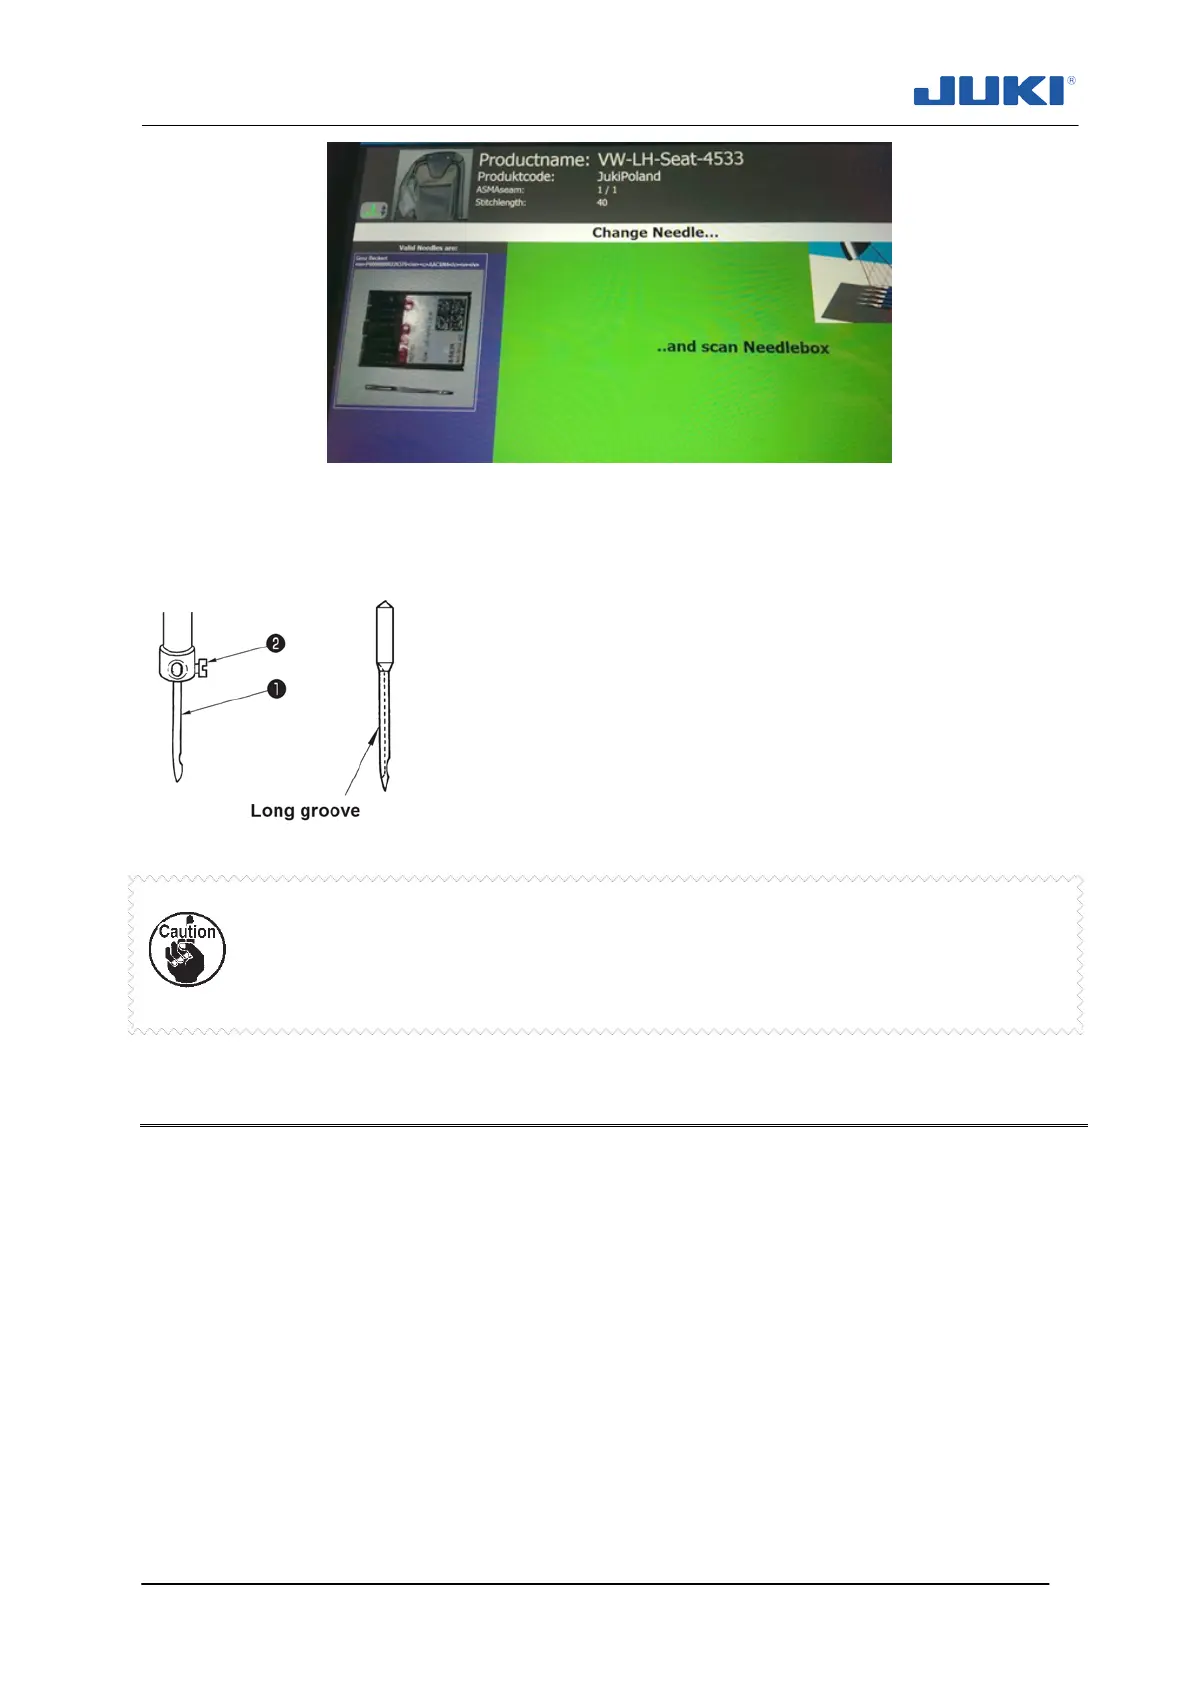
Fig. 25. Statement on touch screen about needle changing
The dialog will close automatically.
1) Turn the handwheel to bring the needle bar to the highest
position of its stroke.
2) Loosen needle clamp screw ❷. Hold the needle so that the
long groove on needle ❶ faces directly to the right.
3) Push needle ❶ deep into the needle clamp hole until it will
go no further.
4) Tighten needle clamp screw ❷ firmly.
When replacing the needle, check the clearance provided between the nee-
dle and the blade point of hook. (Refer to "6.5. Needle-to-hook relation" p. 61
and "6.6. Adjusting the hook needle guard" p. 63.)
If there is no clearance, the needle and the hook will be damaged.
5.4 Placing thread cones
In many plants top and bottom threads are considered to be critical in relation to the
product. Identification of the threads is therefore required and most of the time you’ll find
barcode readers that will scan for a barcode under the cone.
If so, you’ll have to place the cone so that the barcode is aligned with the scanner. The
cone is properly placed if the barcode reader starts to beep and flash.

 Loading...