- 42 -
KD 702_1003_1404 Workshop Manual_cod. ED0053029340_1° ed_ rev. 00
6
2
1
1
1
16
15
13
14
Exhaust manifold
Danger - Attention
Let the exhaust manifold cool before dismounting to avoid
scalds and burns.
When you dismount the exhaust manifold check that the inside
is properly clean and free from cracks or breaks.
Replace gaskets every time you remove the manifold.
Tighten nuts at 25 Nm.
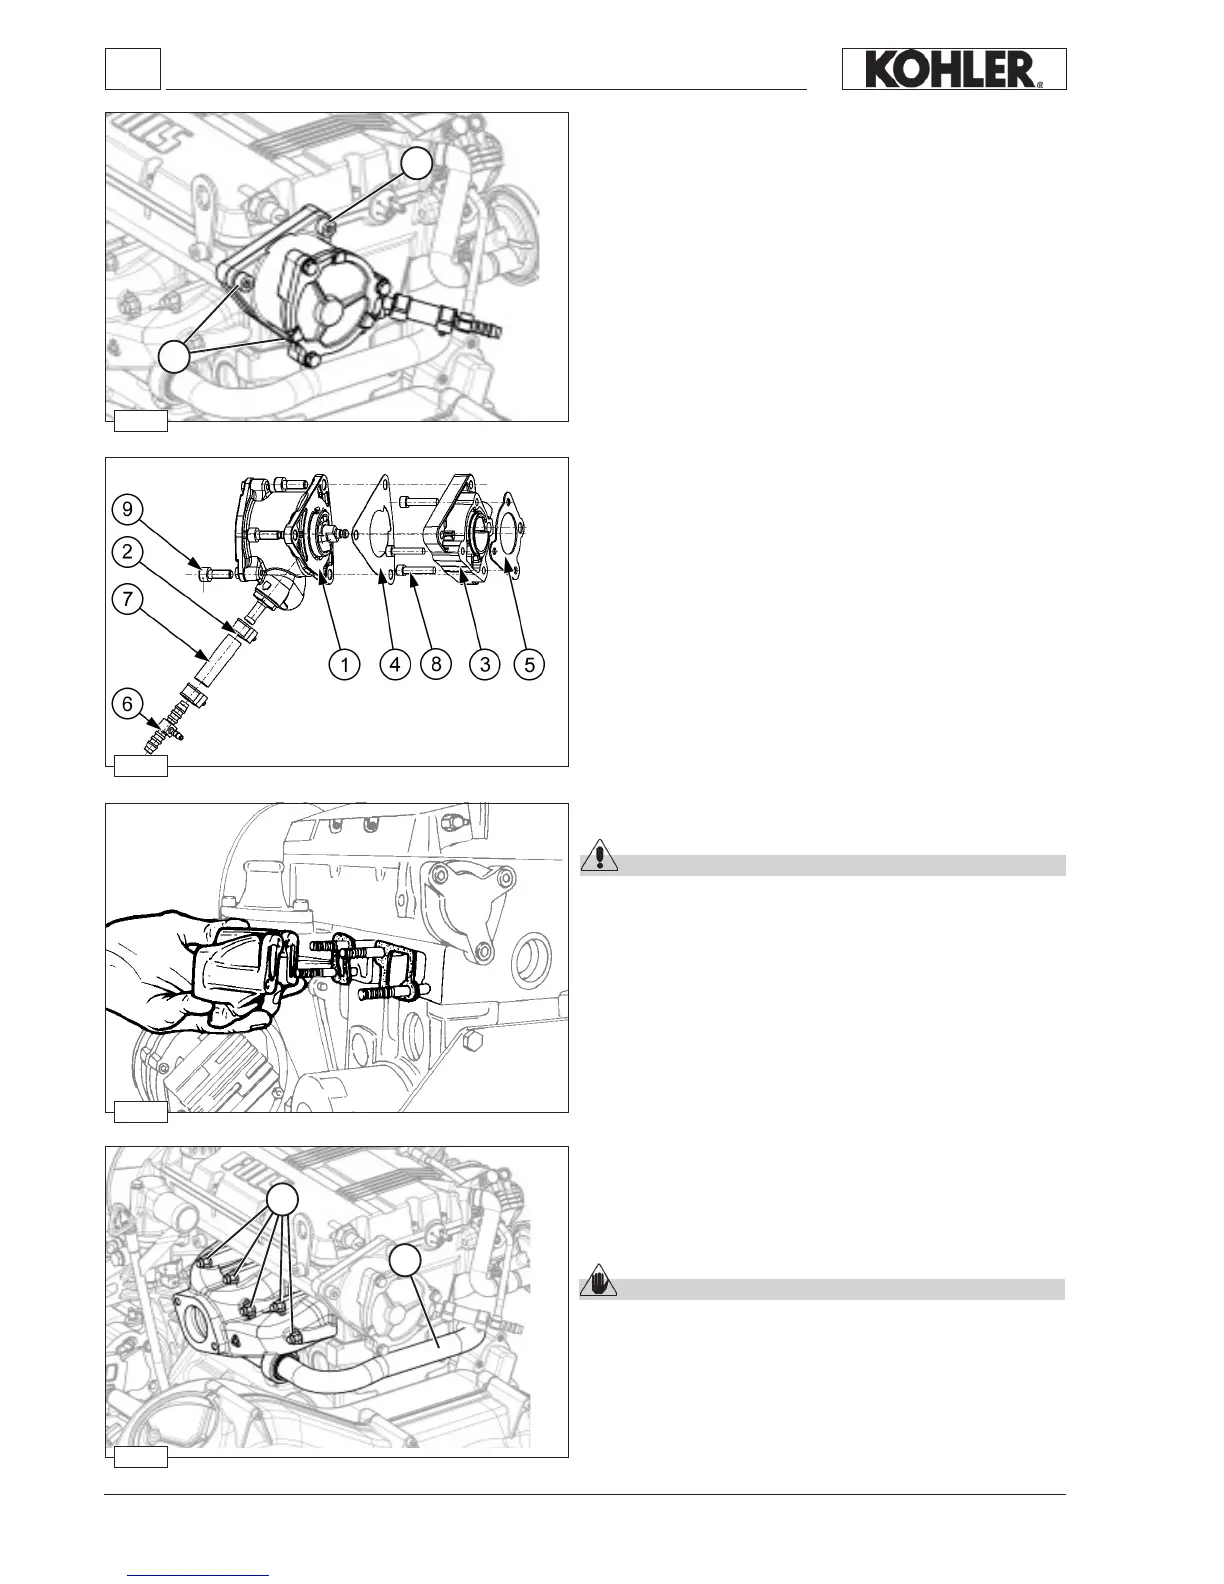
Vacuum pump and vacuum pump ange
Unscrew the three fastening screws 1 that x the vacuum pump
to the ange and remove the vacuum pump.
Unscrew the fastening screws that x the ange to the engine
crankcase and remove it.
Components:
1.
Vacuum pump
2. Clic clamp 86-50
3. Vacuum pump ange
4. Vacuum pump gasket-
5. Vacuum pump ange gasket
6. Three-way union for vacuum pump
7. Vacuum pump pipe
8. Screw
9. Screw
When reassembling, tighten the screws 8 that x the ange
to the cylinder head to the specied torque of 10 Nm, and the
screws 9 that x the vacuum pump to the ange at the specied
torque of 15 Nm.
Exhaust manifold - engines with EGR
Remove the E.G.R. pipe 1.
Unscrew the locking nuts 2 and remove the exhaust manifold
and the seal.
Caution – Warning
When reassembling the exhaust manifold, check that the
inside is properly clean and free from cracks or breaks.
Replace the gasket each time the manifold is reassembled.
Tighten the nuts at the prescribed torque of 25 Nm.
Disassembly / Reassembly
 Loading...