- 61 -
KD 702_1003_1404 Workshop Manual_cod. ED0053029340_1° ed_
6
95
93
90
91
96
94
92
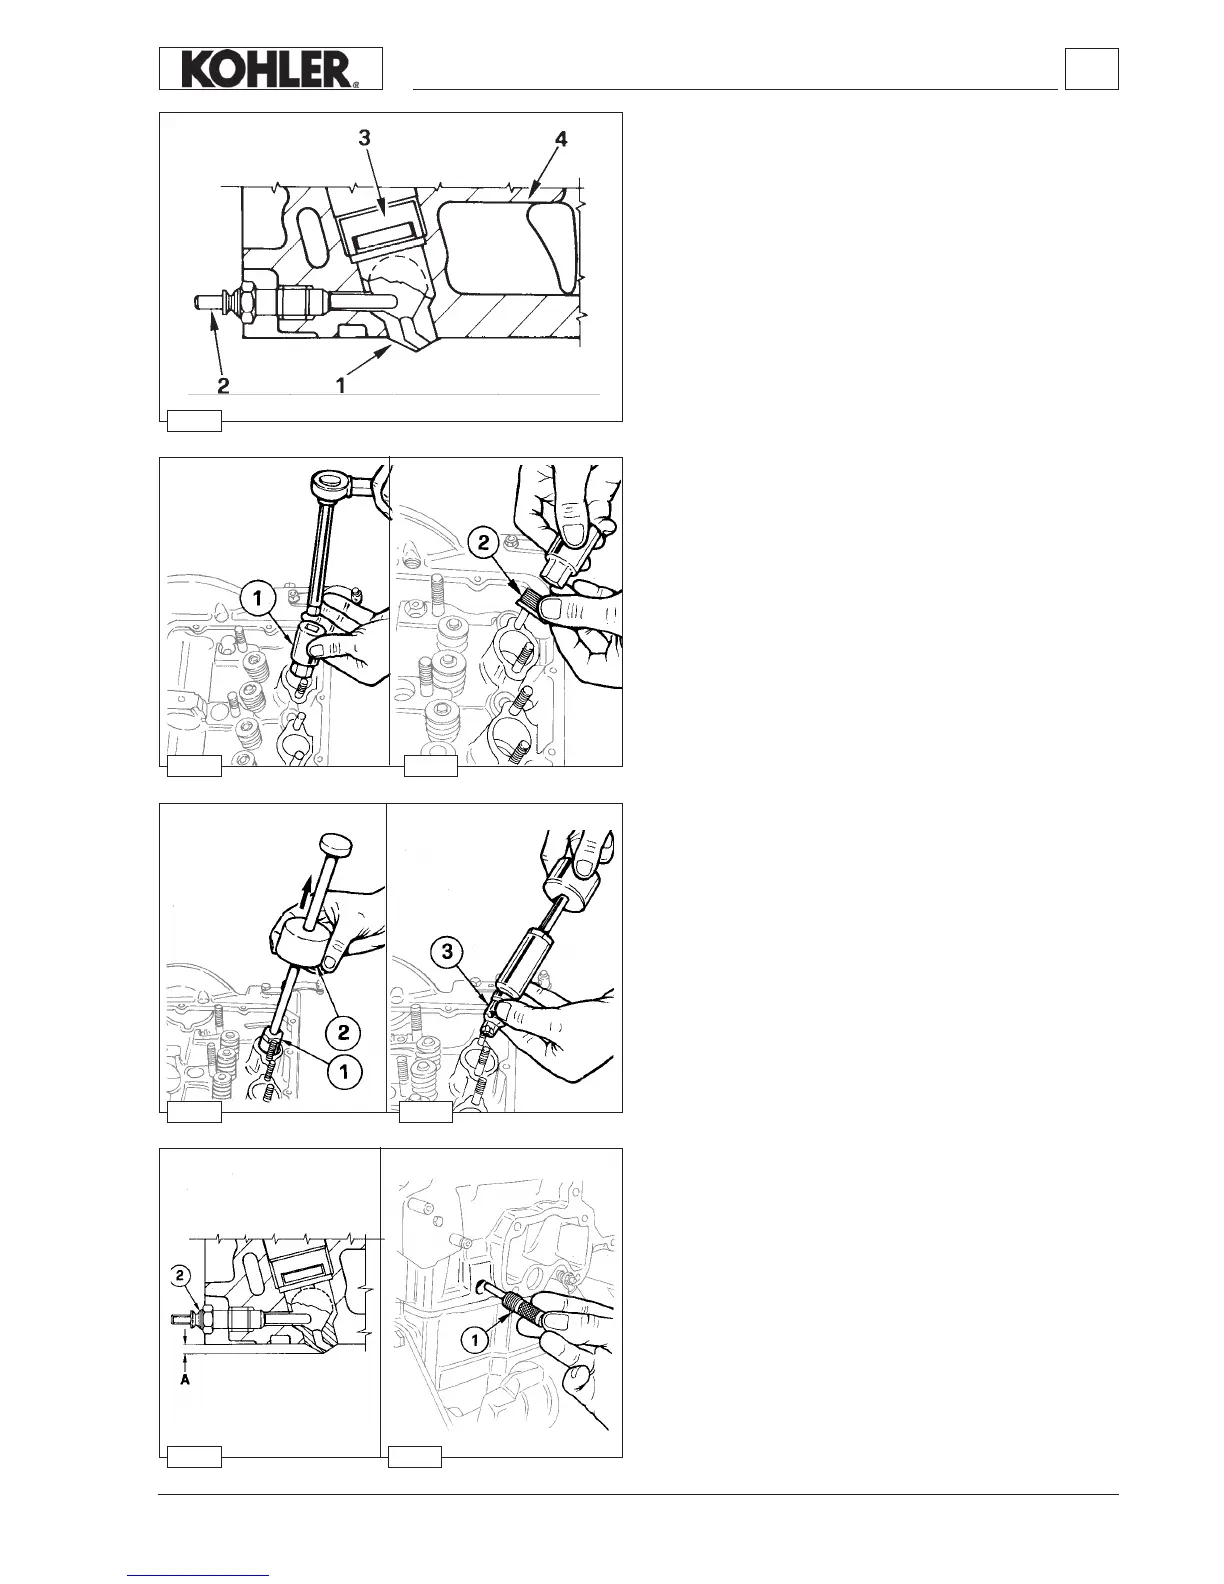
Pre-combustion chamber
Components:
1 Pre-combustion chamber
2 Pre-heating glow plug
3 Pre-combustion chamber ring nut
4 Cylinder head
The pre-combustion chamber does not normally require
removal or service, if service is necessary follow the procedure
described below.
Pre-combustion chamber ring nut removal
The pre-combustion chamber is xed to the cylinder head by a
ring nut, so before removing the pre-combustion chamber it is
necessary to unscrew the pre-combustion chamber ring nut.
Use the special tool "7107-1460-027" 1 to romve the ring nut 2.
Pre-combustion chamber, removal
Before proceeding with removing the pre-combustion chamber it
is necessary to remove the pre-heating glow plug.
Screw special tool "7107-1460-030" 1 into the pre-combustion
chamber.
Carefully, but sharply, slide the slide hammer 2 up the special
tool shaft until contact is made with end of the tool. The hammer
effect of the special tool will extract the pre-combustion chamber
3.
Note:
There are many types of precombustion chambers for the
various engines described as follows.
- KDW 702-1003-1404.
Pre-combustion chamber, installation
The pre-combustion chamber has a hole on the side where the
pre-heating glow plug 2 must be inserted.
When re-tting introduce the the new pre-combustion chamber
into the cylinder head so that the side hole of the pre-
combustion chamber aligns with the glow-plug hole.
To make sure that both the holes align appropriately use tool
"7107-1460-031" 1 inserting it into the glow-plug hole.
Tighten the ring nut twice:
1st tighten at a torque of 100 Nm,
2nd tighten at a torque of 180 Nm.
Chack that clearance A is 3,68÷4,1 mm.
Disassembly / Reassembly
 Loading...