Chapter 7 Assembly of the Devices
134
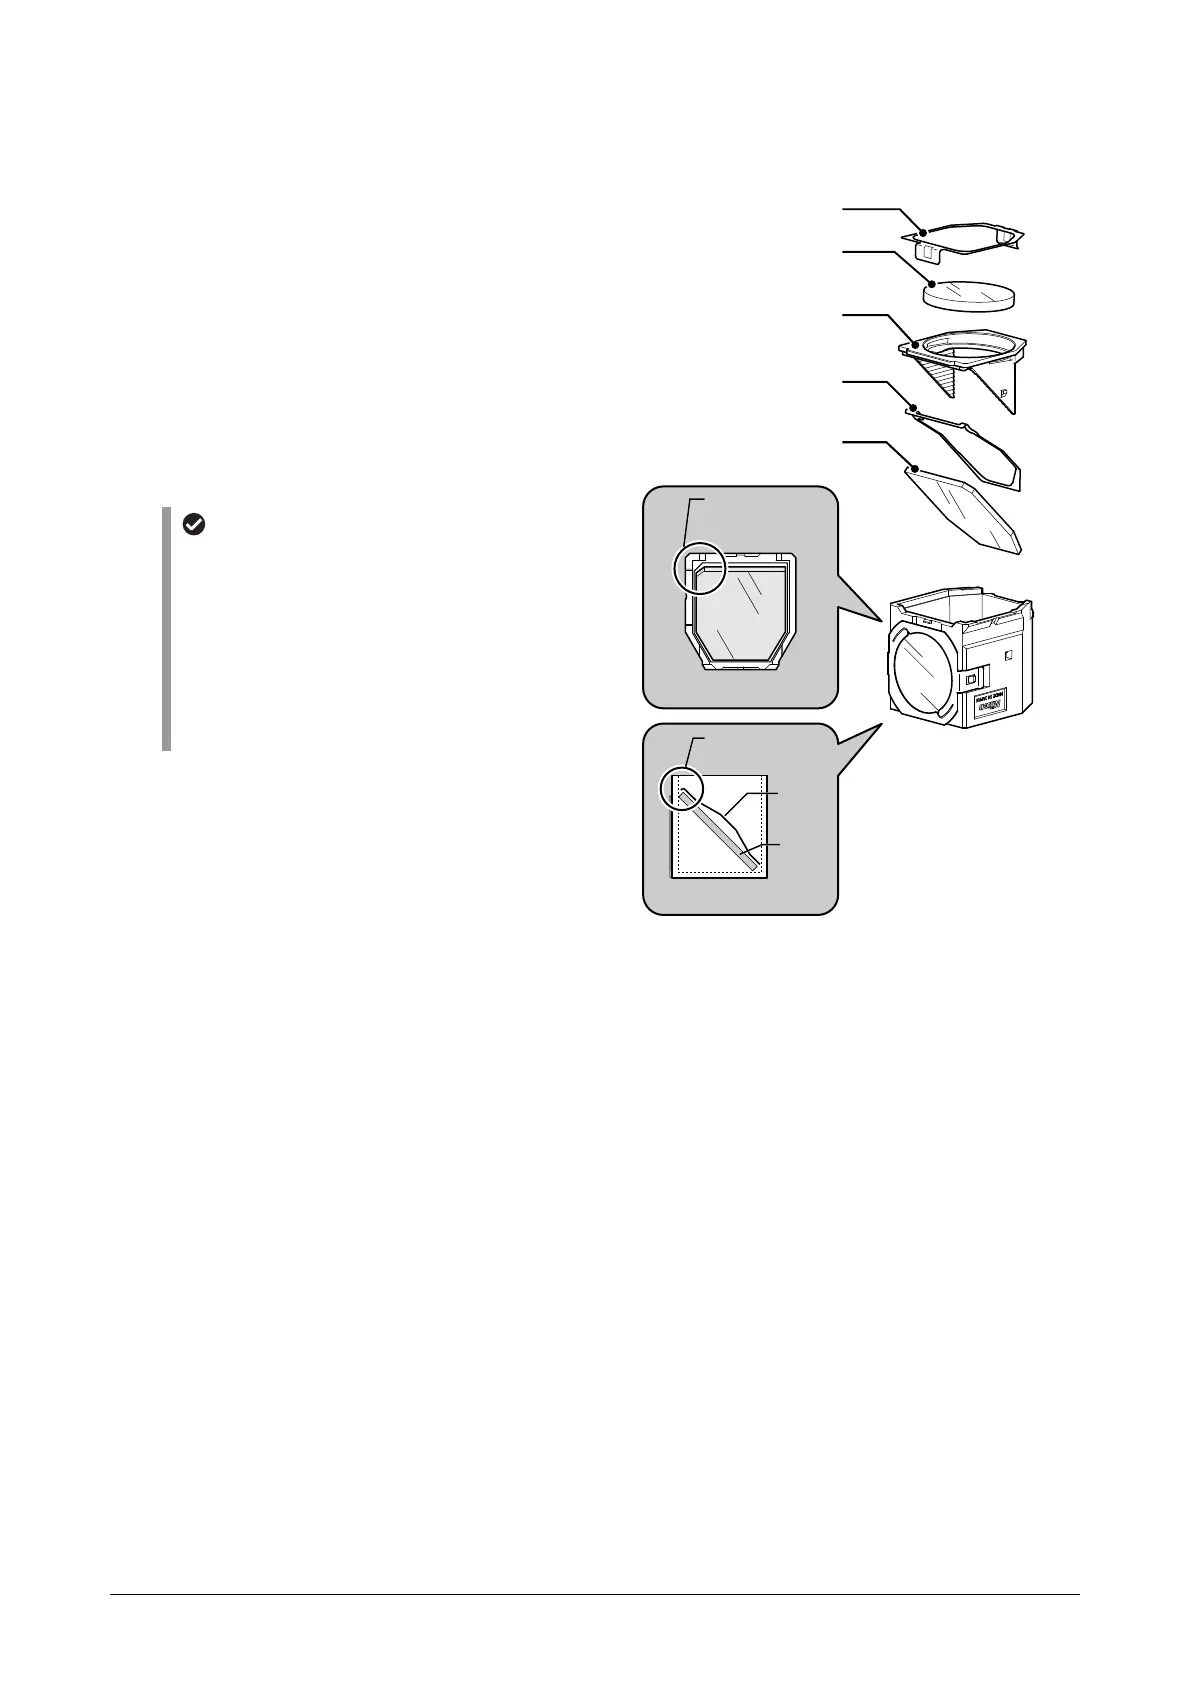
Replacing the dichroic mirror
The dichroic mirror is fixed inside the filter cube with the flat spring and the mirror fixing part.
1. Remove the barrier filter and the retaining
plate.
2. Lift the dichroic mirror fixing part upward to
remove it.
The mirror fixing part is fixed to the cube with
the latch on both sides of the cube.
3. Remove the flat spring and the dichroic
mirror.
4. Checking the attaching direction, place the
desired dichroic mirror as the original mirror
has been.
Attaching direction of the dichroic
mirror
The dichroic mirror has one notched
(chamfered) corner, and the filter cube has one
chamfered inside corner to match with the
mirror notch, which allows the mirror installation
only in the correct direction.
To attach the dichroic mirror, align the mirror
notch with the chamfered inside corner of the
filter cube.
5. Attach the flat spring on the dichroic mirror.
Place the flat spring with the L-shape edge up
and the outer arc faces the dichroic mirror as
shown in the figure on the right.
6. Attach the dichroic mirror fixing part back to
the original position.
Push it in until it is securely fixed to the filter
cube with the latch on both sides.
7. Attach the barrier filter and the retaining
plate back to the original position.
Replacement of the dichroic mirror
* When attaching a non-Nikon dichroic mirror, ask the manufacturer the attaching direction in advance.
Retaining plate
Barrie
filte
Flat spring
Dichroic mirro
Viewed from the top
Dichroic mirror fixing part
Viewed from the side
Mirro
Flat
spring
L-shape
edge up
lign the notch
with the chamfered
inside corner.

 Loading...


