Chapter 7 Assembly of the Devices
153
7.11 Attaching a Condenser
This section describes the procedures for mounting condenser modules, a condenser, and a condenser lens.
Components to be attached for each microscopy
Performing NAMC with DIC microscopy:
• Use a polarizer, a condenser module (slit diaphragm), and an objective that support NAMC.
• Attach an NAMC objective for and an NAMC condenser module, both of which must have the same
NAMC code.
Performing IMSI with DIC microscopy:
• Use a polarizer, an analyzer, a condenser module, an objective, and a DIC slider that support IMSI.
• Attach an IMSI objective and an IMSI condenser module, both of which must have the same IMSI
code.
Performing a Ph Microscopy:
• Use an objective suitable for Ph microscopy and a condenser module for Ph microscopy suitable for
the condenser used.
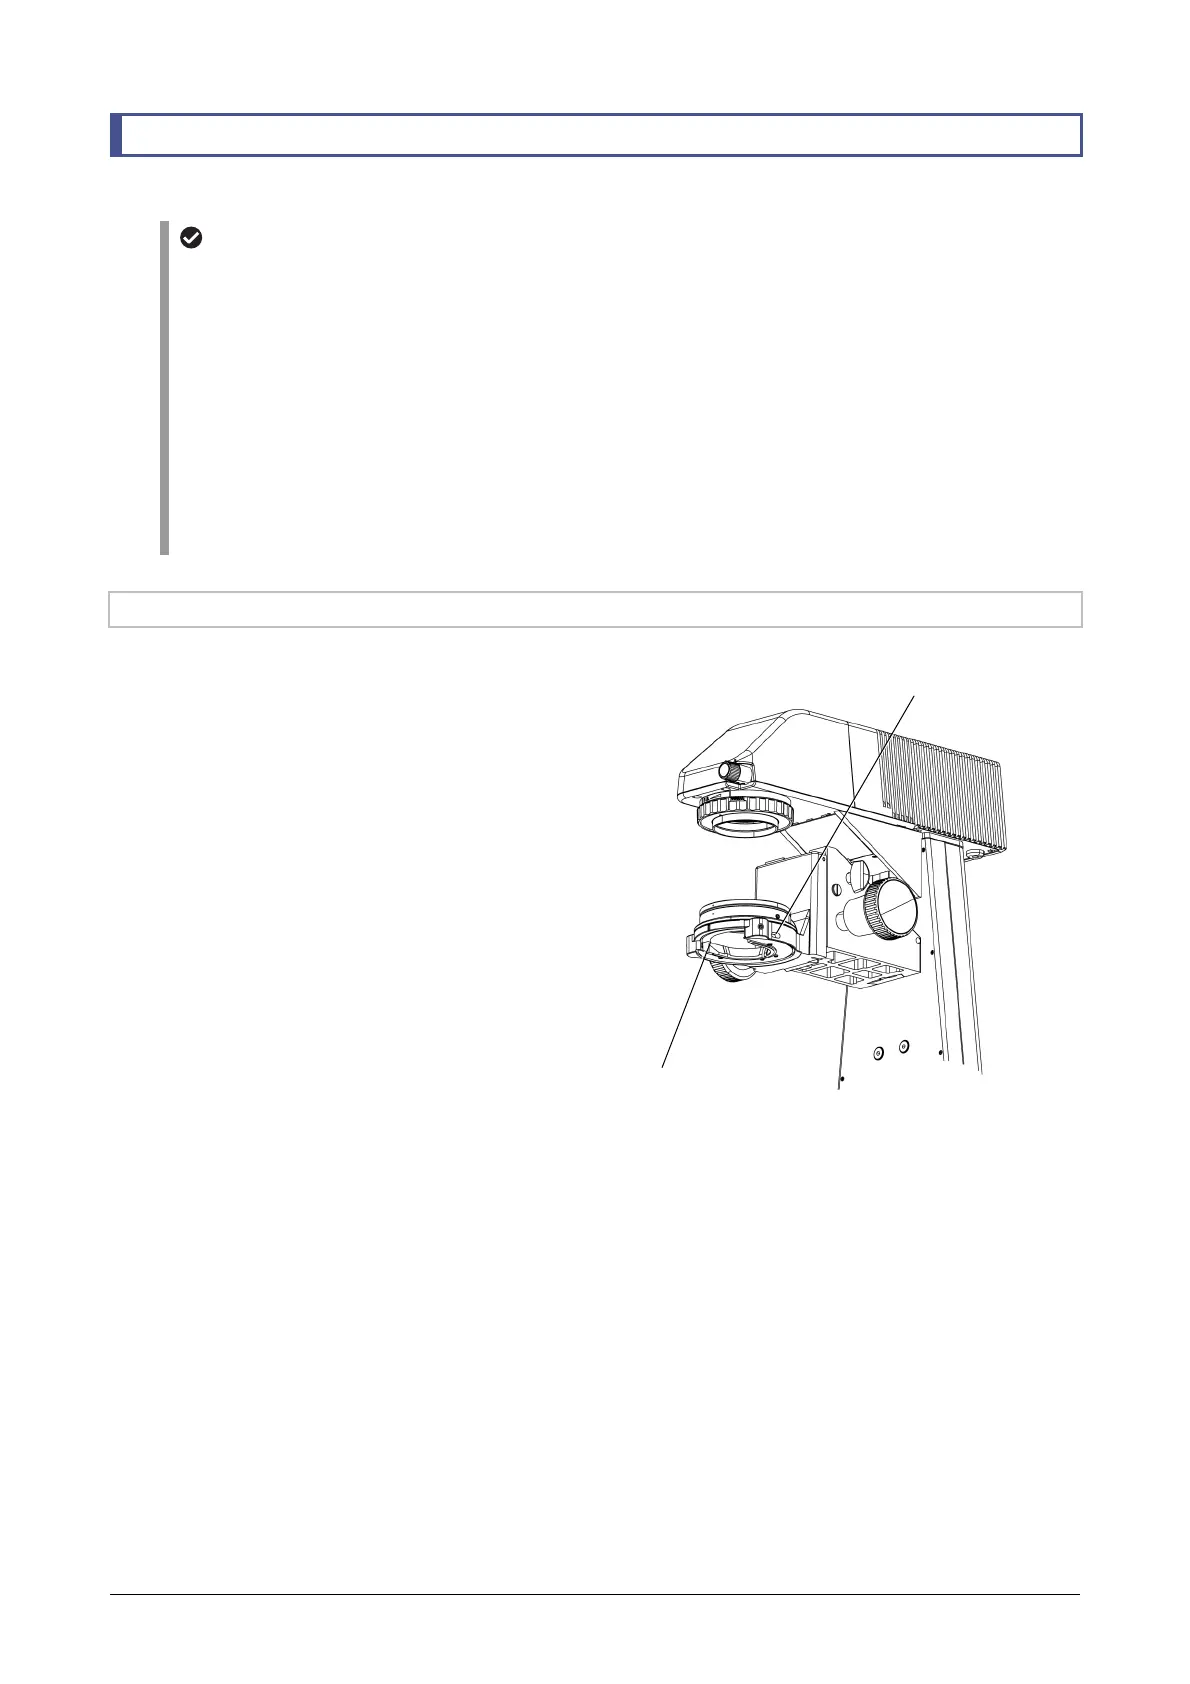
7.11.1 Preparation for Attaching a Condenser
1. Loosen the condenser clamp screw (hex
socket head cap screw) on the right side of
the condenser holder using a hexagonal
screwdriver.
(Tool: 2 mm hexagonal screwdriver, supplied with
the microscope main body)
Condenser holder
2. Attach a condenser or a condenser turret to
the condenser mount.
For condenser: See §7.11.2.
ELWD condenser: See §7.11.3.
DF condenser: See §7.11.4.
High NA condenser: See §7.11.5.
Condenser mount
Condenser clamp screw
(in the hole on the side)

 Loading...


