Chapter 7 Assembly of the Devices
143
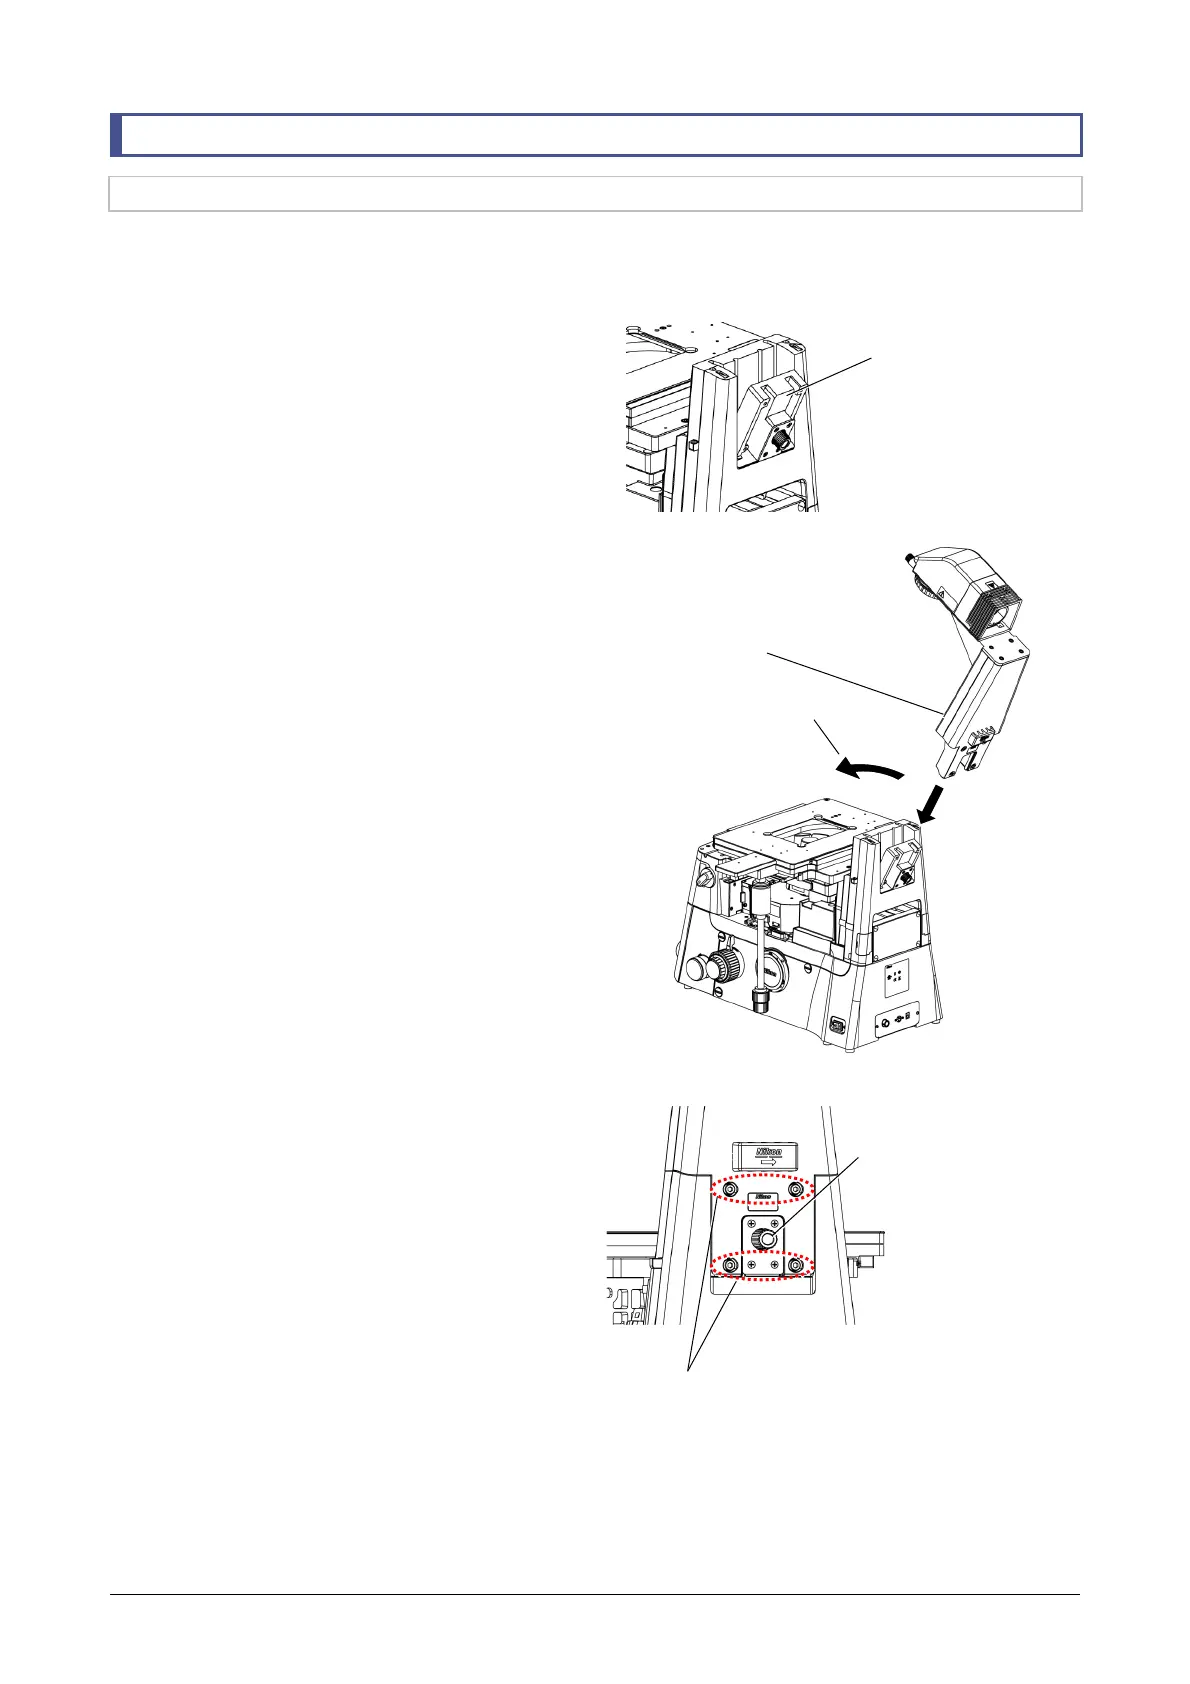
7.8 Mounting a Diascopic Illumination Pillar and a Lamphouse
7.8.1 Mounting an Illumination Pillar
Mount the TI2-D-PD pillar for dia illumination on the microscope main body. (Tool: 4 mm hex wrench,
supplied with the microscope main body)
1. Loosen the tilting clamp knob on the
microscope main body to tilt the illumina-
tion pillar mount to the front.
2. Insert the illumination pillar along the
grooves of the tilted illumination pillar
mount.
3. Return the illumination pillar to the vertical
position.
4. Tighten the tilting clamp knob so that the
pillar does not tilt.
5. From the rear surface of the illumination
pillar, tighten the four M5 hex socket head
cap screws supplied with the illumination
pillar to affix the illumination pillar.
1) Tilt the illumination pilla
mount.
3) Return the illumination pillar to
the vertical position.
4) Tighten the tilting clamp
knob.
5) Fix with hex socket head cap screws (M5, x 4).
2) Insert the
illumination pillar.

 Loading...


