Chapter 7 Assembly of the Devices
141
Using a TC-S-HS short handle
Four M4 set screws are supplied with the short handle. (Tool: 2 mm hexagonal screwdriver, supplied with the
microscope main body)
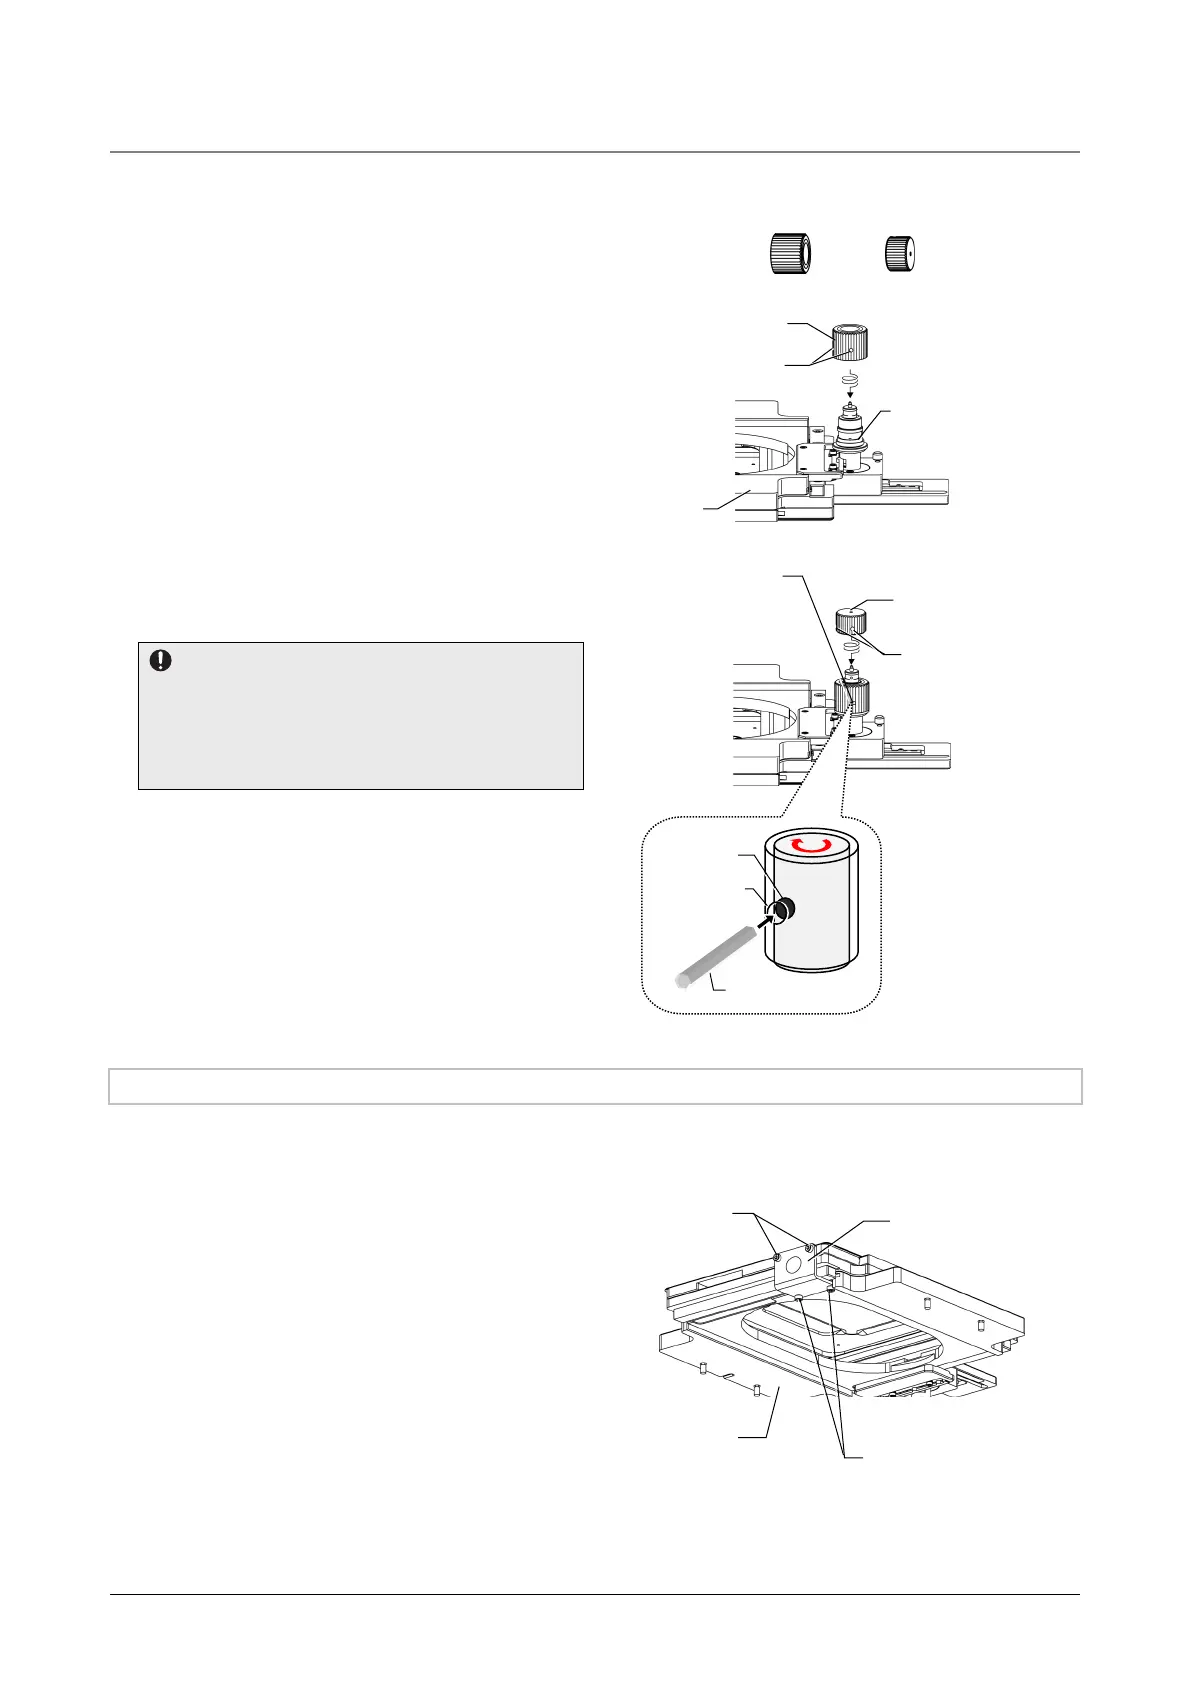
1. Place the stage with its top surface facing
downward while making sure that the top
surface is not damaged.
2. Screw in part A to the handle mount while
firmly holding the handle mount by one
hand.
3. Firmly affix the attached part A using the
two M4 set screws.
Attach a set screw to the tip of the hexagonal
screwdriver and screw it into each hole (2 in
total) at the lower part of the side of part A to
affix it.
Part A Part B
Attaching part A
4. While using a hexagonal screwdriver to keep
the inner shaft from turning, screw in part B
and then firmly mount it using set screws.
Notes on mounting
When screwing in part B, make sure to keep part A
from turning using a hexagonal screwdriver to
avoid co-rotation. If part B is screwed in while part
A is free to rotate, the rack of the stage might be
damaged.
1) Insert the hexagonal screwdriver into a hole
on the side of part A.
2) With the hexagonal screwdriver pressed in
lightly, turn part B inside.
3) Affix a set screw to the tip of the hexagonal
screwdriver and screw it into each hole (2 in
total) on the side of part B.
5. Mount the manual stage to the microscope
main body. (See §7.7.1.)
Attaching part B
7.7.3 Removing a Fixing Tool of the Stage
A fixing tool (L-shaped metal fitting) is attached to the stage and is used to affix the stage plate. Before
removing the fixing tool, attach the stage to the microscope main body. (Tool for manual stage: 3 mm hex
wrench, supplied with the microscope main body)
1. Loosen and remove the fixing screws on the
bottom of the L-shaped metal fitting.
For identification, a red circle sticker is affixed
on the L-shaped metal fitting. Remove the two
fixing screws by loosening them from the lower
part of the stage using a hex wrench.
2. Remove the L-shaped metal fitting by
loosening the two fixing screws on the side
of the fitting.
Remove the L-shaped metal fitting from the
side of the stage by loosening the two fixing
screws using a hex wrench.
When removing the L-shaped metal fitting, hold
it by hand to prevent it from dropping.
Handle mount
2.
Screw in part A.
3.
Fix with set screws
(M4, x 2).
Stage
4.
-1) Insert a
hexagonal
screwdriver to
keep part A
from turning.
4.
-2) Screw in part B.
Hexa
onal screwdriver
Hole on the
Hole on part
4.
-3) Fix with set
screws (M4, x
2).
Fixing screws
(side, x 2)
L-shaped metal fitting
(with a red circle sticker)
Bottom of the
stage
Fixing screws (bottom, x 2)

 Loading...


