Chapter 7 Assembly of the Devices
161
7.13 Attaching an Epi-fluorescence Attachment
To perform epi-fl microscopy, attach an FL turret, an epi-fluorescence attachment, and a light source for
episcopic illumination to the microscope main body.
Mounting FL turrets
For details on the procedure for mounting the FL turret, see “7.5.1 Attaching an FL Turret.”
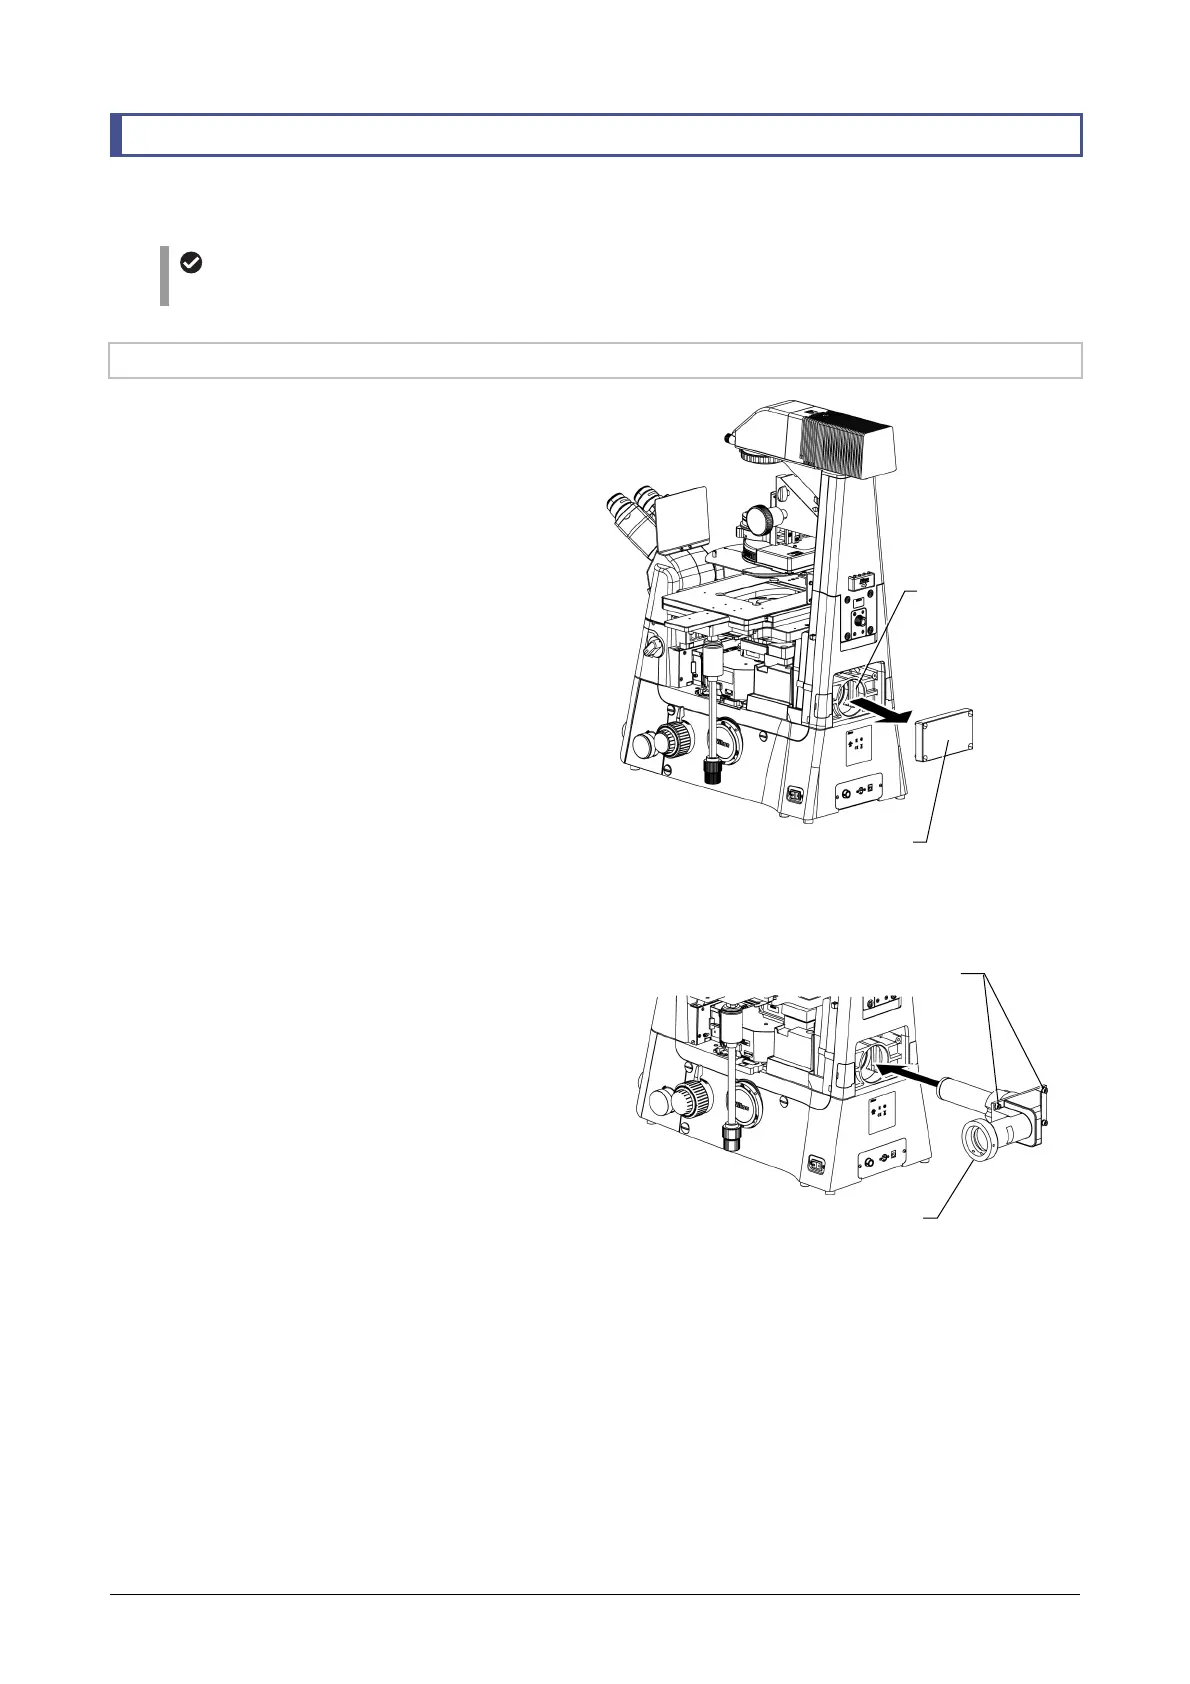
7.13.1 Mounting an EPI-FL Module (TI2-LA-FL-2)
1. Remove the cover from the back port mount
(guide section) on the rear surface of the
microscope main body.
Loosen and remove the four hex socket head
cap screws (M5) securing the cover by using a
hex wrench.
(Tool: 4 mm hex wrench, supplied with the
microscope main body)
2. Attach a branch.
Using a TI2-LA-BF fixed main branch
(1) Insert a fixed main branch into the back port
mount (guide section) on the rear of the mi-
croscope main body, and tighten the four M5
hex socket head cap screws using a hex
wrench.
(Tool: 4 mm hex wrench, supplied with the
microscope main body)
Attaching the fixed main branch
Back port mount
Cover at the back port moun
Fixed main branch
Hex socket head cap screws (M5, x 4)

 Loading...


