Chapter 2 Microscopy
16
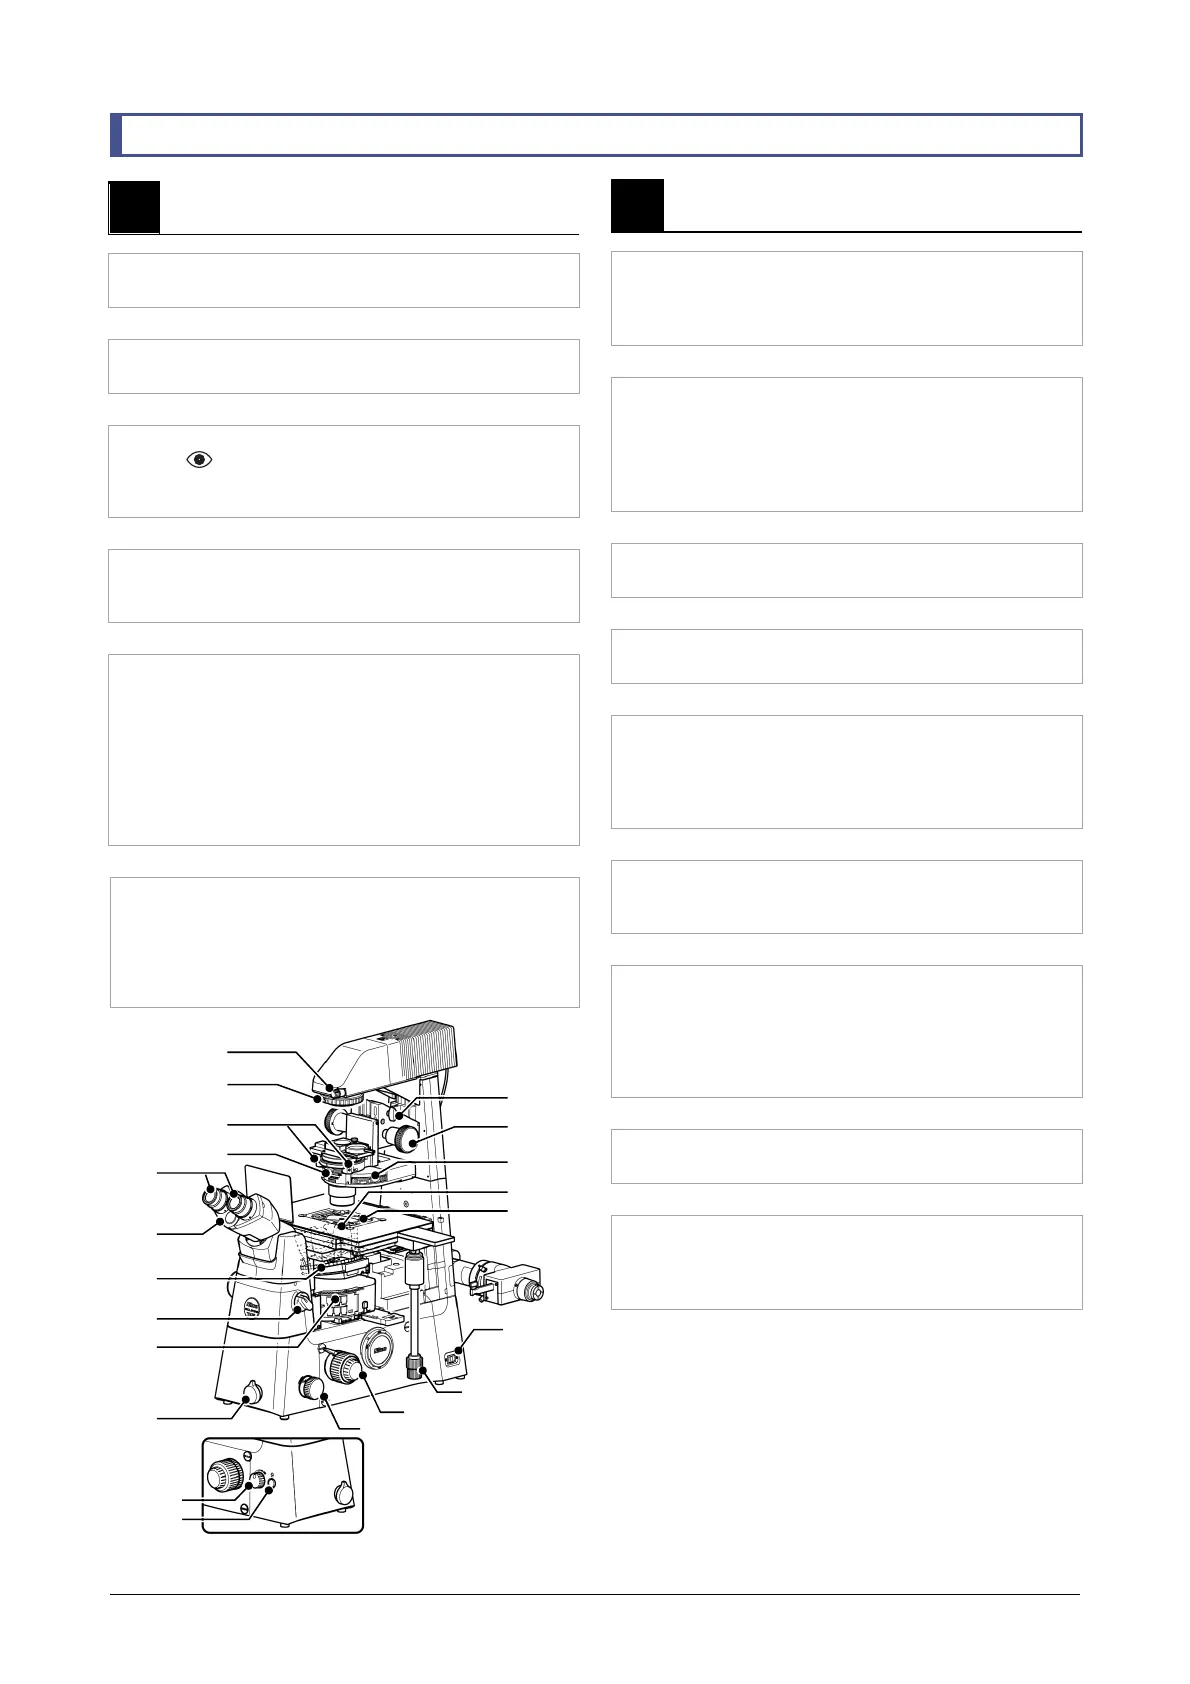
2.1 Diascopic Bright-field (BF) Microscopy
1
Configure the microscope to the basic
state.
1-1 Turn on the power to the system.
[a] Power switch (
☞
3.1)
▼
1-2 Place the 10x objective into the optical path.
[b] Nosepiece (
☞
3.9.1)
▼
1-3 Switch the optical path of the tube base unit
to (binocular part).
[c] Tube base optical path changeover knob
(
☞
3.7.1)
▼
1-4 Switch the optical path to the required
observation port.
[d] Optical path changeover dial (
☞
3.2.1)
▼
1-5 Configure the following controls to the basic
state.
[e] Intermediate magnification dial
(Set to 1x:
☞
3.2.2)
[f] Condenser turret
(Set to hollow or ND:
☞
3.4.6)
[g] Objective with a correction collar
(Set the correction collar to the reference position:
☞
3.10.1)
▼
1-6 Remove unnecessary optical elements from
the optical path.
• Polarizer (
☞
3.5.1)
• Analyzer (
☞
3.5.2)
• DIC slider (
☞
3.9.2)
• Filter cube (
☞
3.12.1)
Note: Letters within [ ] correspond to those in the procedure.
2
Set a sample and focus on it.
2-1 Open the dia-illumination shutter, and close
the FL turret shutter.
[h] Dia-illumination shutter knob (
☞
3.3.1)
[i] FL turret shutter knob (
☞
3.12.2)
▼
2-2 Turn on the dia-illumination LED and adjust
the brightness.
[j] Dia-illumination ON/OFF button (
☞
3.3.2)
[k] Dia-illumination brightness adjuster (
☞
3.3.2)
Illumination reaches the observation port.
Use filters if required.
▼
2-3 Fully open the dia field diaphragm.
[l] Field diaphragm dial (
☞
3.3.3)
▼
2-4 Fully open the dia aperture diaphragm.
[m] Aperture diaphragm open/close lever (
☞
3.4.5)
▼
2-5 Place the sample on the stage.
[n] Stage (
☞
3.8.1)
When placing a large specimen on the stage, tilt the
pillar for dia-illumination backward to obtain sufficient
space (
☞
3.3.5).
▼
2-6 Move the required part of the sample into the
center of the field of view.
[o] Stage handle (
☞
3.8.3)
▼
2-7 Move the condenser to the lower limit.
[p] Condenser focus knob (
☞
3.4.2)
Be careful not to allow the tip of the condenser to
collide with the specimen. If the condenser cannot be
lowered to the limit position, release the refocusing
clamp.
▼
2-8 Focus on the sample.
[q] Focus knob (
☞
3.11.1)
▼
2-9 Adjust the diopters and the interpupillary
distance if required.
[r] Eyepiece (
☞
3.6.2)
[s] Binocular part (
☞
3.6.3)
[a]
[b]
[c]
[m]
[l]
[n]
[h]
[p]
[q]
[r]
[e]
[u]
[j]
[k]
[g]
[s]
[d]
[t]
[f]
[i]
[o]

 Loading...


