Chapter 7 Assembly of the Devices
149
7.8.7 Replacing a Dia-Illumination Lamp (Precentered Lamphouse only)
WARNING
• There are predefined combinations of lamps, illumination pillars, and power supplies. Use the lamps,
illumination pillars, and power supplies in correct combinations referring to “Diascopic illuminator” in “8.2
Performance Properties.” Be sure to use the designated lamps.
CAUTION
• When replacing a lamp, make sure the power is turned off and that the power cords are removed.
•
Precautions against heat
While the lamp is on and immediately after the power for the lamp is turned off, the lamp and its periphery
are very hot. Before replacing a lamp, turn the power off and wait about 30 minutes for the lamp to cool off
sufficiently.
• After replacing a lamp, firmly close the cover of the lamphouse. Never turn on the lamp with the cover
removed.
Notes on Handling a Lamp
Do not touch the lamp glass with your bare hands. Fingerprints and other dirt on the lamp may result in uneven
illumination and reduce the service life of the lamp. Wear gloves or use cloth when handling the lamp.
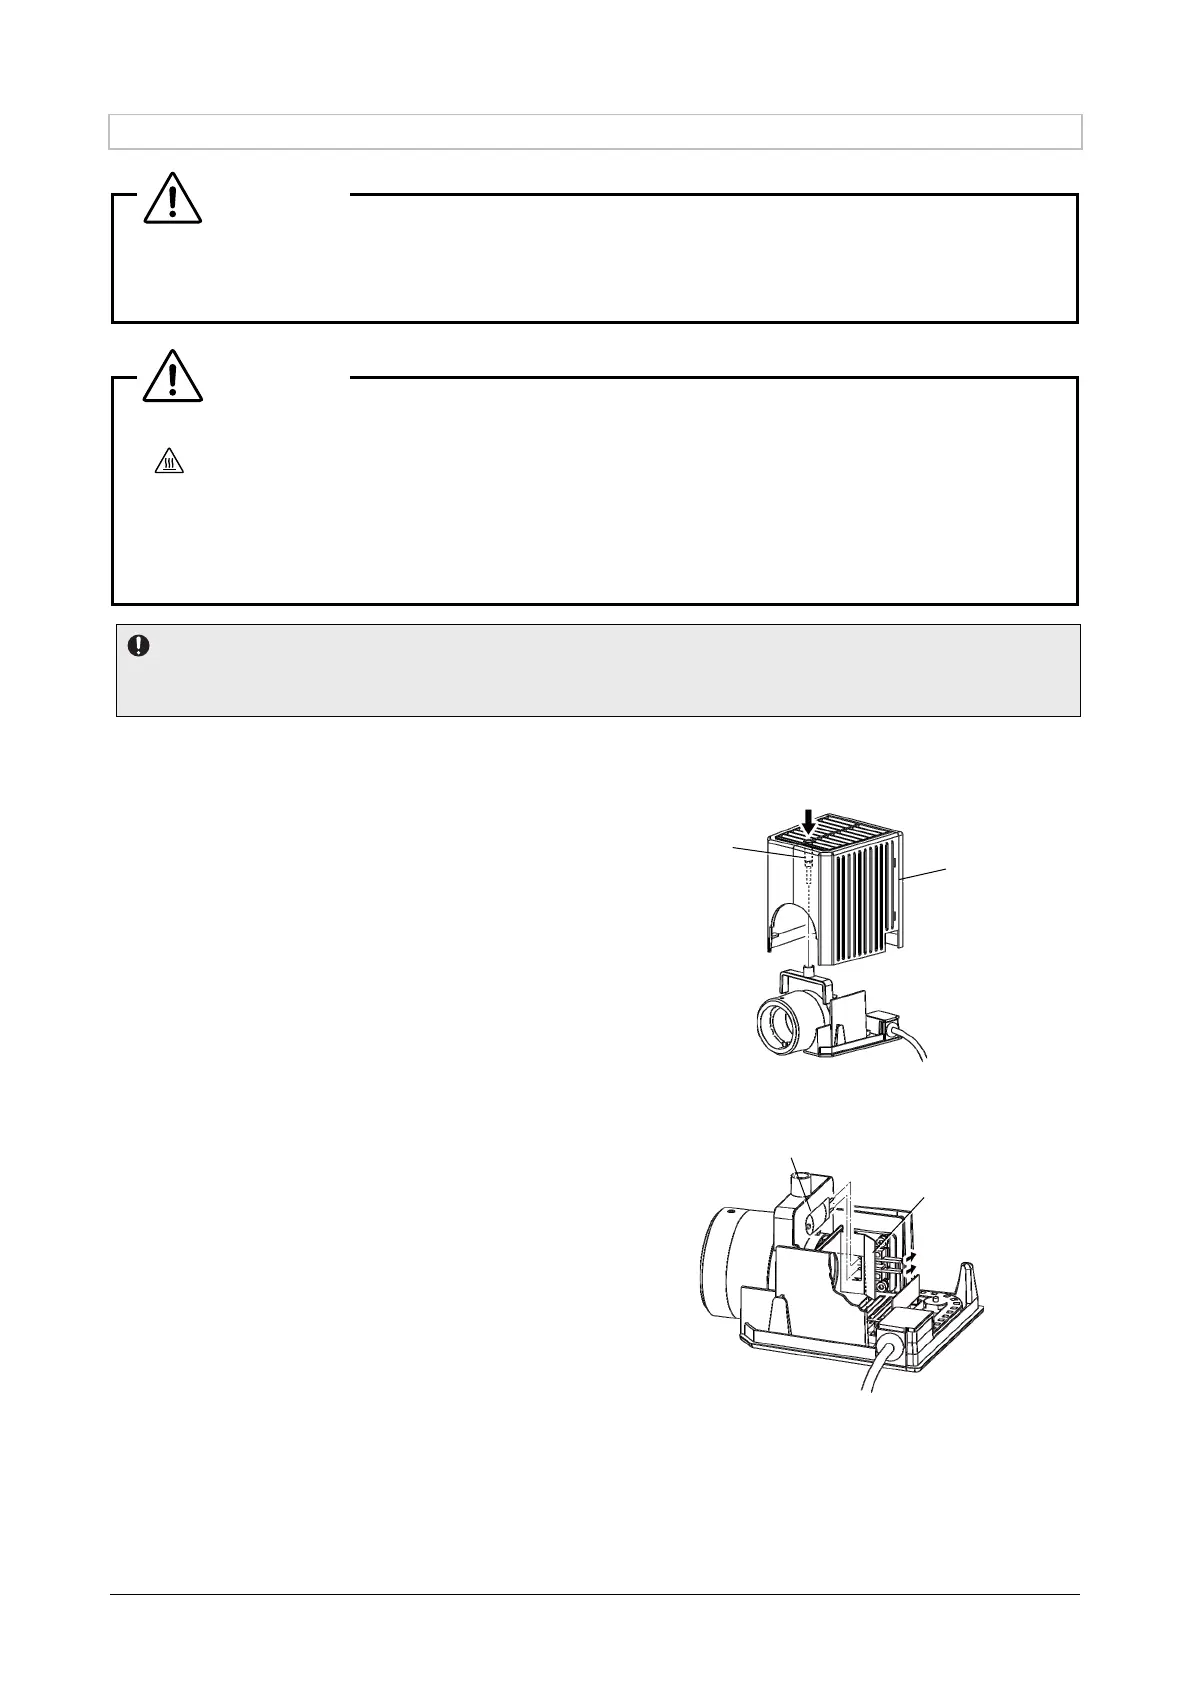
1. Insert a hex wrench into the hole on the top
of the lamphouse cover, and loosen the
fixing screw to remove the lamphouse
cover.
(Tool: 3 mm hex wrench, supplied with the
microscope main body)
Removing a lamphouse cover
2. Push in the lamp clamp lever and remove
the used lamp from the socket.
3. Insert a new lamp into the socket.
Insert the lamp electrode (pin) into the socket
pin hole as far as it goes while pushing in the
lamp clamp lever, and then release the lamp
clamp lever.
• Be sure to use the designated lamp.
• Do not touch the lamp glass with your bare
hands.
• When releasing the lamp clamp lever, take
care that the lamp does not tilt.
4. Securely attach the lamphouse cover at the
original position by tightening the fixing
screw.
Replacing a lamp
Fixing screw
Lamphouse
cover
Insert a hex wrench
to loosen the fixing screw.
Lamp
clamp lever
Lamp
Pushing in the lamp clamp lever opens the pin hole of the
socket. Remove the used lamp by pushing in the lever
and then attach a new lamp.

 Loading...


