Appendix C Maintenance Manual for Second Tray unit
43984801TH Rev.1
155 /
Oki Data CONFIDENTIAL
3.3.6 Gear-Assy-Clatch
(1) Turn off the printer and pull the AC cord. Remove the printer from the device.
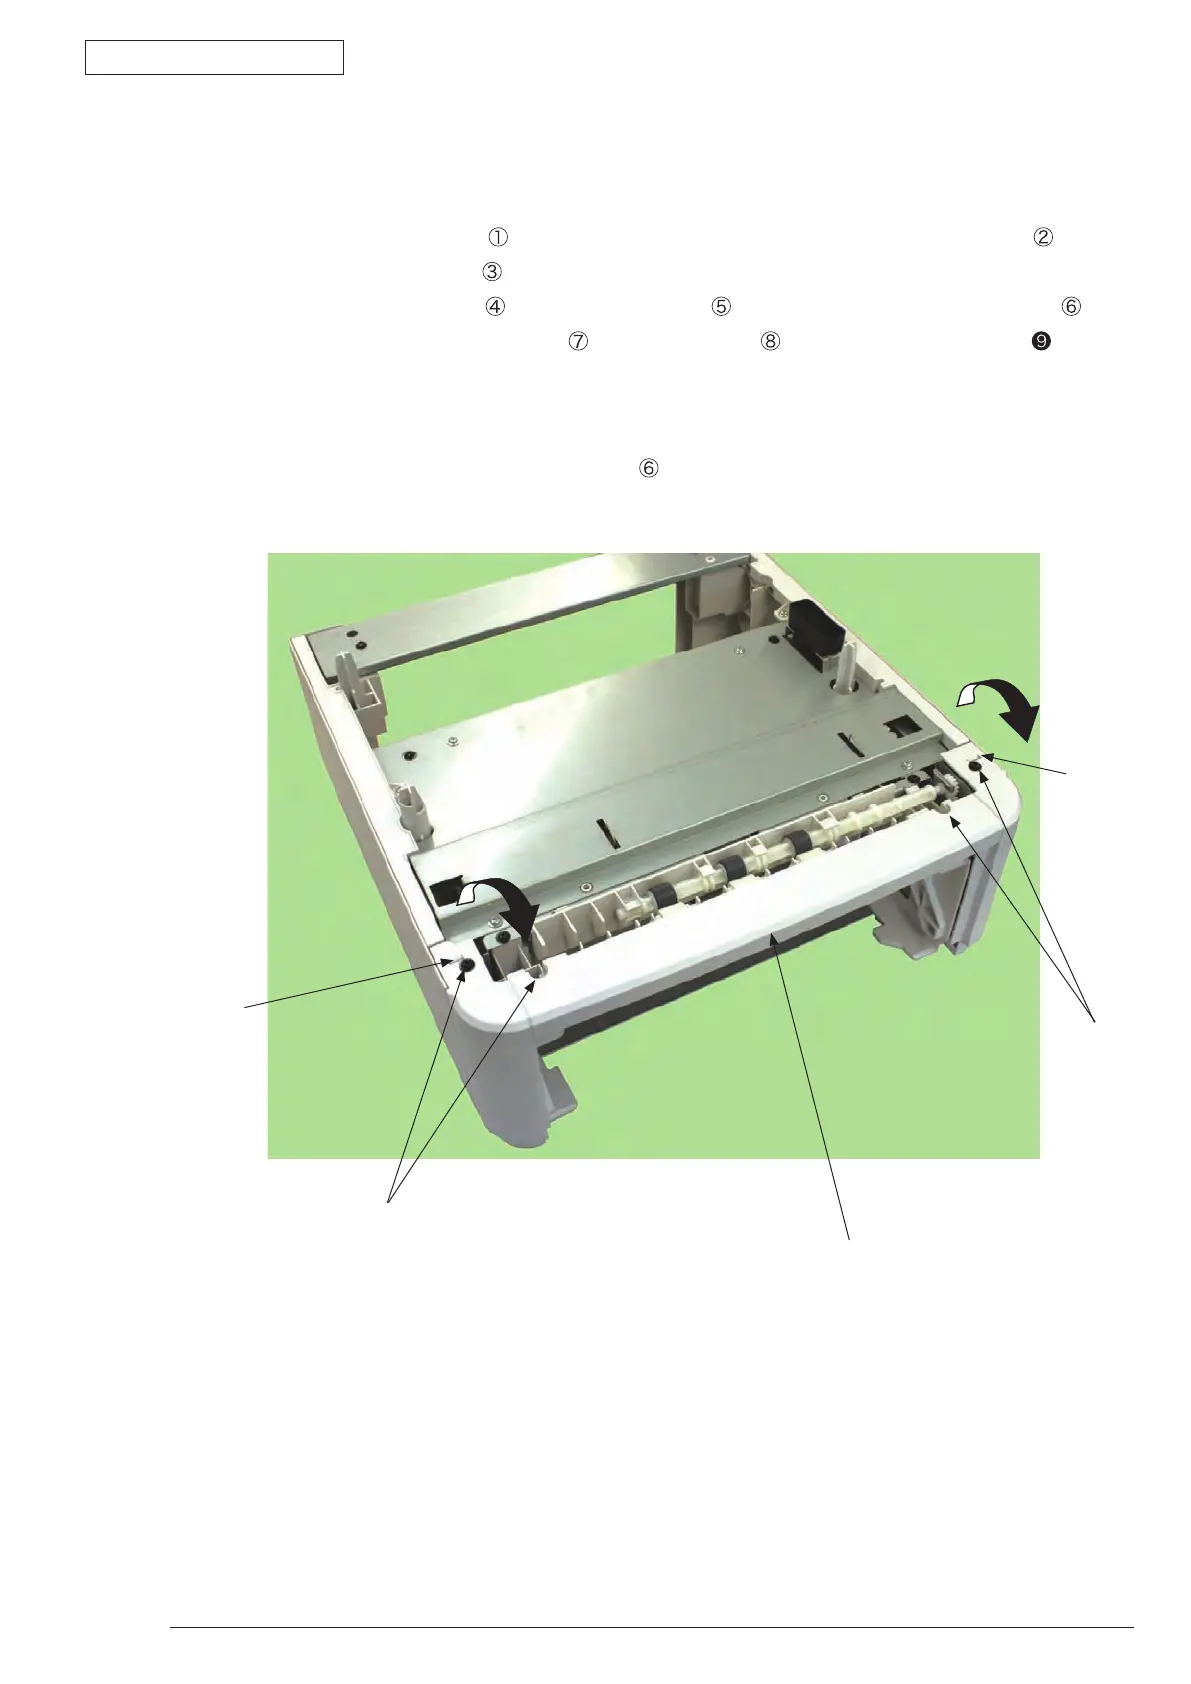
(2) Remove Plate-Top. (See 3.3.4 (2) to (4))
(3) Remove four screws (black)
, and remove the clamps of two claws to remove Cover-Front .
(4) Disconnect two connectors
.
(5) Remove five screws (black)
and two screws (silver) to remove Plate-Hop (Caulking)-Assy .
(6) Remove the cable from Clamp-Cable
, and remove E ring to remove Bear-Assy-Clatch .
(7) As for reinstalling, take the opposite sequence to removal sequence.
(Precautions on reinstalling)
1. W
hen reinstalling Plate-Hop (Caulking)-Assy
, check that Lever-Paper-End is in a position shown in
the figure for the sensor of Board-OT7.
①
②
Claw
①
Claw
 Loading...