Operator’s Manual – OPTI CCA-TS2 3-3
3 CUSTOMIZATION
3.2.1 QC Setup
3.2.1.1 Setting up the Quality Control Material
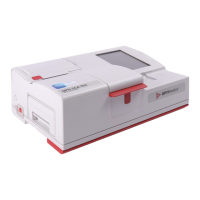
Fig. 3-6 Select Control
When you open a new box of OPTI CHECK or
OPTI CHECK PLUS, the lot number should be
entered into the analyzer, along with the target
ranges. Each QC level of control has its own
unique lot number printed on the information sheet
contained in the control box.
NOTE: OPTICHECKandOPTICHECKPLUS
QualityControlmaterialsaredesignedfor
yourOPTICCA-TS2andhaveassigned
assayrangesforeachmeasuredparameter.
NOTE: TheprocedureforprogrammingQCranges
asdescribedbelowisidenticalforalllevels.
NOTE: TheOPTICCA-TS2cansaveinformation
foronelotofOPTICHECKandonelotof
OPTICHECKPLUSconcurrentlyforeach
level.
1. In the main menu, select <System Manager>
and <Setup>.
2. Enter security information if enabled
(see Section 3.2.3.1).
3. On the <Patient/QC> tab, select <Control>
(Fig. 3-6).
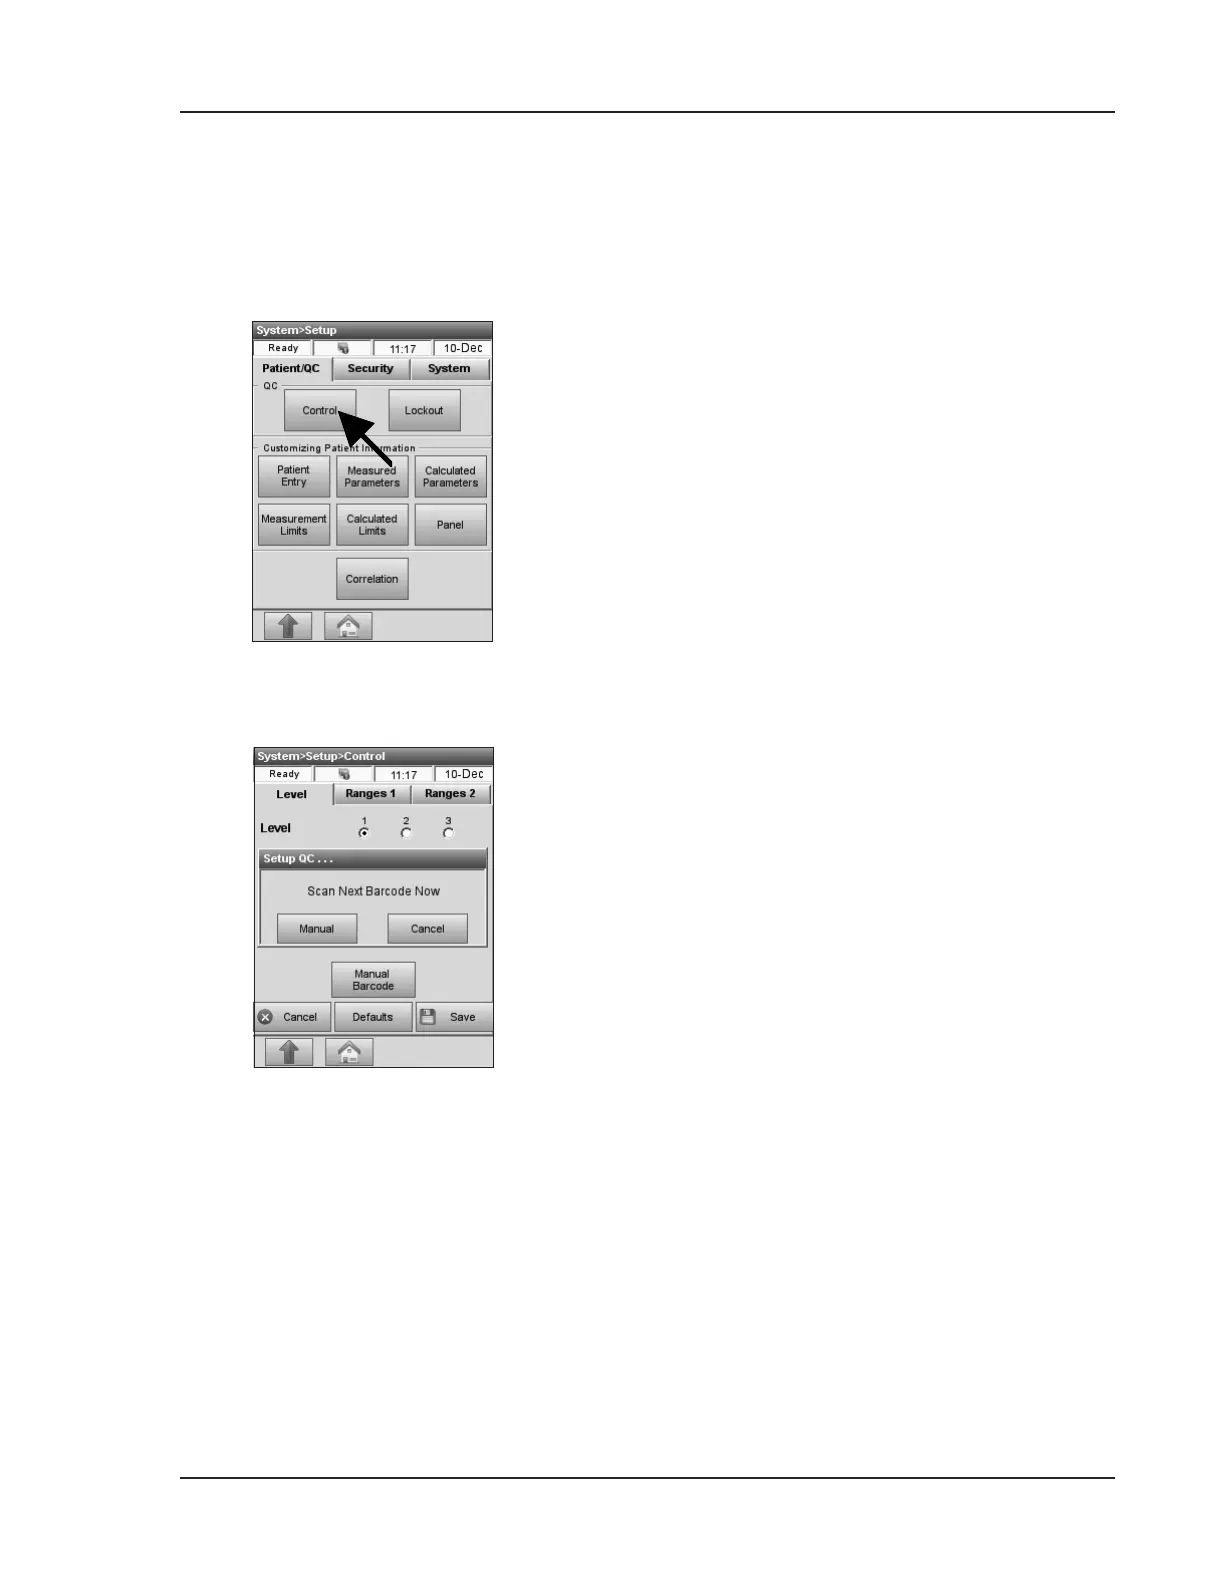
4. Take the bar code sheet out of the OPTI CHECK
box and scan Barcode A for the applicable
level of OPTI CHECK or OPTI CHECK PLUS
(Fig. 3-7).
• Hold the bar code 2-3 inches (5-8 cm) from
the bar code scanner located on the bottom
right-hand corner of the analyzer.
• The red line from the bar code scanner
should cover the entire bar code.
• A beep and a green status light indicates a
valid bar code.
Fig. 3-7 Scan Bar Code
 Loading...