3-28 Operator’s Manual – OPTI CCA-TS2
3 CUSTOMIZATION
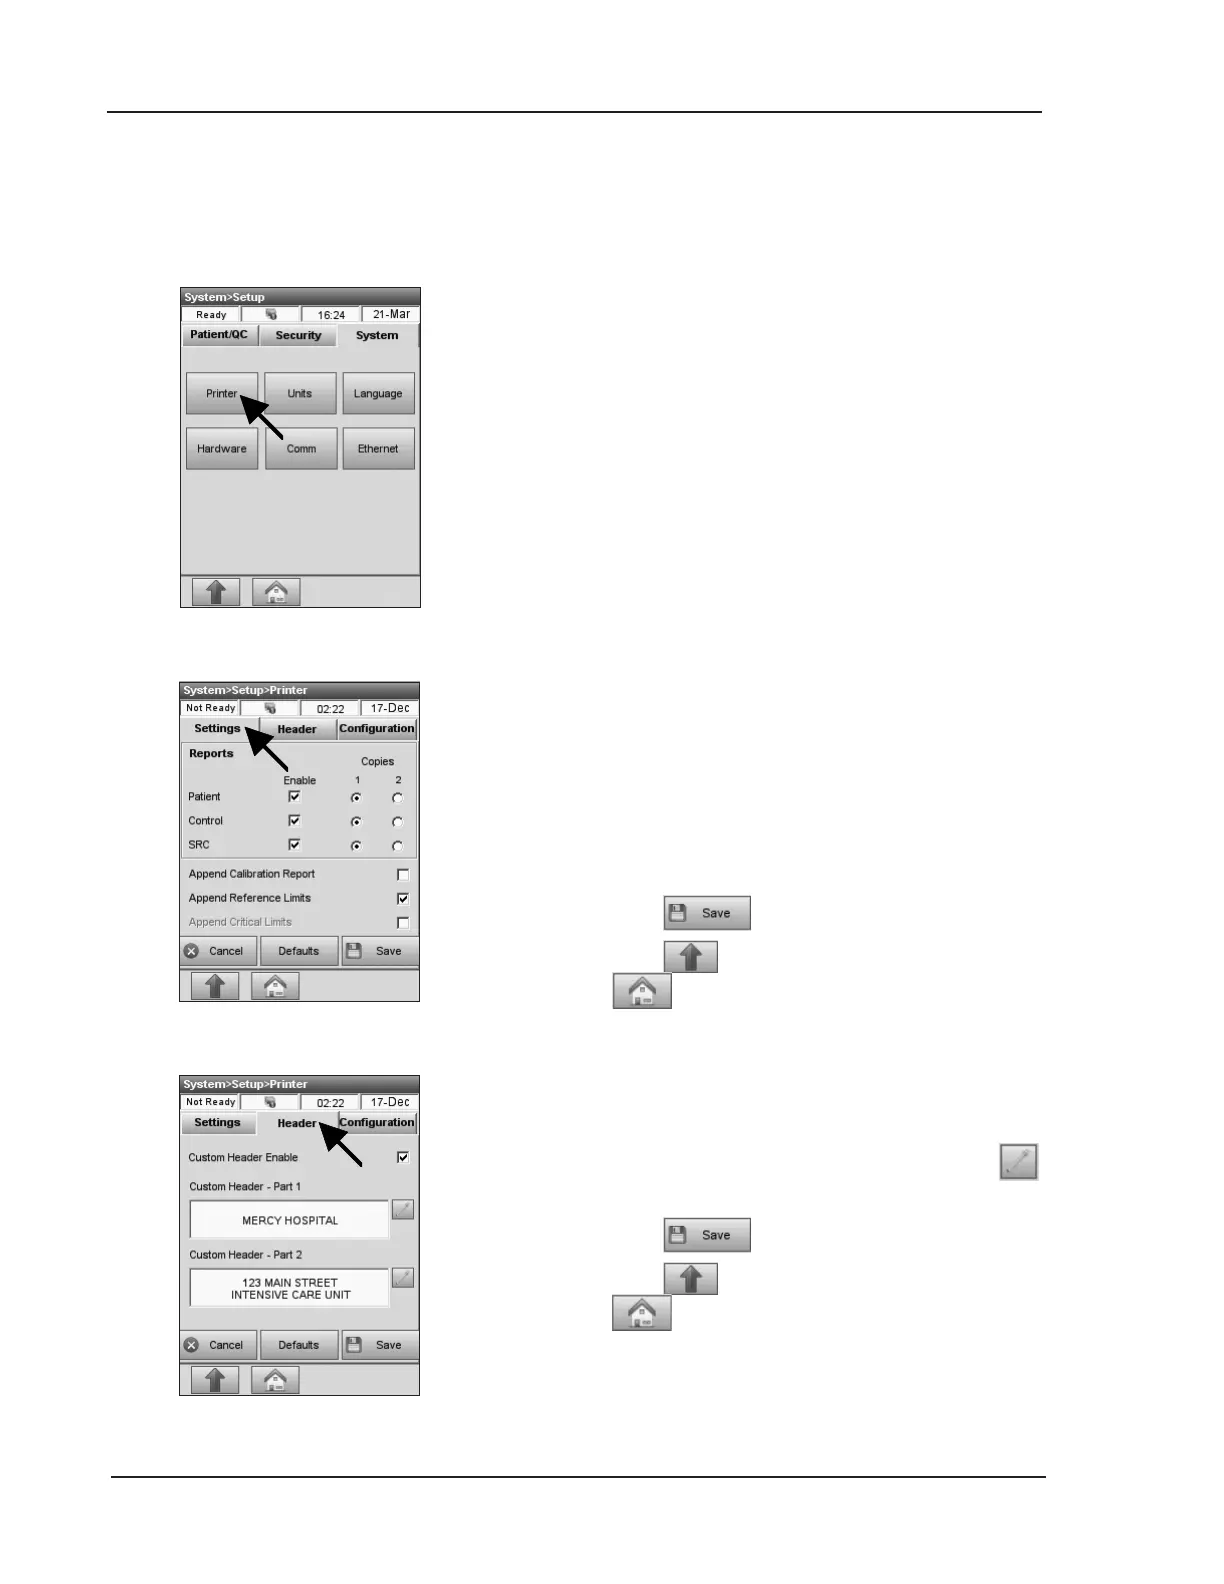
Fig. 3-64 Select Printer
3.2.4 Miscellaneous System Settings
3.2.4.1 Setting the Printer
Fig. 3-65 Printer Settings
The <Printer> menu allows you to program the
printing functions of your analyzer.
It contains three submenus: <Settings>,
<Header> and <Conguration>.
1. In the main menu, select <System Manager>
and <Setup>.
2. In the <System Setup> menu, press the
<System> tab and then <Printer> (Fig. 3-64).
In the <Settings> menu (Fig. 3-65), you can select
to have a patient, control and SRC report printed
after each measurement. In the default settings, these
options are activated.
You can also select to add a calibration report and
reference and critical limits to each patient report.
1. Select the options to be enabled.
2. Press to accept the changes.
3. Press to return to the <Setup> screen or
to return to the main menu.
In the <Header> menu (Fig. 3-66), you can add
custom headers to your printed reports.
1. Select <Custom Header Enable>, press
and enter the custom header.
2. Press to accept the changes.
3. Press to return to the <Setup> screen or
to return to the main menu.
Fig. 3-66 Header
 Loading...