Convenient Functions (Utility)
154154
8. Select [E6] SELECT.
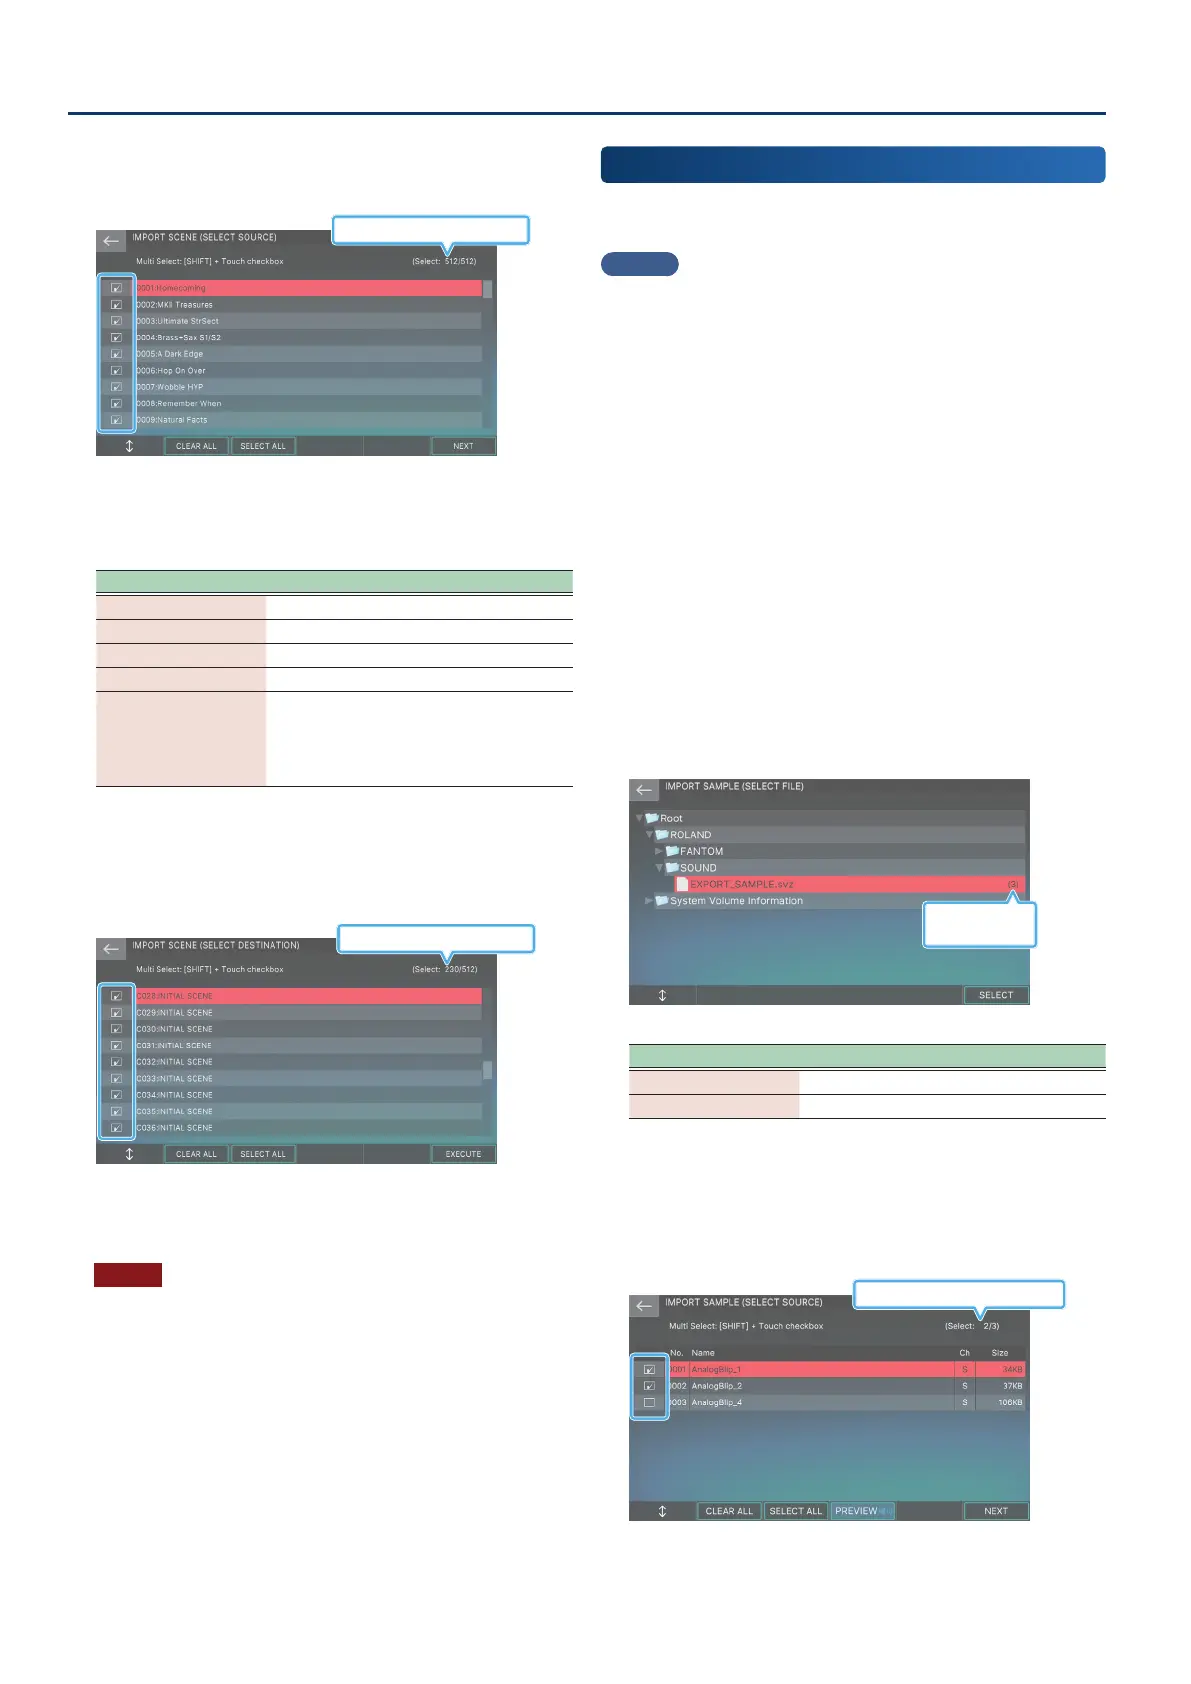
The IMPORT SCENE (SELECT SOURCE) screen appears.
Number marked / Number of items
9. Touch the box at the left of each scene that you
want to import, adding a check mark.
Menu Explanation
[E1] Scrolls the cursor up or down.
[E2] CLEAR ALL Clears all check marks.
[E3] SELECT ALL Adds a check mark to all scenes.
[E6] NEXT Proceeds to the next step.
Hold down the
[SHIFT] button and
touch a check box
Adds a check mark to multiple scenes in
a single action, starting from the tone at
the cursor location to the tone that you
touched while holding down the [SHIFT]
button.
10.
Select [E6] NEXT.
The IMPORT SCENE (SELECT DESTINATION) screen appears.
This is a list of the scenes in the FANTOM.
Number marked / Number of items
11.
Touch the box at the left of the import-destination
scene to add a check mark.
NOTE
The scene in the selected import-destination is overwritten.
By default, check boxes are automatically selected so that INITIAL
SCENE is the import-destination.
12.
Select [E6] EXECUTE.
A conrmation message appears.
If you decide to cancel, select [E6] CANCEL.
13.
Select [E5] OK.
The import is executed, and you return to the IMPORT MENU
screen.
The tones and drums used in the imported scenes are also
imported together.
Importing Sample Data
(IMPORT SAMPLE)
This lets you import the FANTOM sample data from a USB ash
drive.
MEMO
Data that can be loaded includes any sample data exported using
the EXPORT SAMPLE function.
1. Copy the le to import (the SVZ le that was
created using the EXPORT SAMPLE function) to
the USB ash drive.
2. Insert the USB ash drive into the USB MEMORY
port of the FANTOM.
3. Press the [MENU] button.
The MENU screen appears.
4. Touch <UTILITY>.
The UTILITY screen appears.
5. Touch <IMPORT>.
6. Touch <IMPORT SAMPLE>.
The folders and les on the USB ash drive are displayed.
Number of samples
in the le
Menu Explanation
[E1] Scrolls the screen up/down.
[E6] SELECT Selects the le.
7. Touch the SVZ le to import.
8. Select [E6] SELECT.
The IMPORT SAMPLE (SELECT FILE) screen appears.
Number marked / Number of samples
9. Touching the check box to the left of a sample
selects it for import.

 Loading...