About the SAMPLING MENU
8484
Importing an Audio File
(To Keyboard)
“IMPORT To Keyboard” combines all of the steps you need to make
the audio les you imported playable from the keyboard.
Use these steps to create a user tone at the same time that uses the
audio les you import.
1. To begin, put the audio les you want to import
into the folder you choose on a USB ash drive.
NOTE
¹
Use a USB ash drive that you’ve already formatted on the
FANTOM.
¹
This operation might take some time, depending on the size
of the le to import.
2. Press the [SAMPLING] button.
The SAMPLING MENU screen appears.
3. Touch IMPORT <To Keyboard>.
The IMPORT SAMPLE TO KBD (SELECT SOURCE) screen
appears.
Menu Explanation
[E2] PREVIEW
You can preview the audio le while
pressing this knob.
[E3] Preview Level
Sets the volume used for previewing.
This is a system parameter. You can also set
this from MENUÓSYSTEMÓSOUND.
[E6] IMPORT Advances to the next operation.
4. Select the le to be used.
MEMO
You can select the INTERNAL STORAGE tab and import the audio
les in the LIBRARY folder.
NOTE
If a lename contains the following characters, that le cannot be
imported into the FANTOM.
Also, les with double-byte characters and other special characters
cannot be imported.
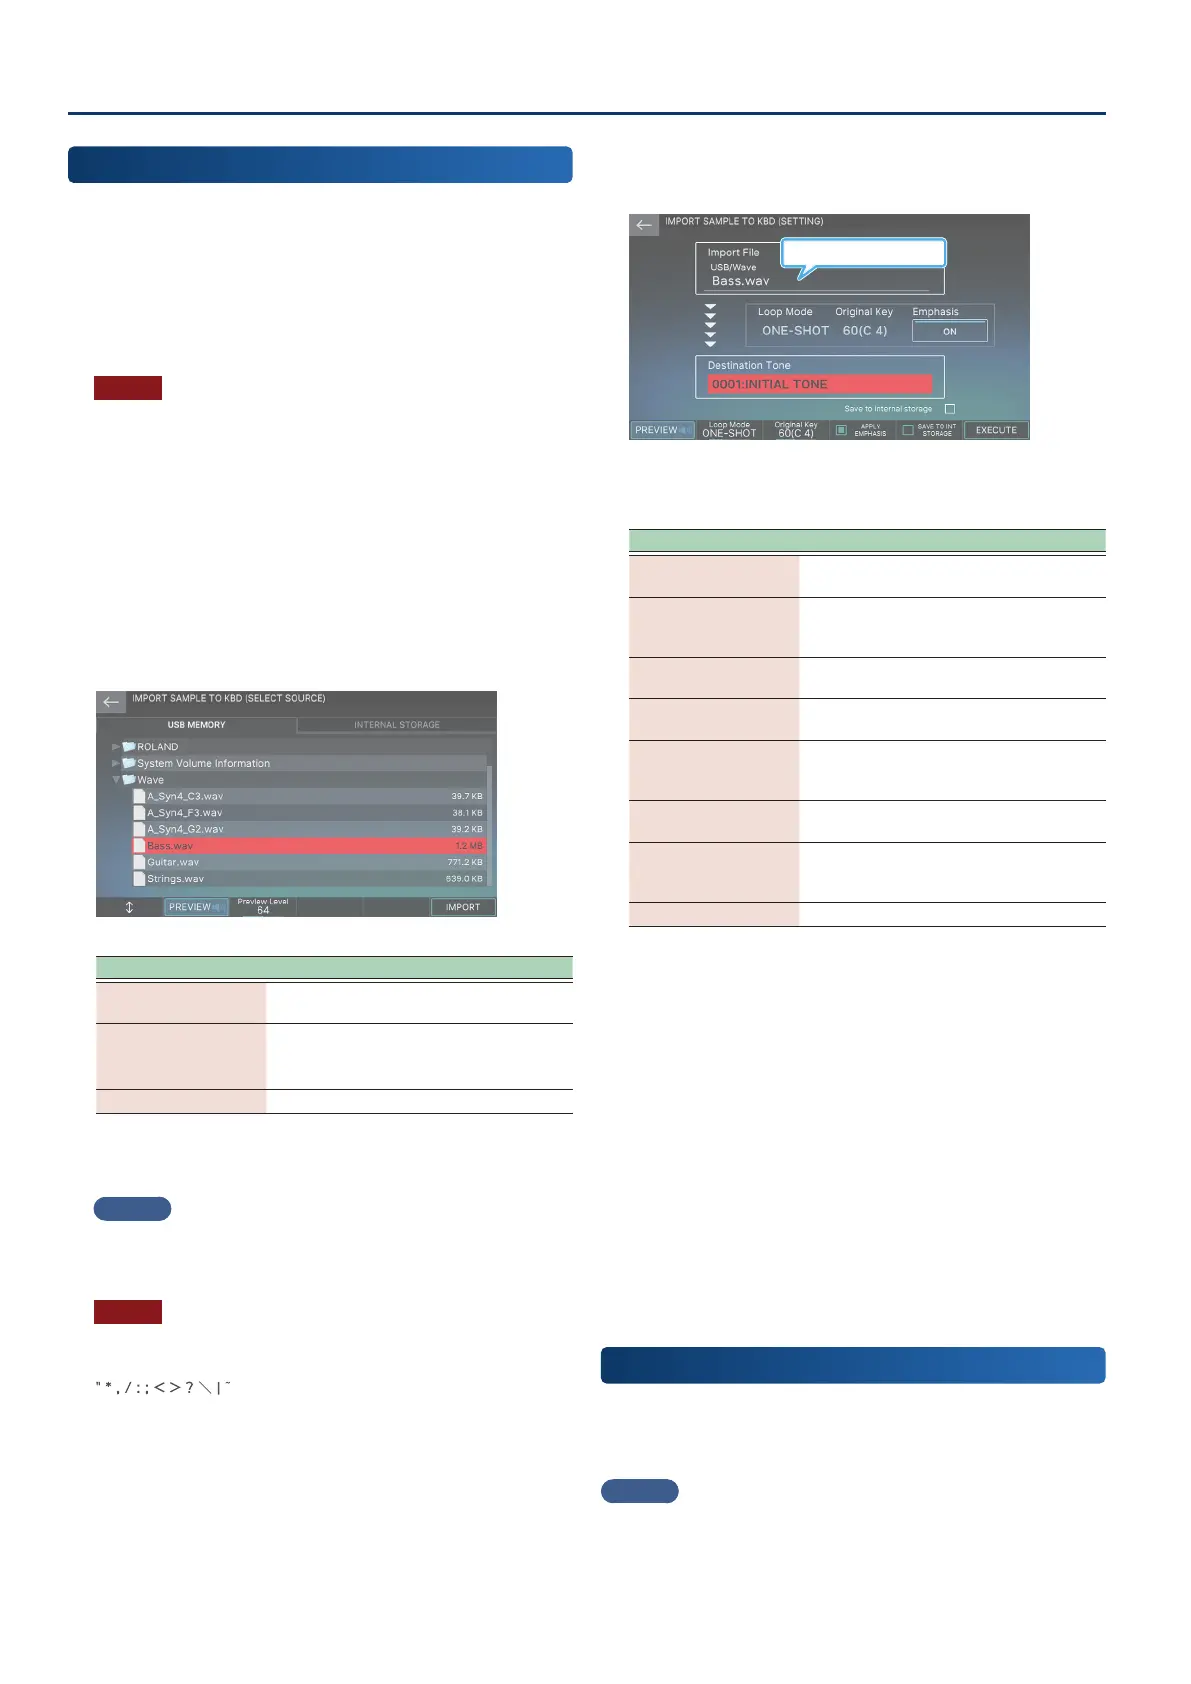
5. Select [E6] IMPORT.
The IMPORT SAMPLE TO KBD (SETTING) screen appears.
Name of le to be imported
6. Edit the desired parameters.
Menu Explanation
Destination Tone
Select the number of the user tone that
uses the audio le you imported.
Emphasis
When this is “ON”, pre-emphasis
(which emphasizes the high end of the
sample) is applied to the imported sound.
[E1] PREVIEW
You can preview the audio le while
pressing this knob.
[E2] Loop Mode
Selects how the sample is played back
(p. 103).
[E3] Original Key
Sets the note number that plays back the
sample at the same pitch at which it was
recorded.
[E4] APPLY EMPHASIS
When this is “ON”, the high end of the
imported sample’s sound is emphasized.
[E5] SAVE TO
STORAGE
The sampled wave is saved in WAV format
on internal storage (in the INT:KBD_SMPL
folder).
[E6] EXECUTE Executes the operation.
7. When you are nished making settings, select [E6]
EXECUTE.
A conrmation message appears.
8. Select [E5] OK.
The IMPORT operation is executed.
If you decide to cancel, select [E6] CANCEL.
This creates a user tone that uses the imported waveform.
The user tone that was created is selected in the current
zone and shown on the screen (ZONE VIEW1 display).
9. Play the keyboard.
You can play the imported sound in the current zone, with
the pitches matching the notes you play.
Importing an Audio File
(To Pad)
“IMPORT To Pad” combines all of the steps you need to make the
audio les you imported playable from the pad.
For details, refer to “Importing an Audio File (To Pad)” (p. 97).
MEMO
A preview is available in the le selection screen.

 Loading...