Chapter 3 Mounting the enclosure
12 CNT-SVN01C-EN
Mounting the enclosure
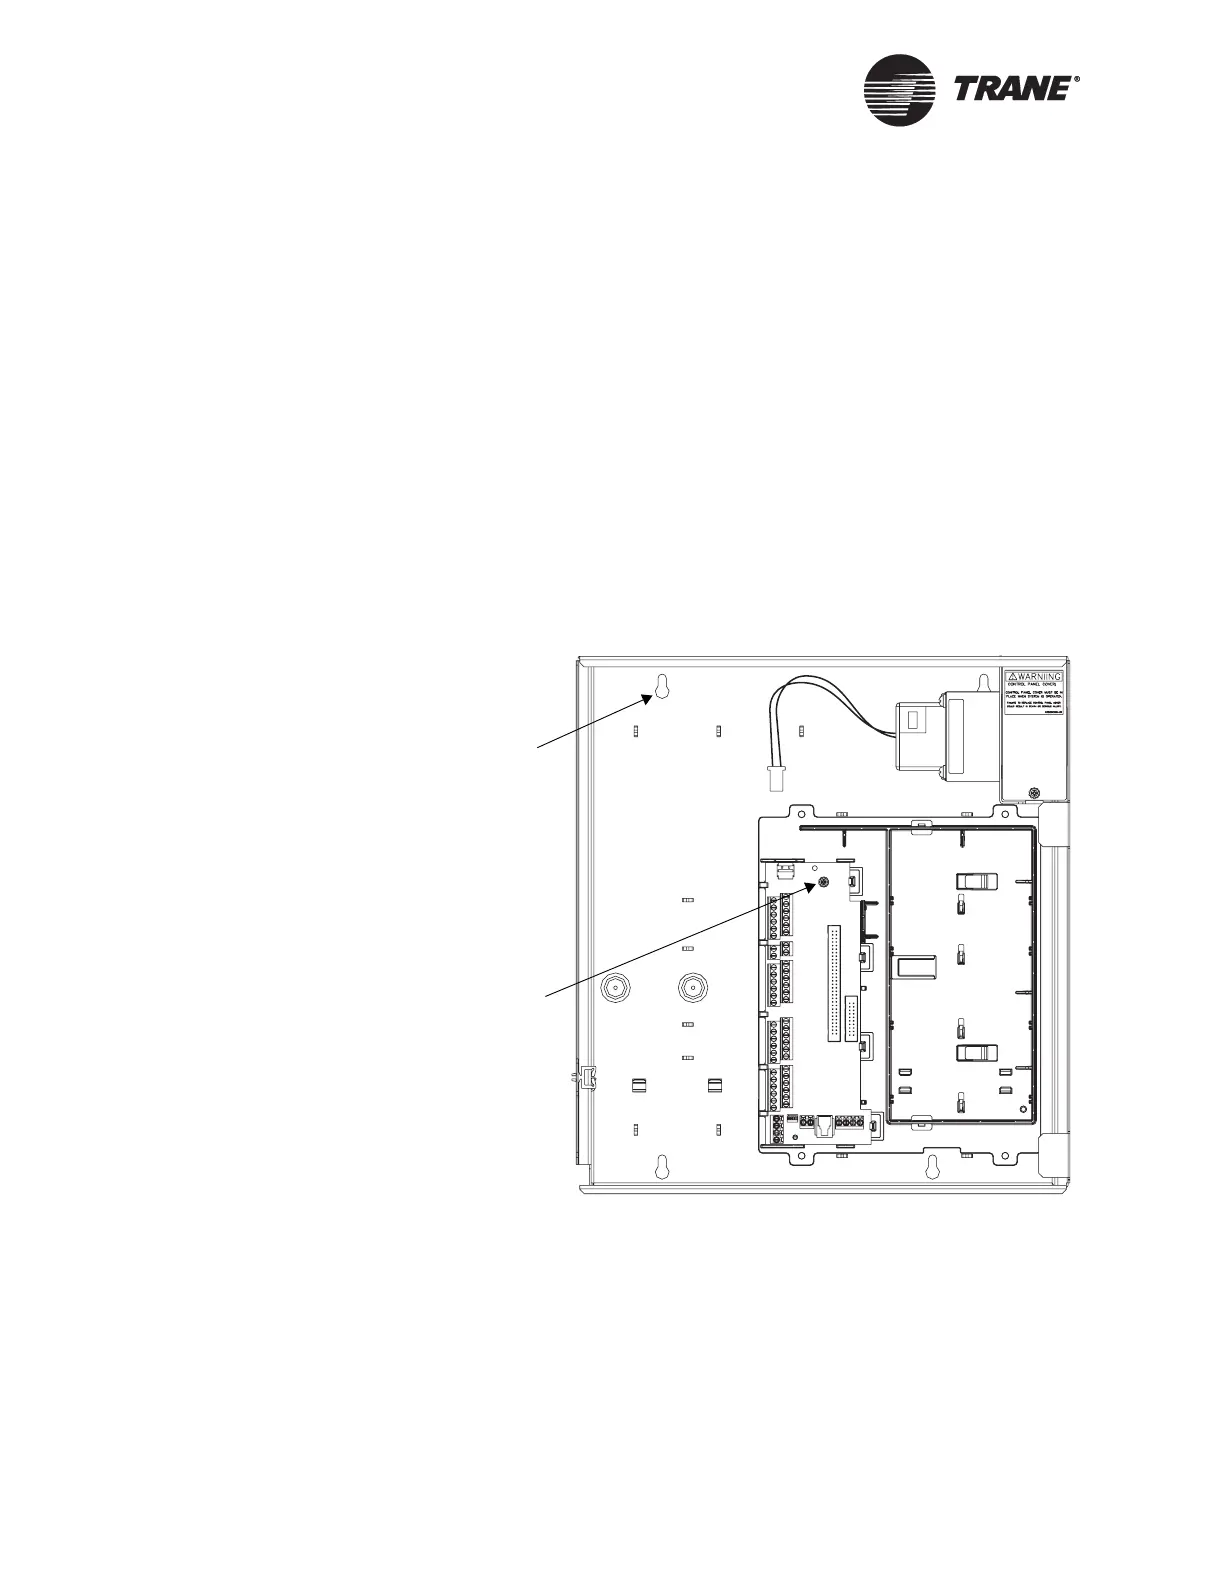
The back of the enclosure is shipped with the termination board installed
inside of it.
IMPORTANT
The termination board should be shipped with the grounding screw
installed. Verify this by checking the location shown in Figure 7.
The enclosure door is shipped separately. If the door has already been
attached to the enclosure back, remove it.
To mount the enclosure:
1. Using the enclosure as a template, mark the location of the four
mounting holes on the mounting surface (see Figure 7).
Figure 7. Enclosure mounting holes
2. Set the enclosure aside and drill holes for the screws at the marked
locations.
Drill holes for #10 (5 mm) screws or #10 wall anchors. Use wall
anchors if the mounting surface is dry wall or masonry.
3. Insert wall anchors if needed.
4. Secure the enclosure to the mounting surface with the supplied
#10 (5 mm) screws.
Mounting hole
(four locations)
Termination board
grounding screw

 Loading...