ConneCt Com mun iC ation C aB le to
thermos tat
2
1
3
AB +-
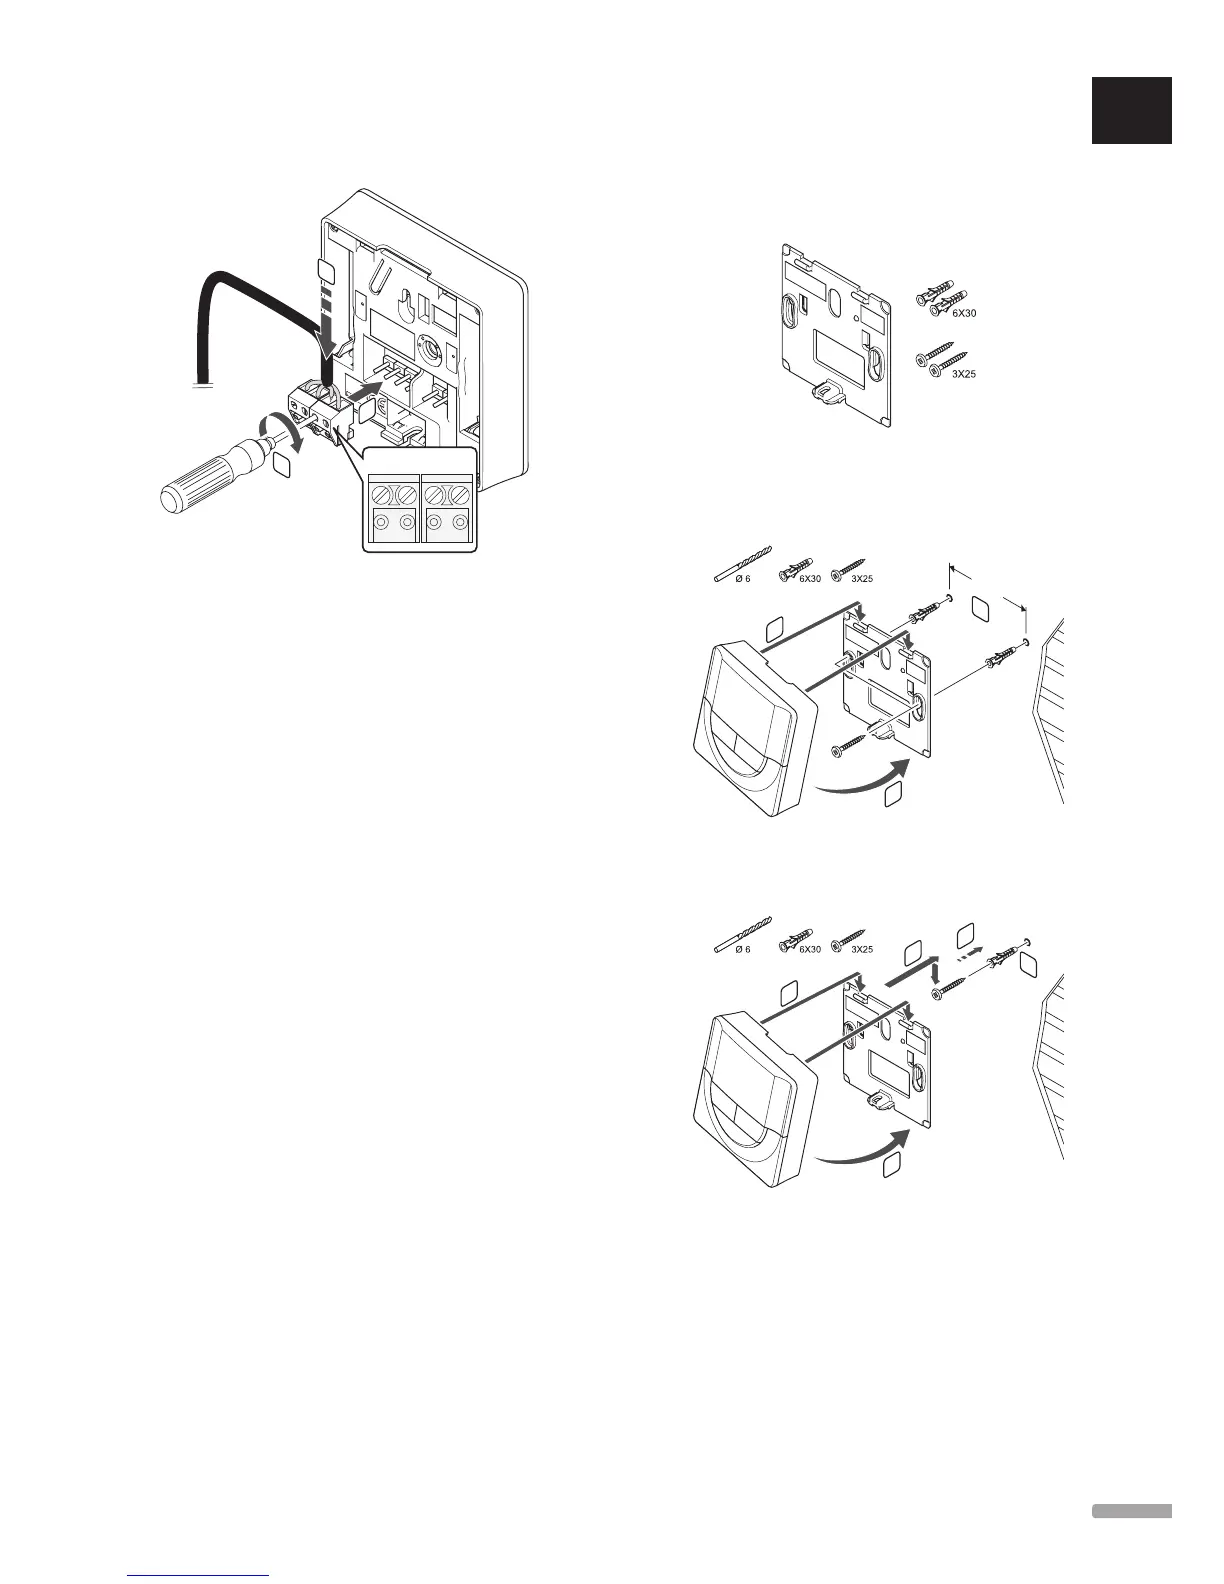
To connect a communication cable to a timer:
1. Insert the four wires into the removable connectors
marked (A,B, + and -) on the timer.
2. Tighten the screws fixing the wires in the connector.
3. Insert the connectors on the input pegs on the
timer.
Conne Ct CaBle to star mod ule
To connect a communication cable to a star module:
1. Lead the cables through cable entries in the star
module frame.
2. Insert the four wires (A,B, + and -) into the
connector on the electrical card.
3. Tighten the screws fixing the wires in the connector.
7.4 Attach a timer to the wall
The timer is delivered in kits including screws, wall
plugs, and a wall bracket, presenting several options of
attaching the timer to the wall.
using Wall BraCKet (r eCommended)
The illustration below shows timer mounting hole
positions and how to attach it to the wall using a wall
bracket.
2
3
1
60 mm
The illustration below shows how to attach it to the wall
using one screw and wall plug.
2
3
4
5
1
UK
CZ
DE
DK
EE
ES
FI
FR
HR
HU
IT
LT
LV
NL
NO
PL
PT
RO
RU
SE
SK
UPONOR SMATRIX BASE/BASE PRO · INSTALLATION AND OPERATION MANUAL
 Loading...