Vertiv | SmartAisle2 | User Manual 95
Installation
2.12. Roof opening system installation
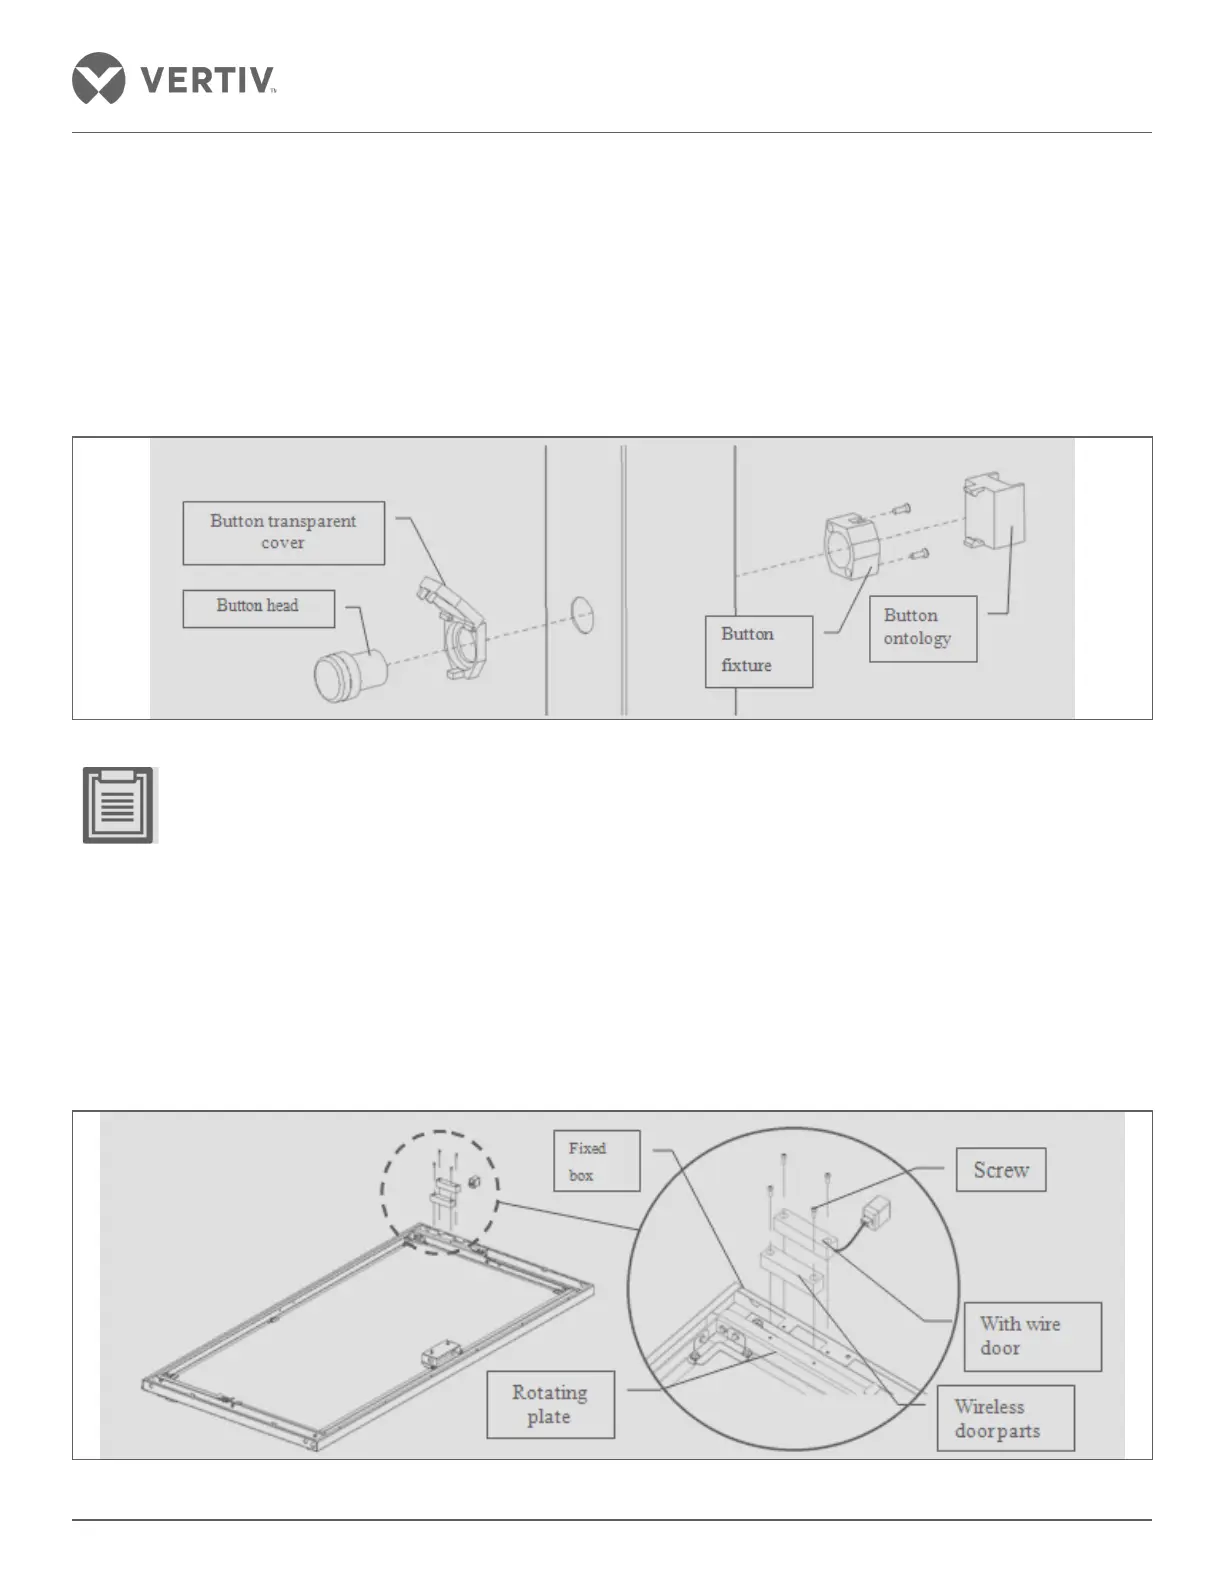
2.12.1. Installation of roof opening button
Using a flathead screwdriver to gently press the side snap button. The button body is removed. On removing the
screws, loosen the fastening member fixing the button, the button and the head through the transparent cover
panel. Tighten the screw of the button fastener sleeve following which the button body of the card holder needs
to be tightened.
Figure 2-104 Button to open the roof installation
• The transparent cover opens in the upward direction.
• Put the fixing member by using the screws.
• The sliding door open button is inside the channel on the column and has the same mounting method and
is inclusive of a swing door.
2.12.2. Magnetic Roof installation
Screw the door sensor cable with the top plate fixing frame firmly fixed to the cross member, and the other side
door is fixed to the rotary magnetic plate.
Figure 2-105 Magnetic roof installation
 Loading...