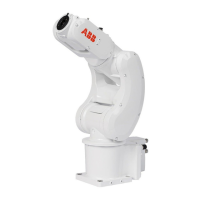
6.7 Checking the synchronization position
Introduction
Check the synchronization position of the robot before beginning any programming
of the robot system. This may be done:
• Using a MoveAbsJ instruction with argument zero on all axes.
• Using the Jog window on the FlexPendant.
Using a MoveAbsJ instruction
Use this procedure to create a program that runs all the robot axes to their
synchronization position.
NoteAction
Tap Code.1
Create a new program.2
Use MoveAbsJ in the Add Instruction menu.3
Create the following program:
MoveAbsJ [[0,0,0,0,0,0],
[9E9,9E9,9E9,9E9,9E9,9E9]]
\NoEOffs, v1000, fine, tool0
4
Run the program in manual mode.5
See Synchronization marks and
synchronization position for axes on
page 283 and Updating revolution
counters on page 285.
Check that the synchronization marks for the axes
align correctly. If they do not, update the revolu-
tion counters.
6
Using the jogging window
Use this procedure to jog the robot to the synchronization position of all axes.
NoteAction
Tap Jog.1
From the Mechanical unit list select a
mechanical unit.
2
From the Motion mode section, select an
axis-set that need to be jogged.
3
For example, to jog axis 2, select the axis
set Axis 1-3.
Follow the screen instruction on joystick
movements to understand the direction of
the axis that you want to move and move
the joystick.
4
Manually run the robots axes to a position
where the axis position value read on the
FlexPendant, is equal to zero.
5
See Synchronization marks and synchron-
ization position for axes on page 283 and
Updating revolution counters on page 285.
Check that the synchronization marks for
the axes align correctly. If they do not, up-
date the revolution counters.
6
Product manual - IRB 1010 305
3HAC081964-001 Revision: B
© Copyright 2022 ABB. All rights reserved.
6 Calibration
6.7 Checking the synchronization position
 Loading...