114 Rockwell Automation Publication 1756-UM540E-EN-P - December 2017
Chapter 6 Install ControlLogix Analog I/O Modules
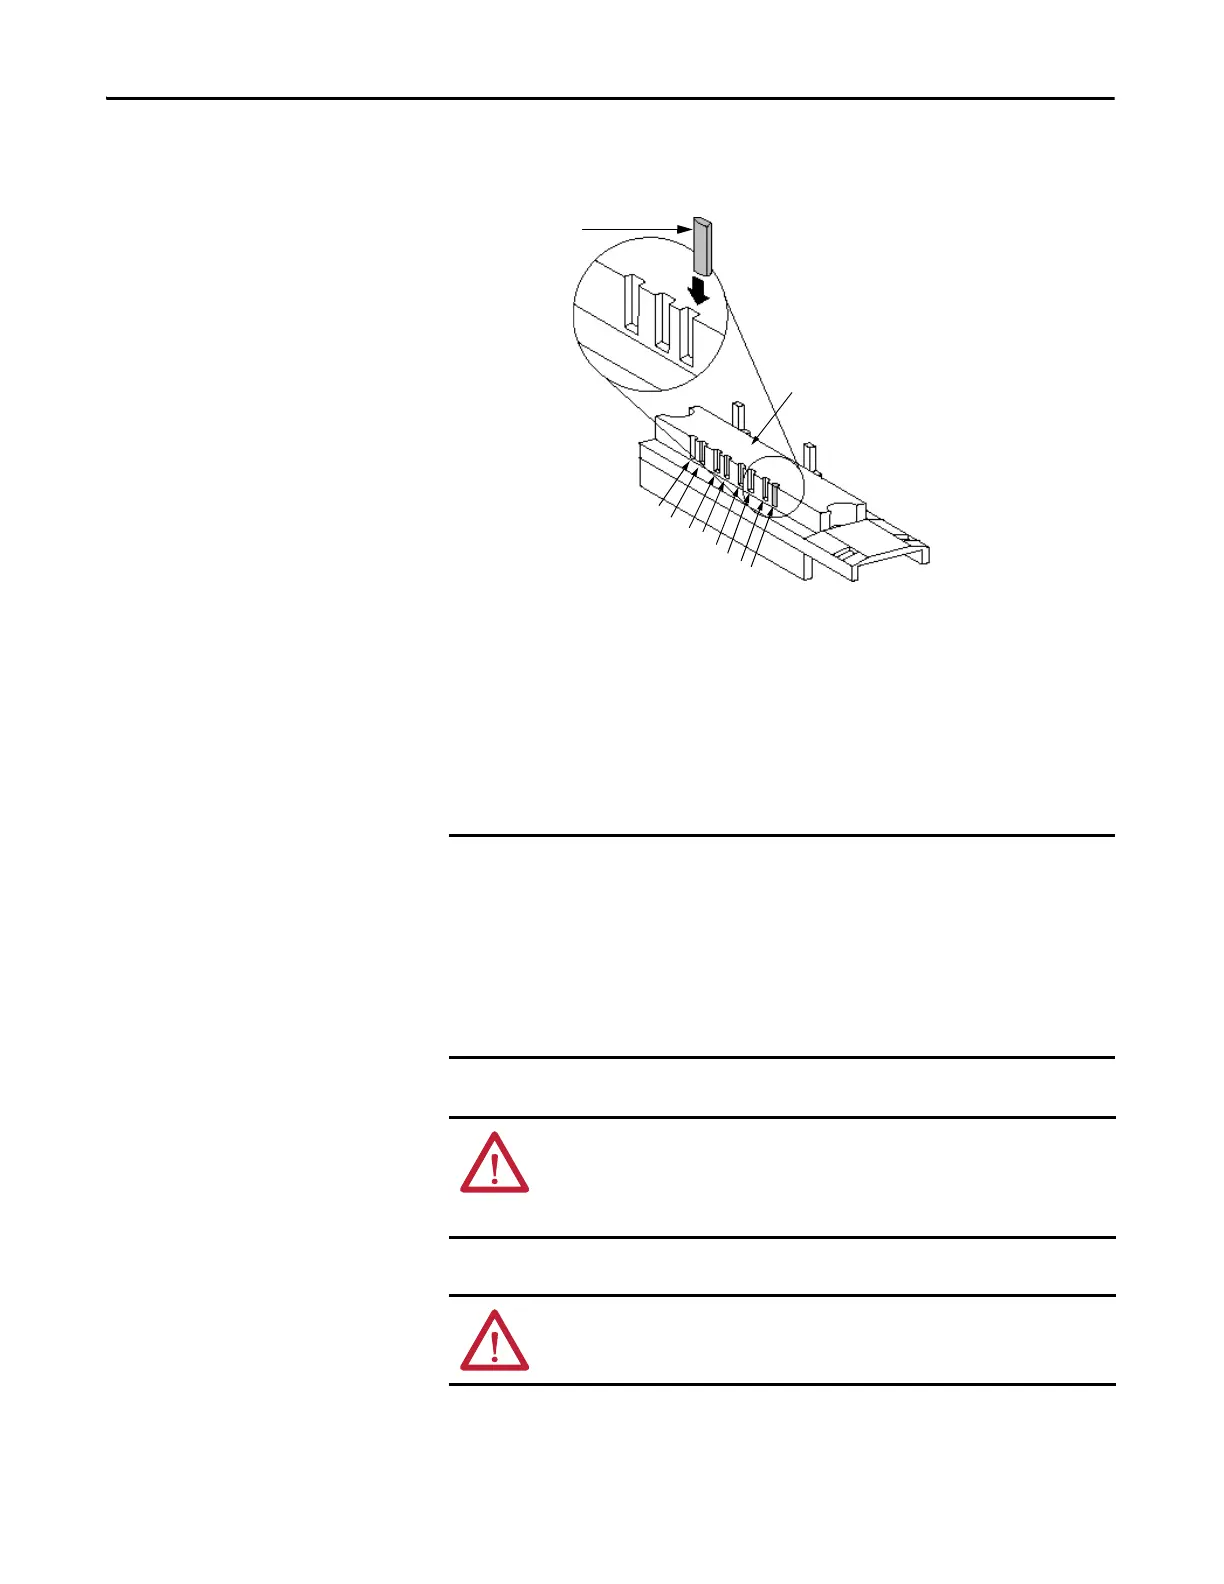
4. Insert the wedge-shaped tab on the RTB with the rounded edge first.
5. Push the tab onto the RTB until it stops.
Connect Wiring
Connect wiring to the module with an RTB or a Bulletin 1492 pre-wired Analog
Interface Module (AIFM). This section describes how to wire the module with
an RTB. If you are using an AIFM to connect wiring, see the documentation for
that product.
Wedge-shaped
Keying Tab
Module Side of the RTB
0
1
2
3
4
5
6
7
20851-M
We recommend that you use Belden 8761 cable when wiring the RTB for the
following ControlLogix analog modules:
• 1756-IF8I
• 1756-OF8I
• 1756-IRT8I on points that use the Thermocouple functionality
We recommend that you use Belden 9533 or 83503 cable with the 1756-IRT8I
module on points that use the RTD functionality.
WARNING: If you connect or disconnect wiring while the field-side power is on,
an electrical arc can occur. This could cause an explosion in hazardous location
installations. Be sure that power is removed or the area is nonhazardous before
proceeding.
ATTENTION: If multiple power sources are used, do not exceed the specified
isolation voltage.
 Loading...