92 Rockwell Automation Publication 1756-UM540E-EN-P - December 2017
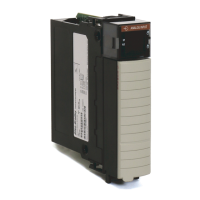
Chapter 5 1756-OF8I Isolated Analog Output Module
You can disable or latch clamping alarms on a per channel basis. The alarms are
disabled by default.
Clamp/Limit Alarms
This function works directly with clamping. When a module receives a data value
from the controller that exceeds clamping limits, it applies signal values to the
clamping limit but also sends a status bit to the controller notifying it that the
value sent exceeds the clamping limits.
With the previous example, if a module has clamping limits of 8V and -8V but
then receives data to apply 9V, only 8V is applied to the screw terminals and the
module sends a status bit back to the controller informing it that the 9V value
exceeds the module’s clamping limits.
To see where to set clamp and limit alarms, see page 139
.
Data Echo
Data Echo automatically multicasts channel data values that match the analog
value that was sent to the module’s screw terminals at that time.
The 1756-OF8I module returns a status word that represents the value sent to it
by the controller. The echoed value is indicated in input tag I.Ch[x].Data and is
represented in Engineering Units.
Fault and status data are also sent. This data is sent at the RPI.
Clamp values are in engineering units and are not automatically
updated when the scaling high and low engineering units are changed.
Failure to update the clamp values can generate a very small output signal
that could be misinterpreted as a hardware problem.
For example, a 1756-OF8I module channel that uses a Current (mA) output
type with Clamping enabled has the following configuration parameters:
• Scaling values:
– High Engineering = 100.0000%
– Low Engineering = 0.0000%
• Clamp Limits:
– High Clamp = 100.0000%
– Low Clamp = 0.0000%
If you change the Scaling High Engineering value to 90.0000%, the High
Clamp value remains at 100.0000.
You must change the High Clamp value to 90.0000 to make sure the
application continues to operate as expected.
 Loading...