Rockwell Automation Publication 2711P-UM007D-EN-P - December 2015 27
Install the PanelView Plus 7 Standard Terminal Chapter 2
Prepare for Panel Mounting
Before mounting a terminal in a panel, read this section and the entire
installation procedure on page 30
.
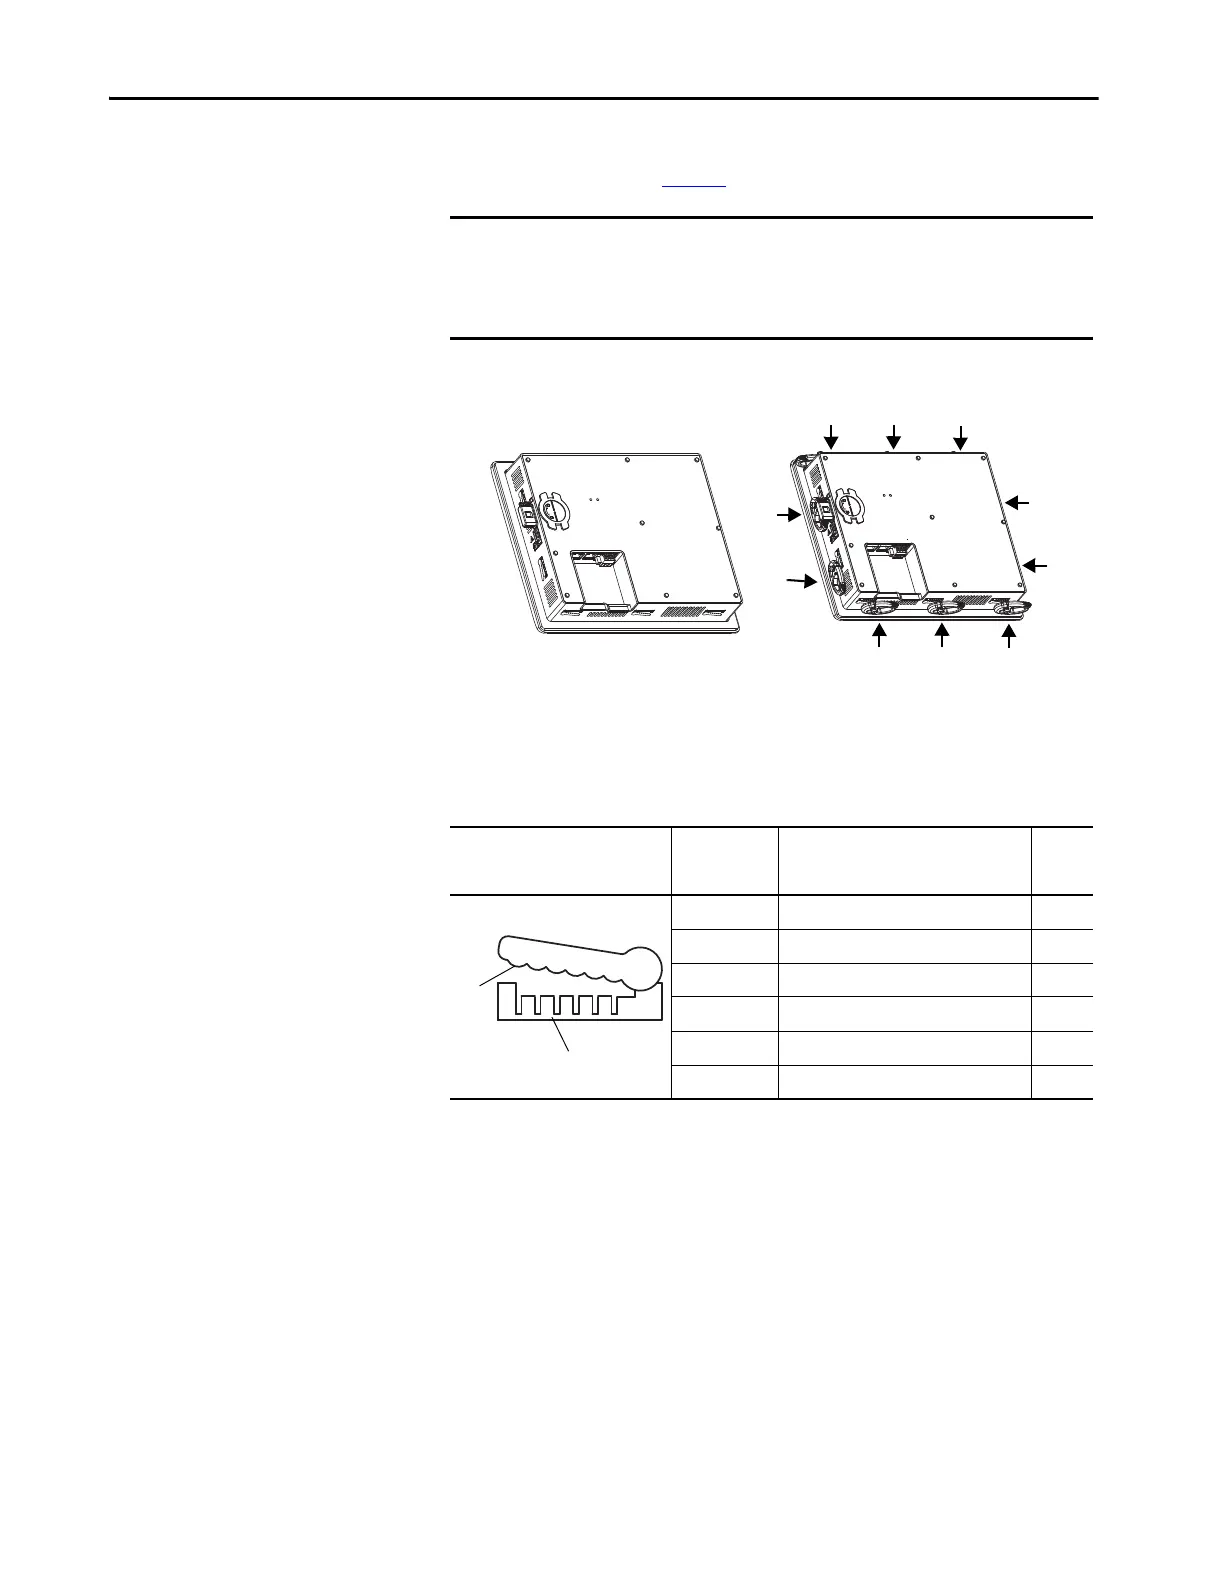
Mounting levers insert into the slots around the bezel to secure the terminal in
the panel. The number of mounting levers varies by terminal size.
Each slot has six notches with alignment marks that are locking positions for a
mounting lever. The thickness of the panel that you mount the terminal in
determines the locking position that is required to maintain a NEMA, UL
Type, and IP seal.
Always orient a mounting lever vertically before inserting it into a slot. This
method is the only way to slide the mounting lever knob within the slot for
positioning. After sliding the mounting lever to a specific notch, rotate the
mounting lever toward the panel to lock it in position. The flat side of the
mounting lever must come into contact with the panel.
IMPORTANT Use catalog number 2711P-RMCS mounting levers (gray) for PanelView
Plus 7 Standard terminals. Do not use these mounting levers with any other
PanelView Plus terminals. Do not use black mounting levers; they are not
compatible with PanelView Plus 7 Standard terminals.
Table 14 - Mounting Lever Locking Positions
Mounting Slot
Mounting
Lever Lock
Position
Panel Thickness Range
Typical
Gauge
1
1.50…2.01 mm (0.060…0.079 in.) 16
2
2.03…2.64 mm (0.08…0.104 in.) 14
3
2.67…3.15 mm (0.105…0.124 in.) 12
4
3.17…3.66 mm (0.125…0.144 in.) 10
5
3.68…4.16 mm (0.145…0.164 in.) 8/9
6
4.19…4.80 mm (0.165…0.188 in.) 7
16
1
2
3
4
5
6
 Loading...