34 Rockwell Automation Publication 2711P-UM007D-EN-P - December 2015
Chapter 2 Install the PanelView Plus 7 Standard Terminal
Remove and Replace Power
Terminal Block
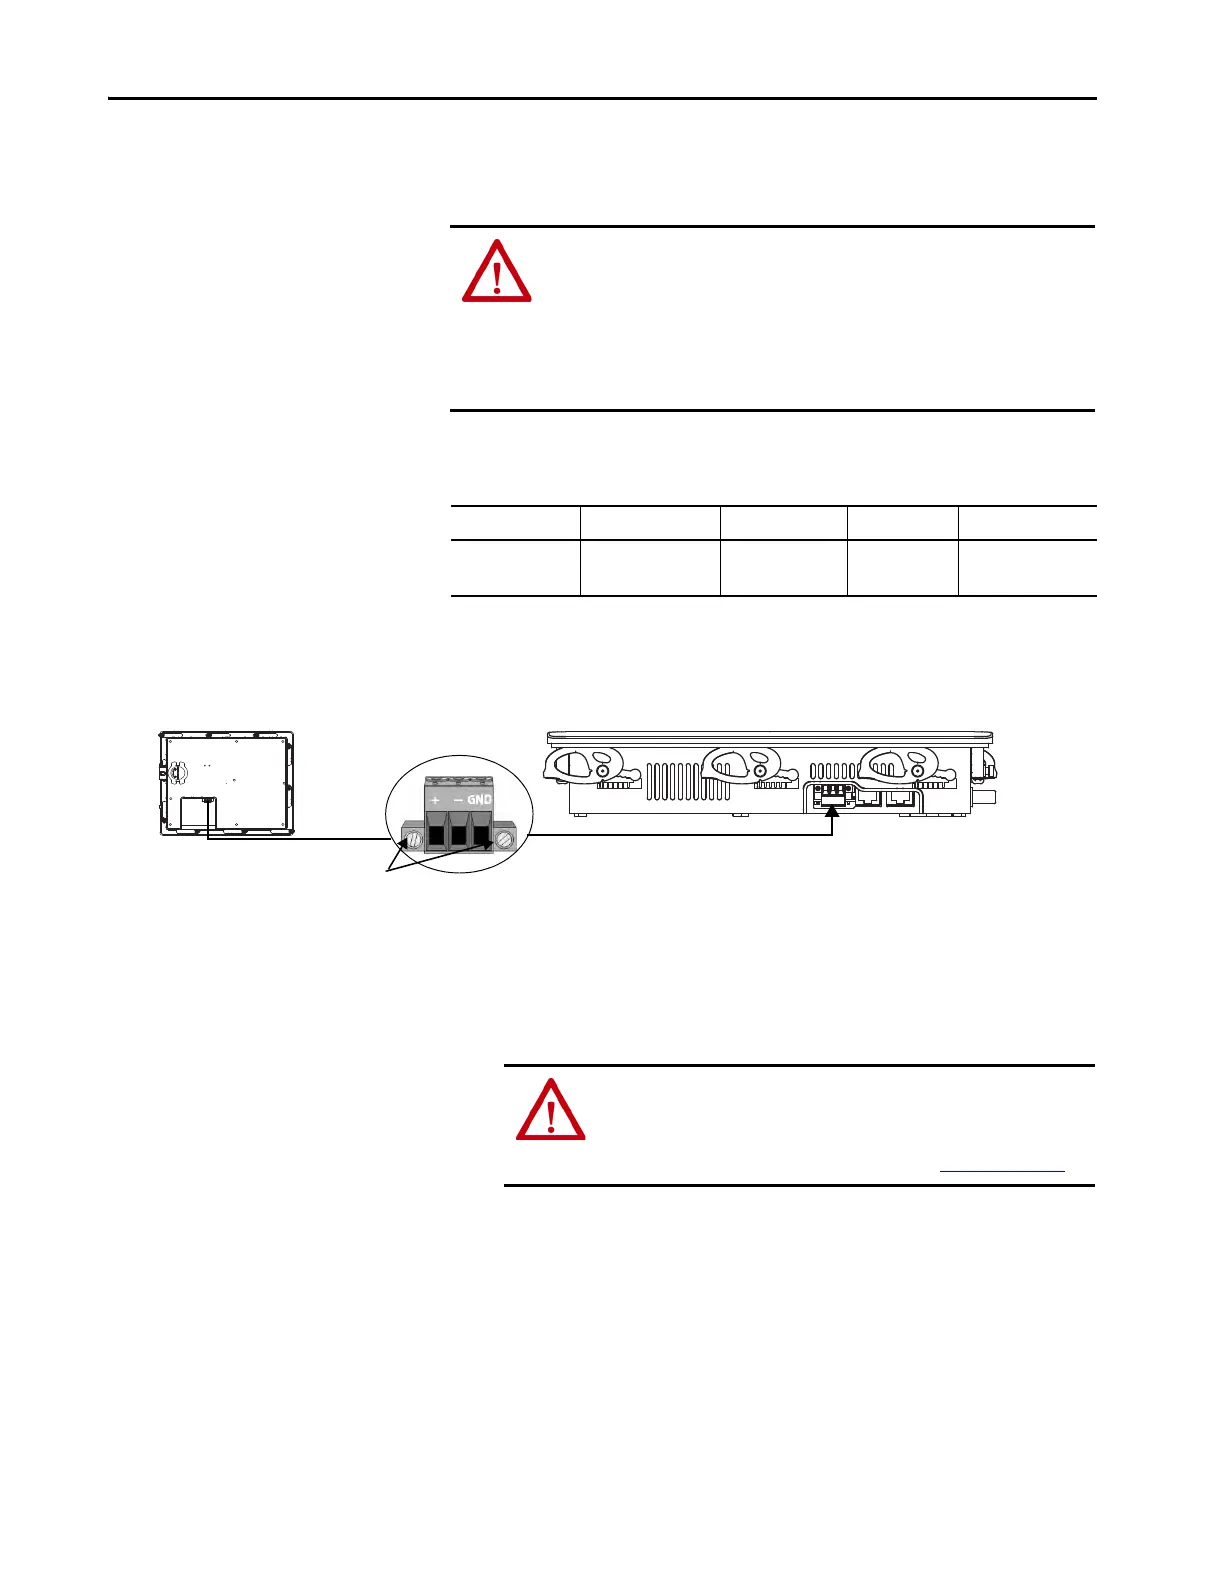
The product has a three-pin terminal block for power connections. You can
remove the terminal block for ease of installation, wiring, and maintenance.
Use a 0.6 x 3.5-mm flat blade screwdriver for terminal block wiring.
To remove the power terminal block, follow these steps.
1. Loosen the two screws that secure the terminal block.
2. Gently pull the terminal block away from the connector.
To install the power terminal block, follow these steps.
1. Press the terminal block onto the connector until seated.
2. Tighten the two screws that secure the terminal block to the connector.
WARNING: Explosion Hazard
If you connect or disconnect wiring while the power is on, an electric arc can
occur. This arc can cause an explosion in hazardous location installations. Make
sure that the power is off and the area is nonhazardous before proceeding.
Failure to turn power off can result in electrical shock or damage to the
terminal.
Table 15 - Wire Specifications for Power Input Terminal Block
Wire Type Dual-wire Size
(1)
(1) Two-wire maximum per terminal.
Single-wire Size Strip Length Screw Torque
Stranded or solid
Cu 90 °C (194 °F)
0.3…1.3 mm
2
22…16 AWG
0.3…2.1 mm
2
(22…14 AWG)
7 mm (0.28 in.) 0.56 N•m (5.0 lb•in)
Series B terminal with dual
Ethernet ports shown.
ATTENTION: Do not use excessive force to press the DC terminal
block into position. The DC terminal block is keyed to fit the DC
connector. If the terminal block does not fit into the connector, verify
that you have the correct DC terminal block. See Table 5 on page 17
.
 Loading...