Step 3
Position the chassis so that you have the most comfortable access to the chassis to remove the DIMM.
Step 4
Locate the DIMMs on the Cisco ASR 1001-X Router. See the following figure.
Step 5
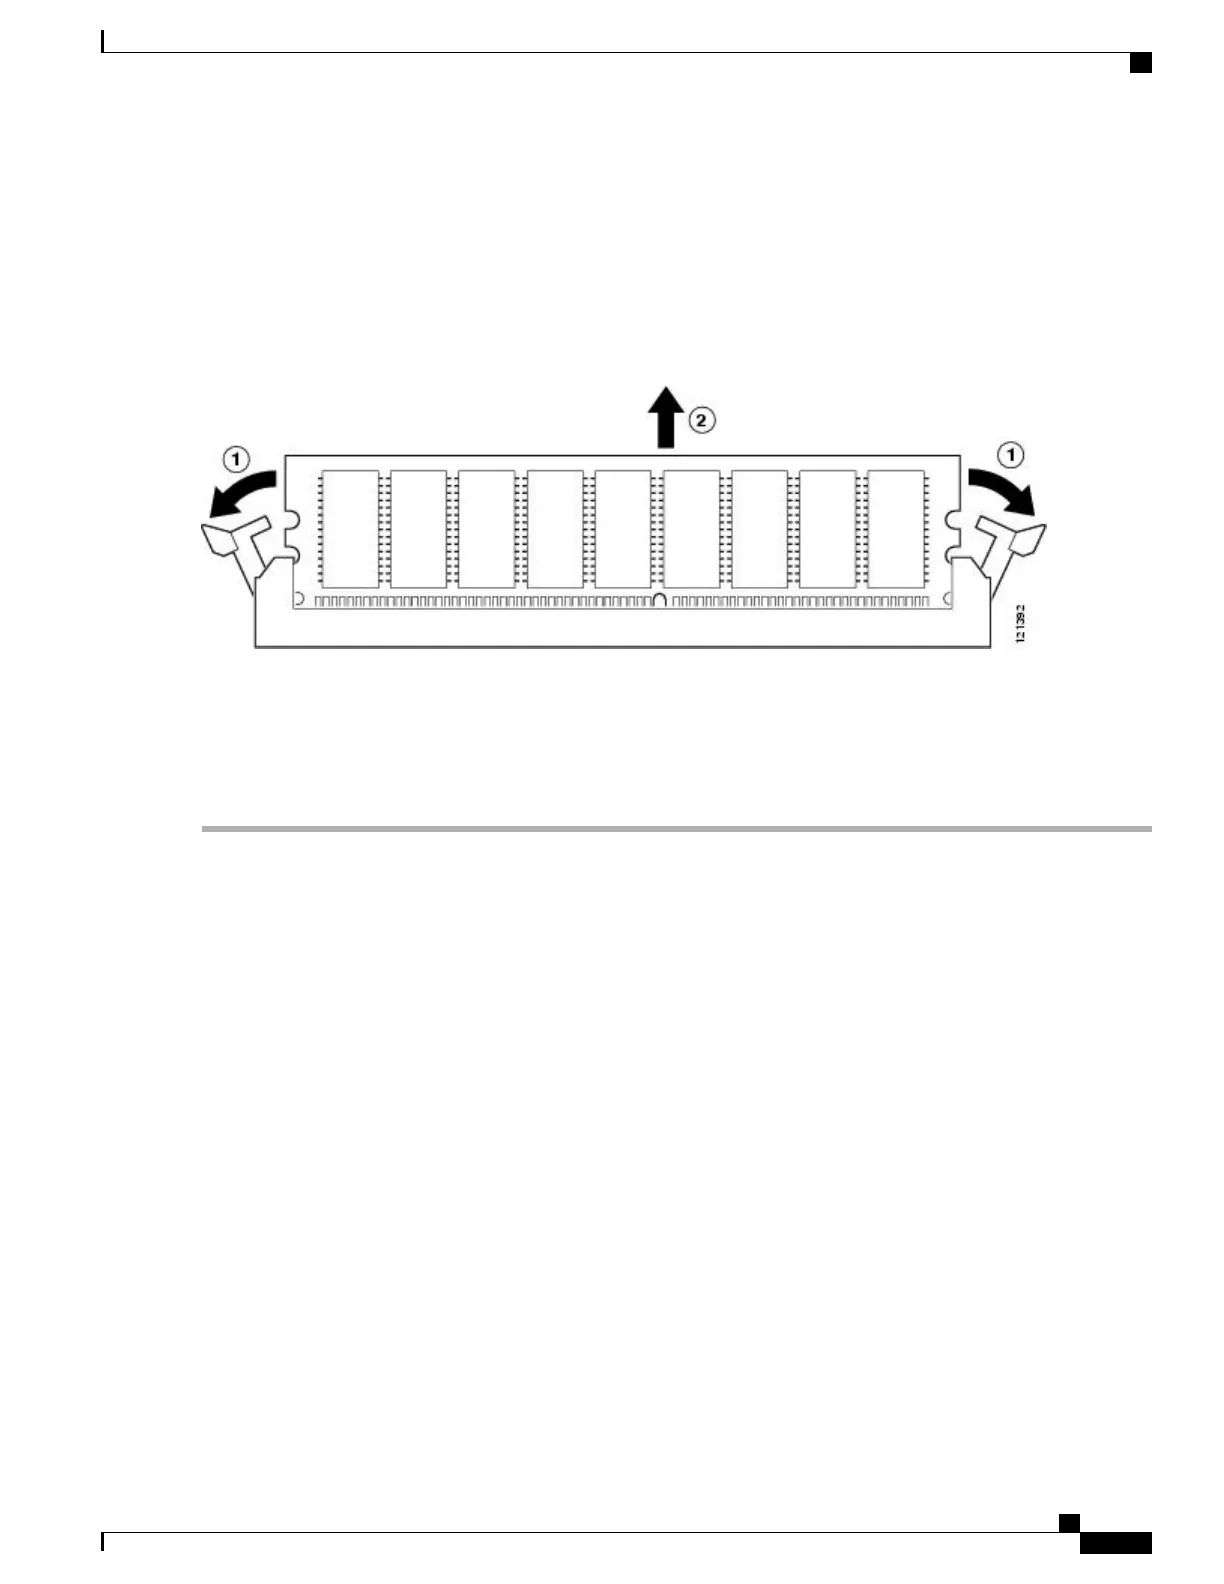
Pull down the DIMM module spring latches to release the corresponding DIMM from the socket. See the following
figure.
Figure 19: DIMM Module Spring Latches to Remove the DIMMs from the Cisco ASR 1001-X Router
Step 6
When both ends of the DIMM are released from the socket, grasp each end of the DIMM with your thumb and forefinger
and pull the DIMM completely out of the socket. Handle only the edges of the DIMM; avoid touching the memory
module, pins, and the metal traces (the metal fingers along the connector edge of the DIMM) along the socket edge.
Step 7
Place the DIMM in an antistatic bag to protect it from ESD damage.
Step 8
Repeat Step 5 through Step 7 for the remaining DIMMs, if required, for your upgrade.
What to Do Next
This completes the steps for removing the Cisco ASR 1001-X Router DIMMs from the chassis.
Replacing a Cisco ASR 1001-X Router DIMM
This section lists the steps to replace a DIMM in the Cisco ASR 1001-X Router.
Cisco ASR 1001-X Router Hardware Installation Guide
105
Removing and Replacing FRUs from the Cisco ASR 1001-X Router
Removing and Replacing the Cisco ASR 1001-X Router DIMM Memory Module

 Loading...