xStack® DES-3200 Series Layer 2 Managed Fast Ethernet Switch
175
Host-Based Network Access Control
In order to successfully make use of 802.1X in a
shared media LAN segment, it would be necessary
to create “logical” Ports, one for each attached
device that required access to the LAN. The Switch
would regard the single physical Port connecting it
to the shared media segment as consisting of a
number of distinct logical Ports, each logical Port
being independently controlled from the point of
view of EAPOL exchanges and authorization state.
The Switch learns each attached devices’ individual
MAC addresses, and effectively creates a logical
Port that the attached device can then use to
communicate with the LAN via the Switch.
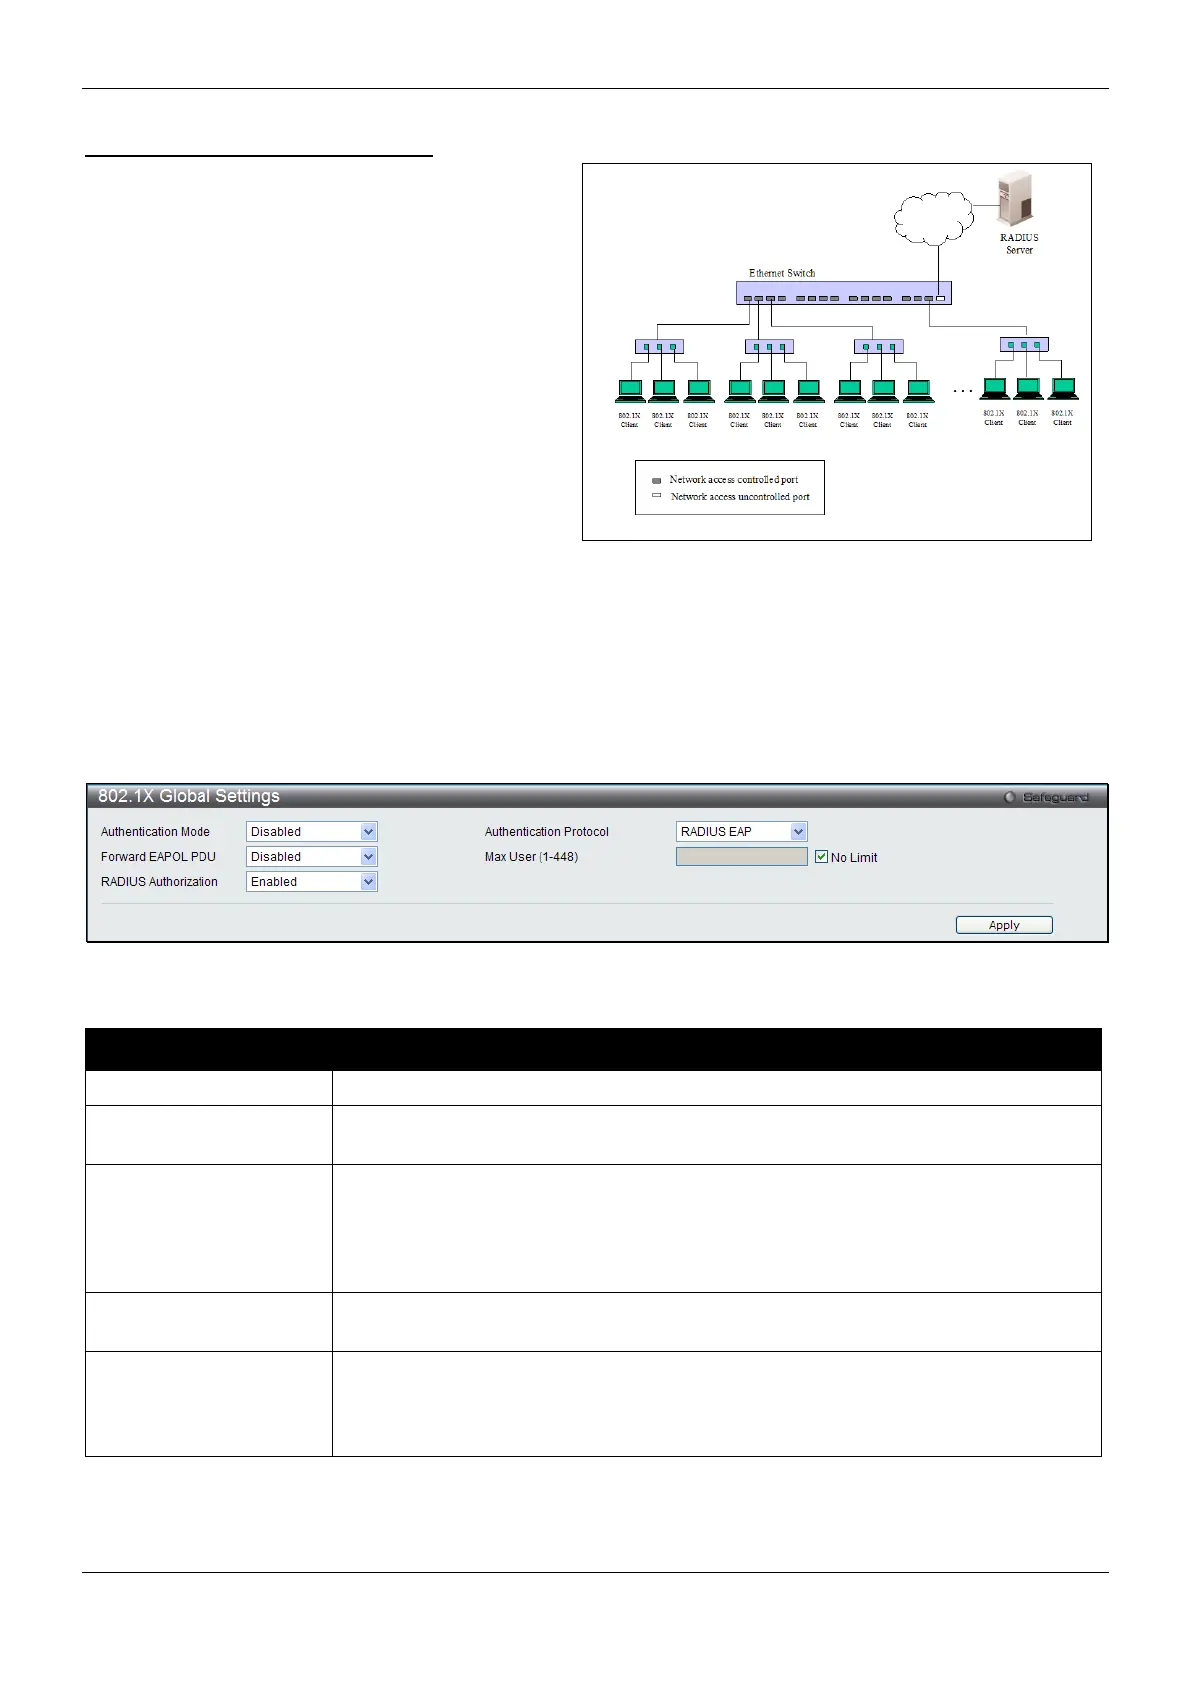
Figure 8-8 Example of Typical Host-based Configuration
802.1X Global Settings
Users can configure the 802.1X global parameter.
To view this window, click Security > 802.1X > 802.1X Global Settings as shown below:
Figure 8-9 802.1X Global Settings window
The fields that can be configured are described below:
Parameter Description
Choose the 802.1X authenticator mode, Disabled, Port-based, or MAC-based.
Authentication
Choose the authenticator protocol, Local or RADIUS EAP.
Forward EAPOL PDU
This is a global setting to control the forwarding of EAPOL PDU. When 802.1X
functionality is disabled globally or for a port, and if 802.1X forward PDU is enabled
both globally and for the port, a received EAPOL packet on the port will be flooded
in the same VLAN to those ports for which 802.1X forward PDU is enabled and
802.1X is disabled (globally or just for the port). The default state is disabled.
Max Users (1-448) Specifies the maximum number of users. The limit on the maximum users is 448
users. Tick the No Limit check box to have 448 users.
RADIUS Authorization
This option is used to enable or disable acceptation of authorized configuration.
When the authorization is enabled for 802.1X’s RADIUS, the authorized data
assigned by the RADIUS server will be accepted if the global authorization network
Click the Apply button to accept the changes made.

 Loading...