28 Installation and Service Guide
Installing Hardware
4 Disconnect the USB cable from the USB Type B port on the printer interface board, and from the USB Type A port
on the printer.
5 Start the E-35A (see page 24).
Completing the installation
To complete the installation of the E-35A at the customer site, do the following:
1 Make sure that the E-35A and printer are turned off.
2 Set the power switch of the E-35A to ON (|) position.
3 Power on the E-35A using the power button (see Figure 8 on page 24).
Press once and release the button to power on the system. The power supply automatically senses the correct
voltage.
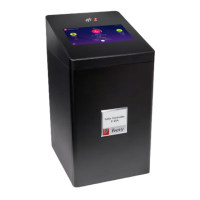
4 Check the activities on the Fiery QuickTouch.
The power supply automatically senses the correct voltage. Allow startup to proceed without interruption. Do not
press any buttons while the system is starting.Wait for the E-35A to power on.
5 Power on the printer using the main power switch on the front.
Wait until the E-35A becomes Idle.
6 Print the Test Page and Configuration page and ask the customer to verify the output (see page 29).
7 Perform any required system software upgrades. For instructions, see the documentation that accompanies the
system upgrade.
8 Ask the site administrator to perform Setup and print some test documents over the network.
9 Store the output and the current Configuration page(s) near the printer.
10 After the site administrator completes the Setup, use the Fiery System Restore to copy the contents of the E-35A
hard disk drive to an image file. For detailed instructions, see “Using Fiery System Restore” on page 88.
11 Inform the site administrator that the E-35A user software must be installed on networked computers that print to
the E-35A.
12 For additional installation instructions, see the service documentation that accompanies the E-35A.

 Loading...