55 Installation and Service Guide
Replacing Parts
3 Connect the USB cable and tie it to the support bracket using a tie wrap.
4 Connect the power cable.
Loop the cables around the guides available inside the chassis walls.
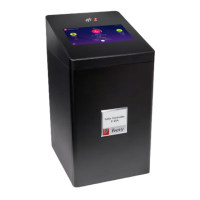
5 Insert the screw which holds the metal connector to the Fiery QuickTouch and tight it to secure the Fiery
QuickTouch.
6 Insert the front screw and tight it to secure the front portion of the Fiery QuickTouch
7 Insert the two rear screws and tight them to secure the rear portion of the Fiery QuickTouch.
8 Replace the front panel (see page 51).
9 Replace the chassis panel (see page 50).
Removing and replacing E-35A internal components
Before replacing costly components, be sure to verify the connections between the printer and the E-35A. Also, verify
the connections of each replaceable E-35A component. For more information about troubleshooting, see
“Troubleshooting” on page 103.
The following sections describe how to remove and install replaceable parts on the E-35A:
• Printer interface board
• Motherboard
• DIMM
• CPU and CPU cooling assembly
• Battery
• Chassis fan
• Power supply
• Hard disk drive (HDD)
For information about replacing other components, see the documentation that accompanies your printer.
Note: There may be tie-wraps used to secure the cables to the chassis. If necessary, cut these tie-wraps before
removing the components.
Caution:Use a screwdriver with a magnetic tip so you do not drop a loose screw into the E-35A.
Important: Be sure to use an ESD grounding wrist strap and follow standard ESD (electrostatic discharge)
precautions while performing these procedures. For details, see “Precautions” on page 10.

 Loading...