FLEX-6000 Signature Series – Maestro User Guide
Page 7
Copyright 2019 FlexRadio Systems. All Rights Reserved.
4 SETTING UP YOUR MAESTRO
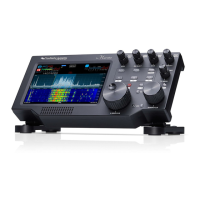
To operate your Signature Series Flex 6000 transceiver with your Maestro, you must provide power,
an Ethernet connection and an input device to the Maestro. Other equipment such as speakers,
headphones, line level signals and push-to-talk switches are optional.
4.1 POWER
Maestro requires a supply of 10 to 15 volt DC external power such as supplied by the wall power
adapter that is provided with the Maestro, or a supply such as is required to run the FLEX-6000 radio.
Additionally, Maestro may be powered by a user supplied 5-volt battery placed in the battery
compartment on the back of the Maestro.
Note: Maestro “A” models (those with serial numbers in the form xxxx-xxxx-0100-xxxx) must be
connected to DC power for 15 to 30 minutes every 4 to 6 weeks of non-use to ensure that the
internal display battery does not completely discharge. If the display battery discharges, the
Maestro will not boot, and a HelpDesk ticket will have to be opened to resolve the issue.
4.2 NETWORK CONNECTION
Maestro requires a network connection to your FLEX-6000 radio. This connection can take one of
two forms:
• A wired connection using the RJ-45 Ethernet port on the back of the Maestro. This
connection can take two forms
o A direct connection with a single wire, one end plugged into the Maestro, the other
end plugged into the FLEX-6000 transceiver. In this configuration, the Maestro and
the radio set up a two-node ad hoc network and communicate across it.
o An indirect connection through a Local Area Network switch. Many configurations
are possible, but typically the Maestro is connected to a 100/1000 BaseT port on the
switch, and the FLEX-6000 transceiver is connected to a similar port. A third agent,
such as an ISP supplied router-modem provides IP addresses to the network
components via a DHCP service.
Note: When Maestro is operated on battery power, the wired Ethernet port is
disabled.
• A Wi-Fi (wireless) connection using the built-in wireless adapter. On start-up, Maestro will
attempt to make a Wi-Fi connection using information from earlier sessions, or if no
recognized network is available, Maestro will present the Choose a Wi-Fi Network screen
showing available networks. Select a network by tapping its name, then tapping the Connect
button. You may be required to enter a password to access the network.
The next section of this document, section 5, Connecting to a Radio, describes the process of
selecting a radio and connecting to it.

 Loading...