FLEX-6000 Signature Series – Maestro User Guide
Page 8
Copyright 2019 FlexRadio Systems. All Rights Reserved.
4.3 INPUT DEVICE
A microphone or key is required to operate the transmitter in your FLEX-6000 transceiver. A straight
key or paddles can be plugged into the Key port on the back panel of the Maestro. A microphone
can be plugged into either the MIC 1 RJ-45 port or the MIC 2 1/8
th
inch TRS port.
4.4 MAKING THE BACK-PANEL CONNECTIONS
The following sections describe, in detail, the connections that can be made on the back panel of the
Maestro.
4.4.1 Straight Key or Paddles (KEY)
For CW operation, the ⅛ inch (3.5mm) TRS KEY connector accepts a TRS plug for operating a keyer
with paddles or a straight key.
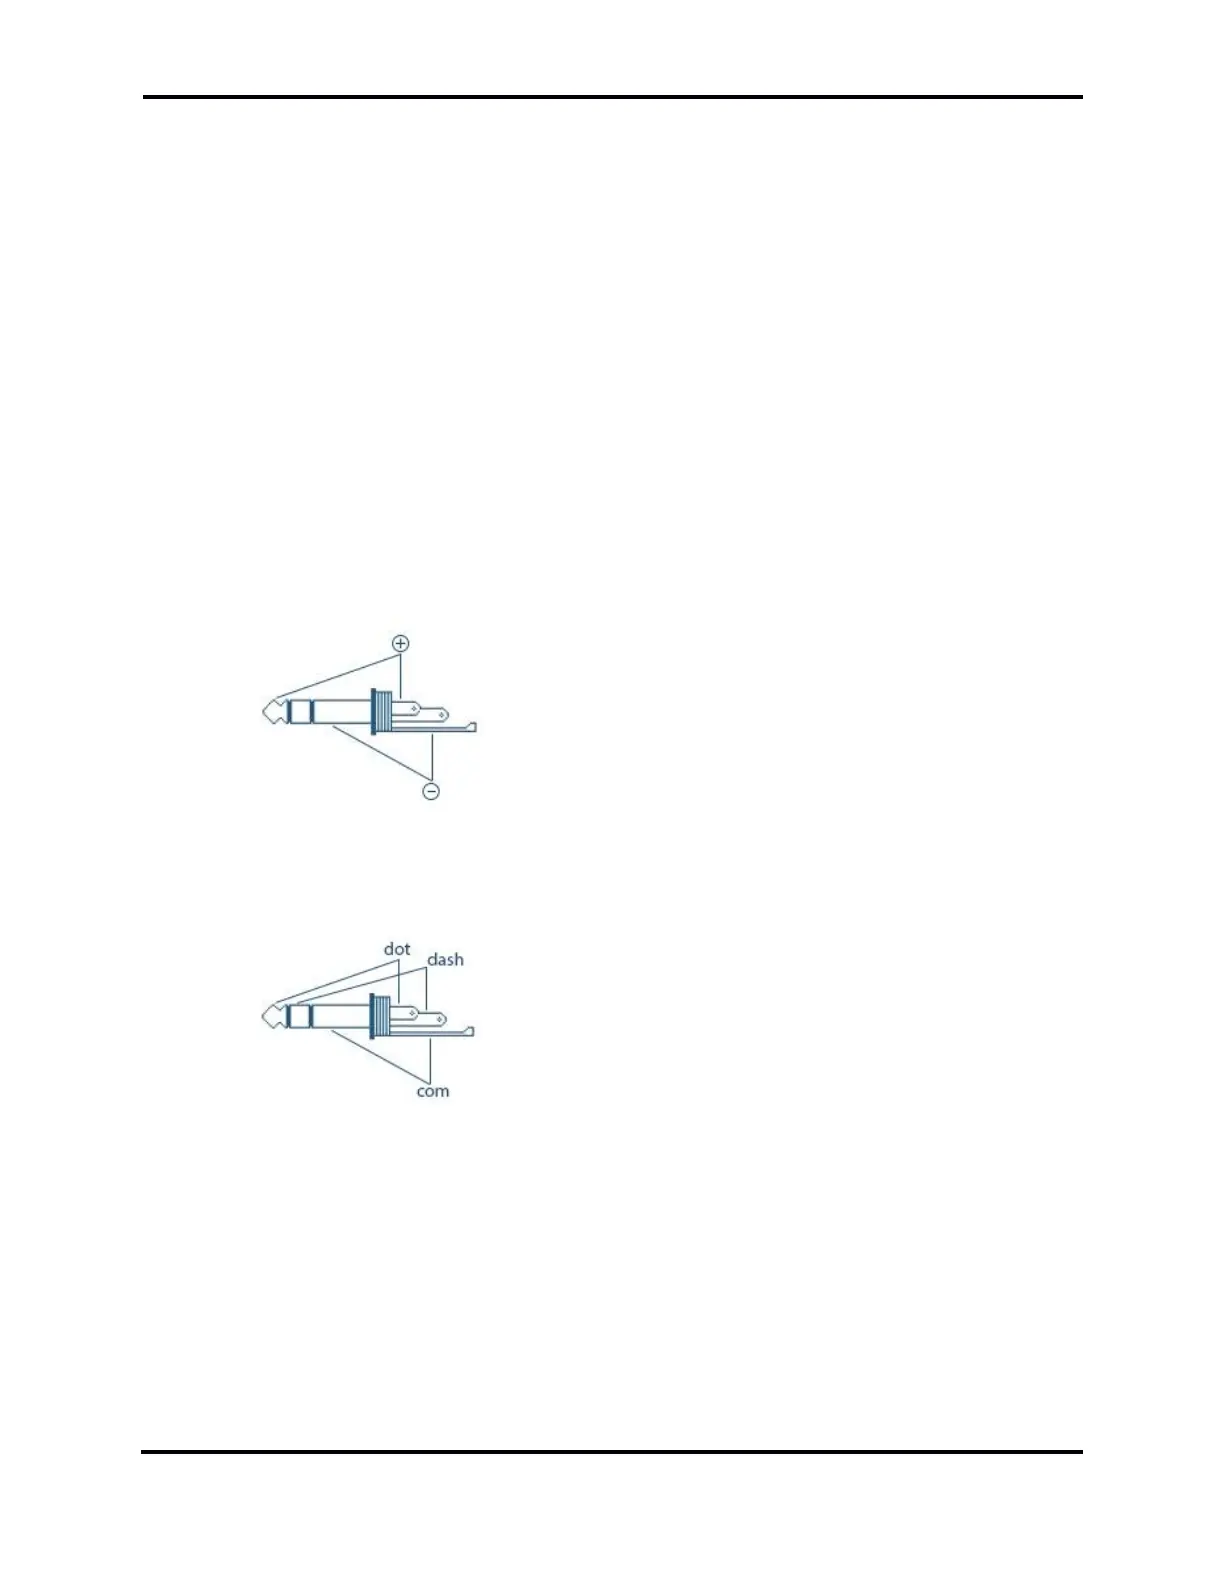
When Connecting a CW straight key, a TRS plug must be used for proper connectivity to the Maestro.
Connect the key to the Tip and Sleeve, leave the Ring unconnected.
When connecting a CW paddle and using the internal electronic keyer, connect the Dot to the Tip,
the Dash to the Ring and the paddle common to the Sleeve.
See section 30.8, Phone/CW Tab for information on configuring Maestro for proper operation of the
key or paddles.
 Loading...